|
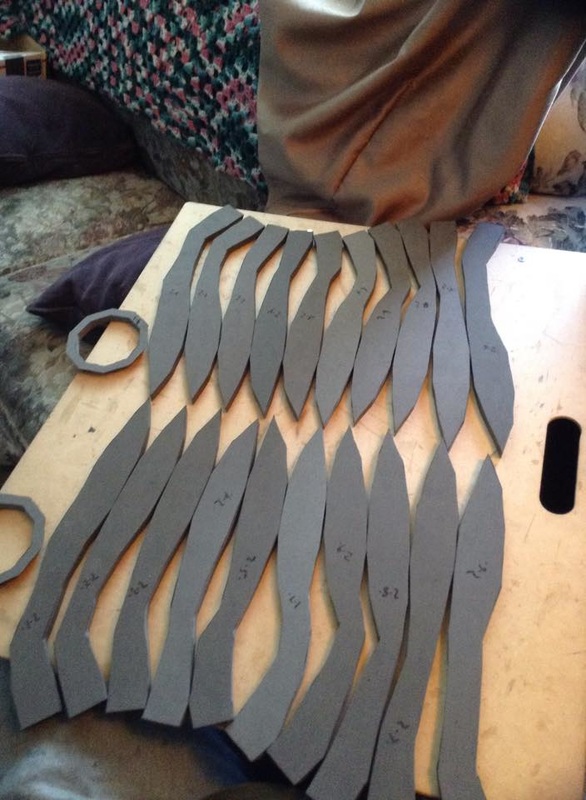
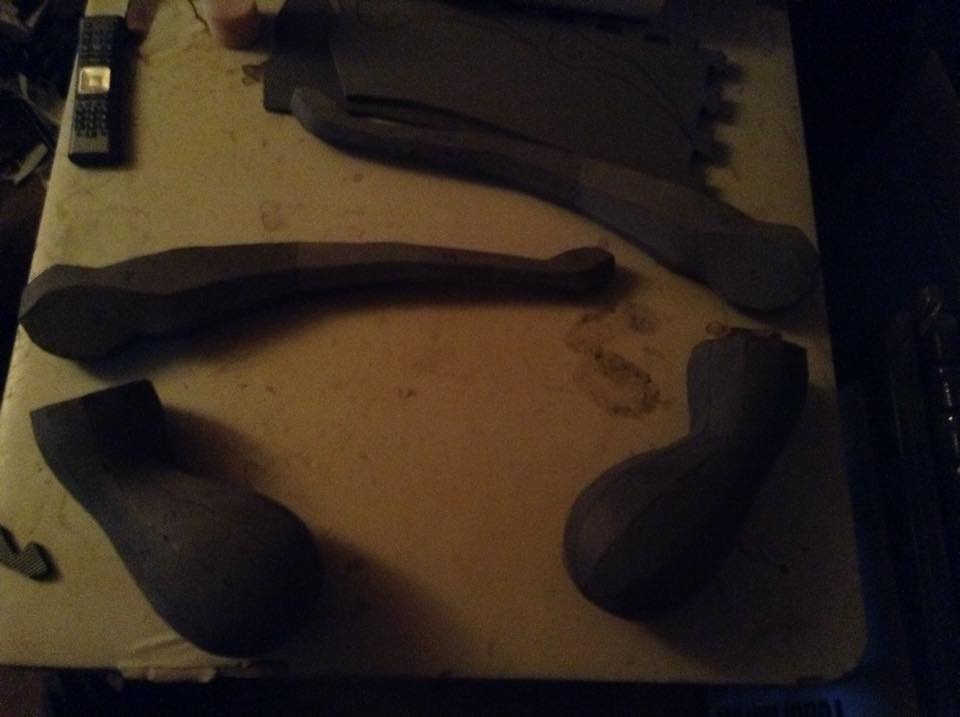
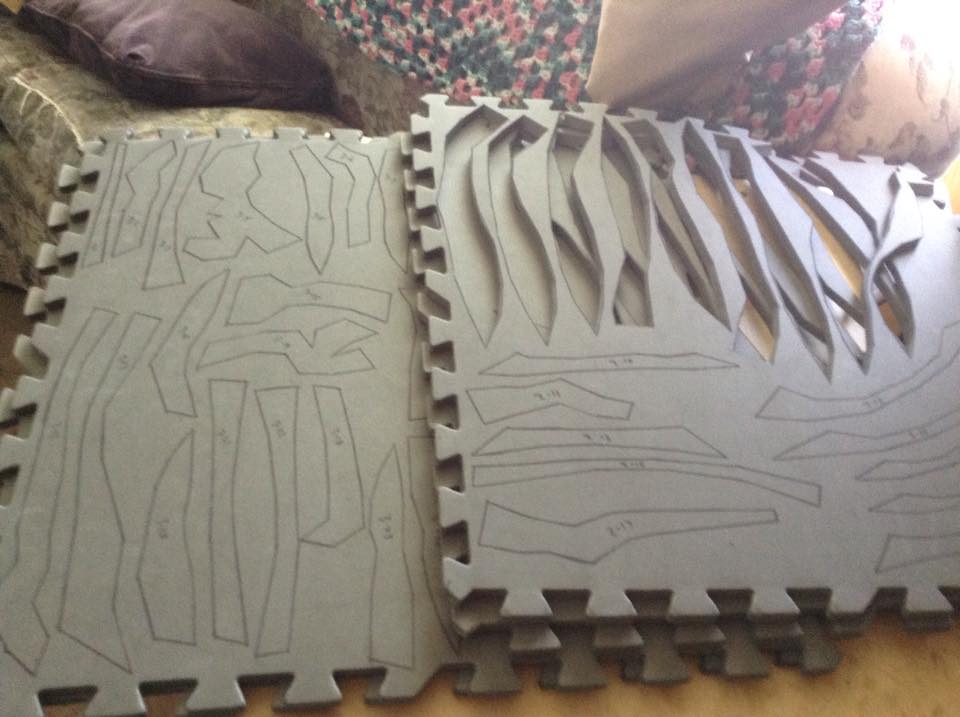
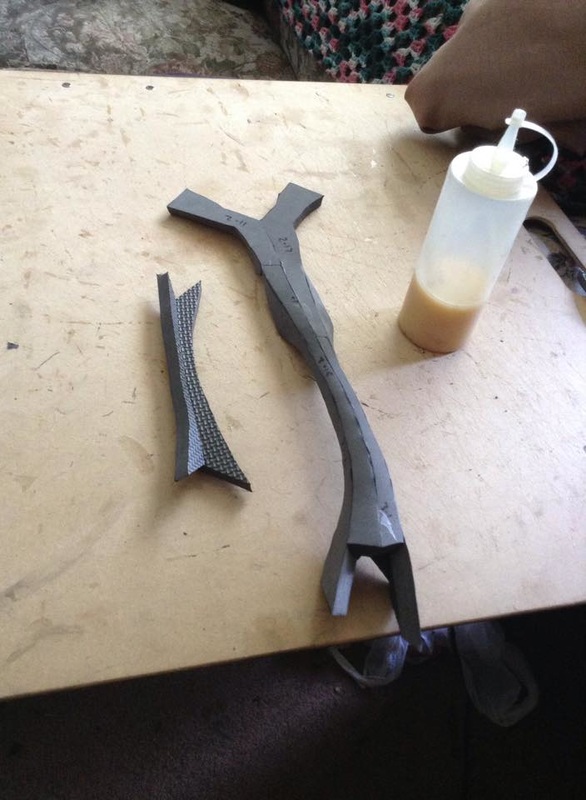
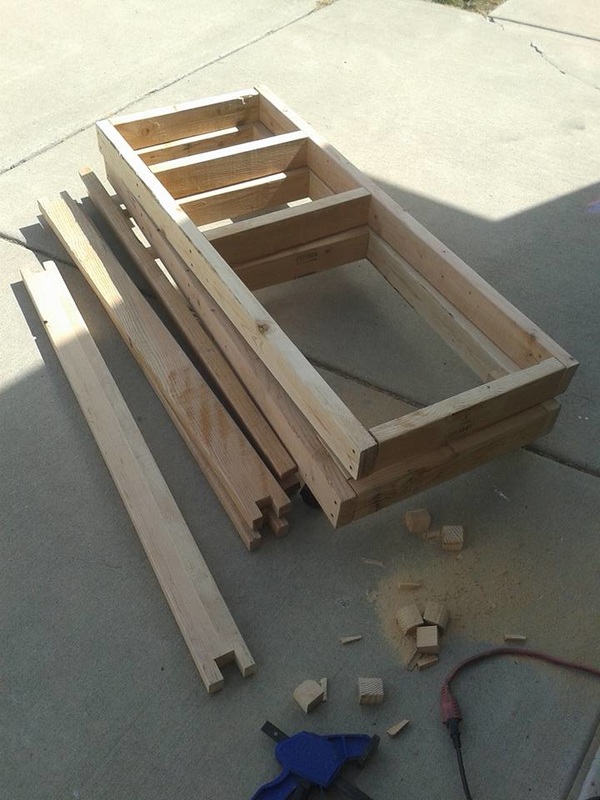
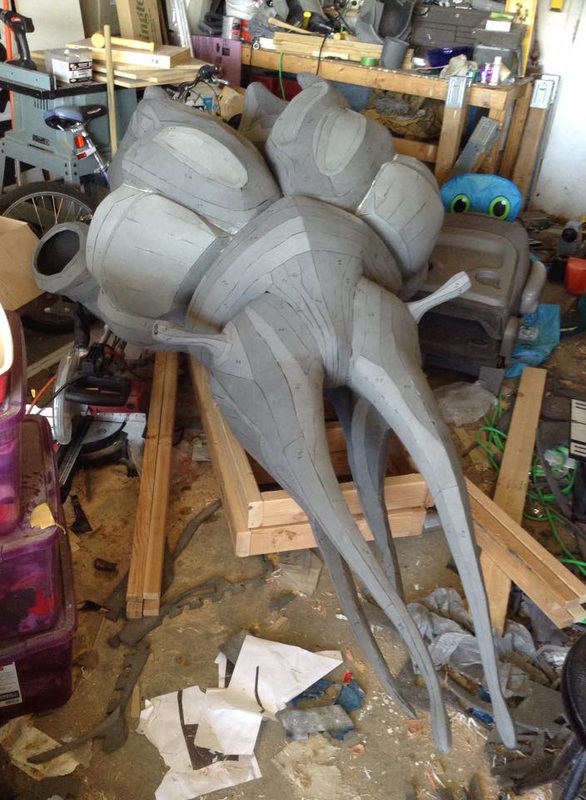
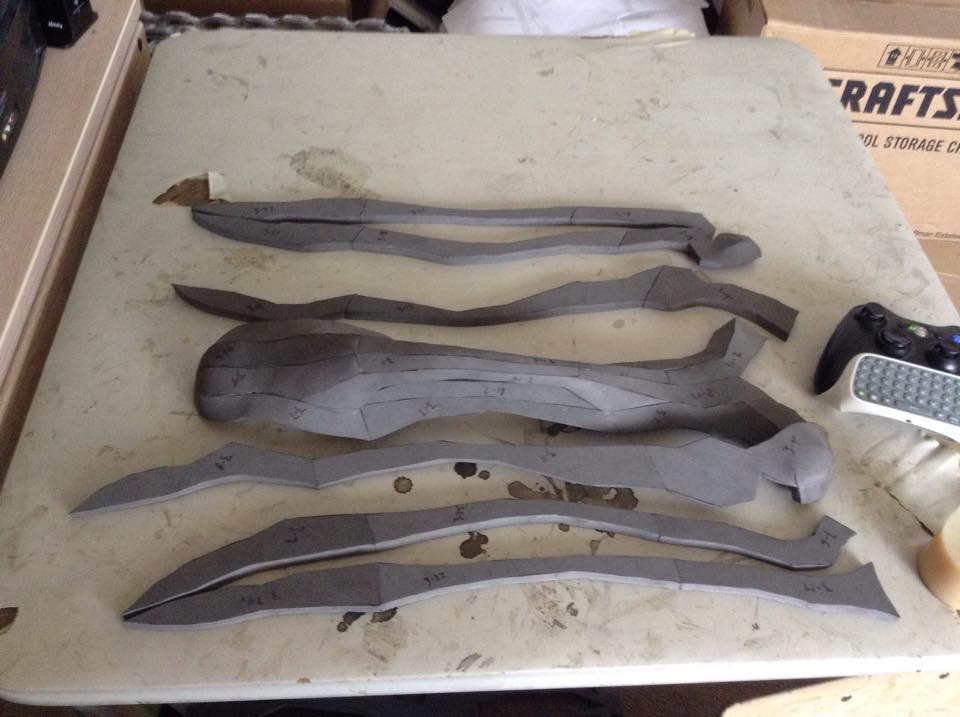
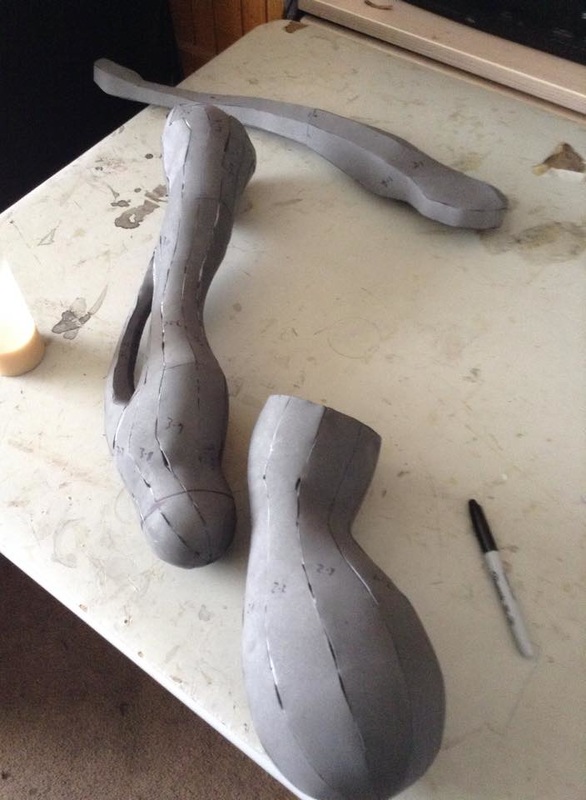
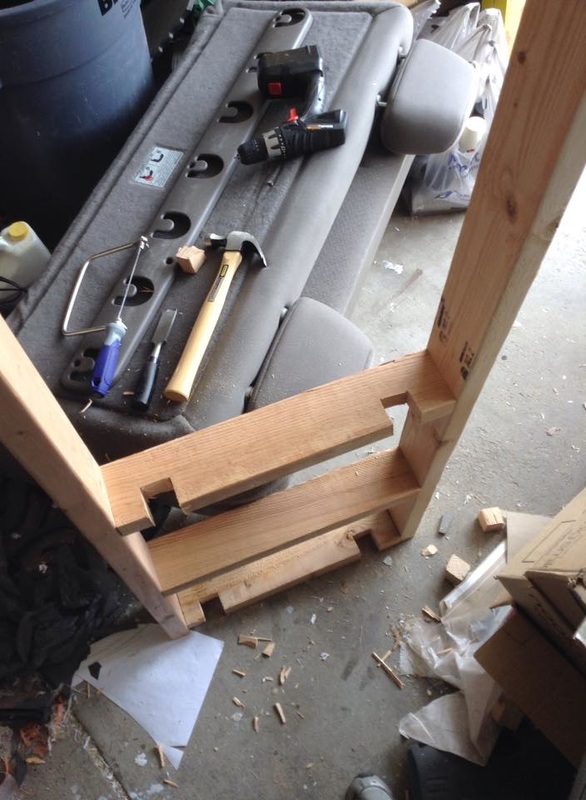
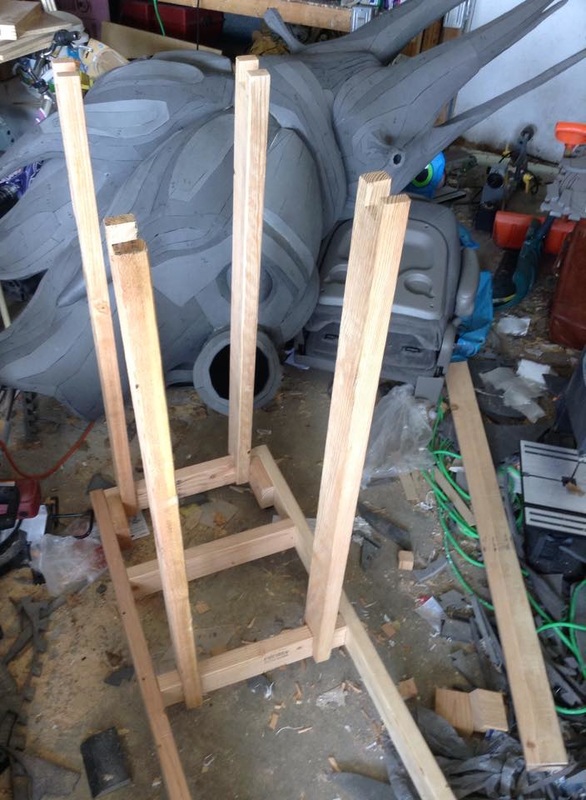
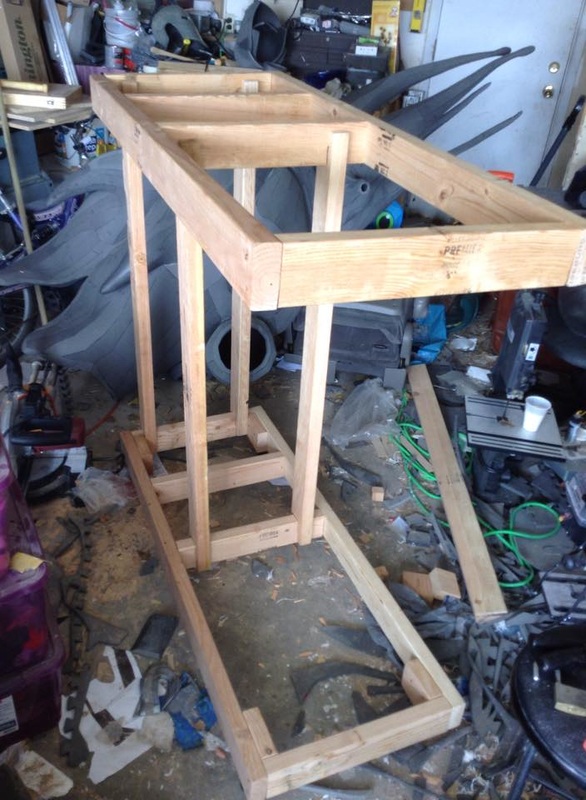
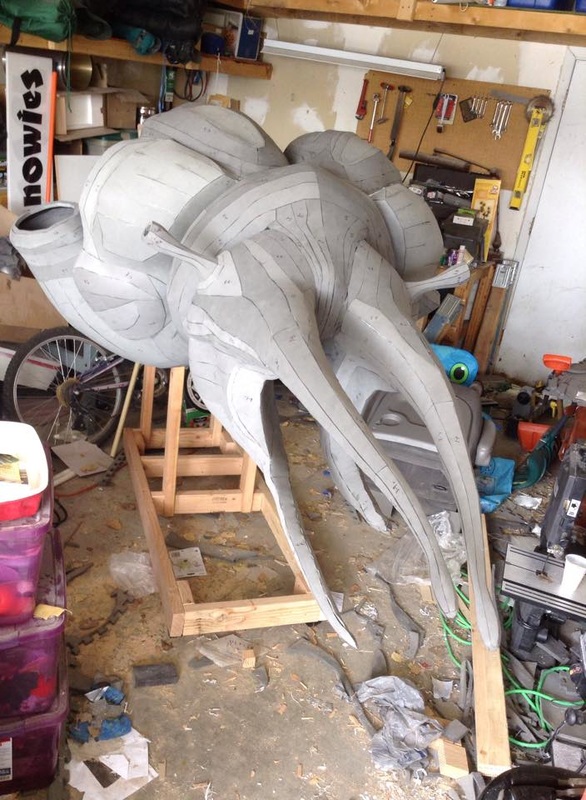
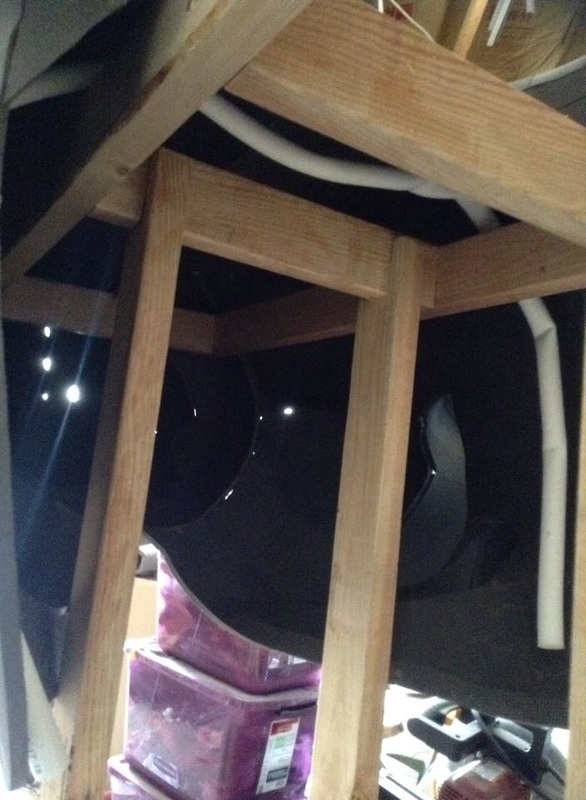
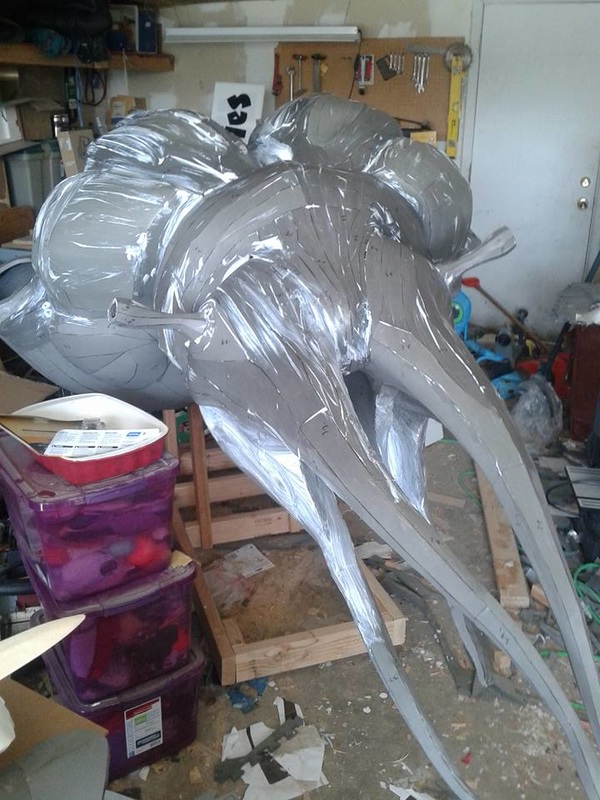
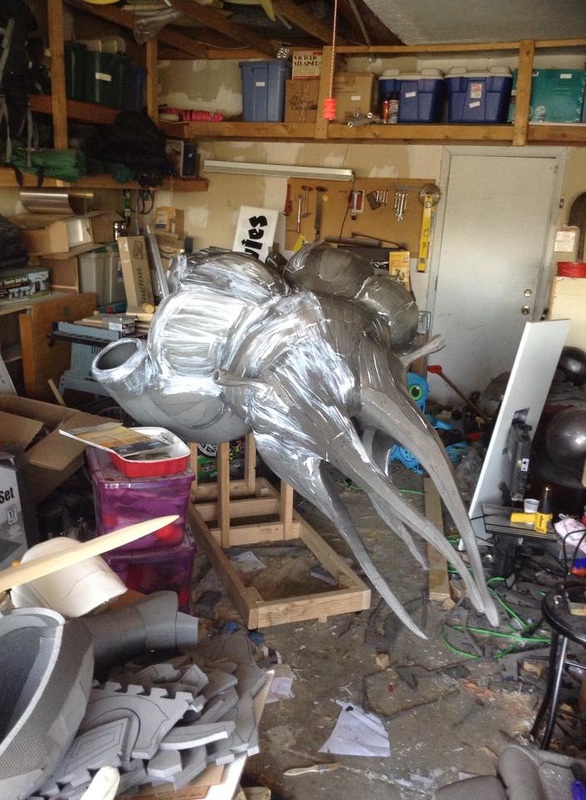
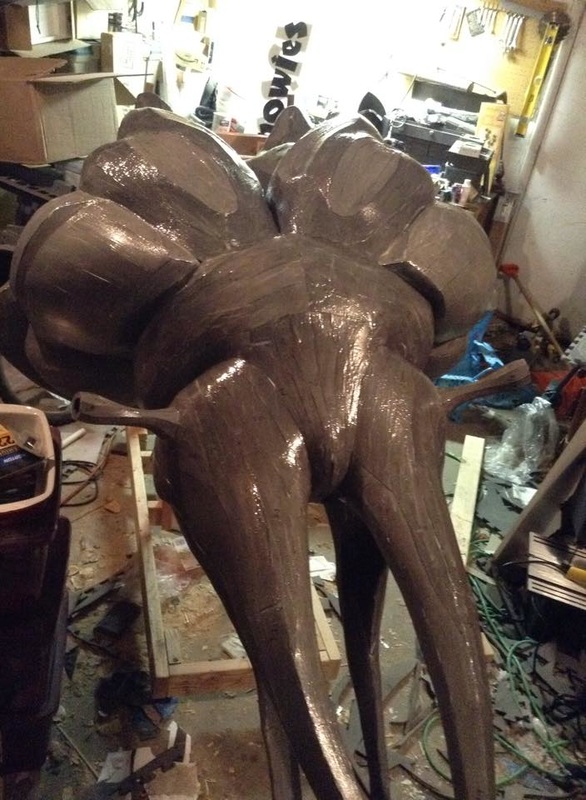
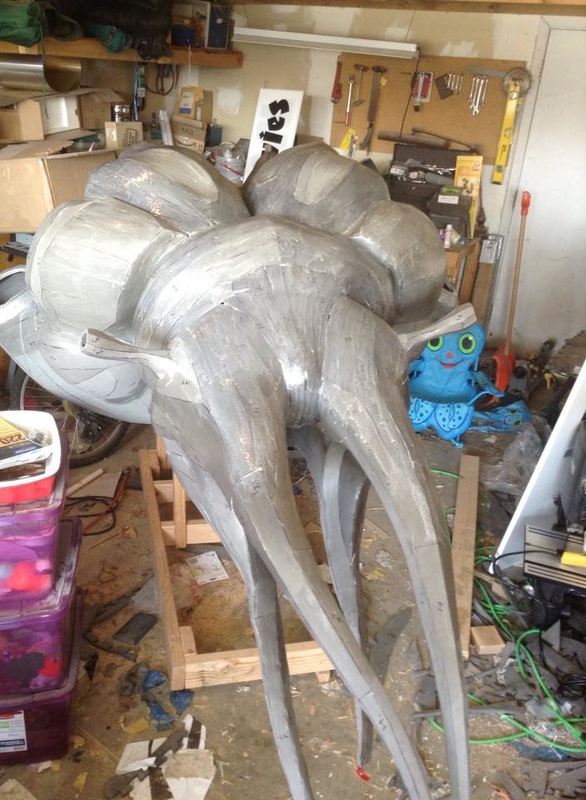
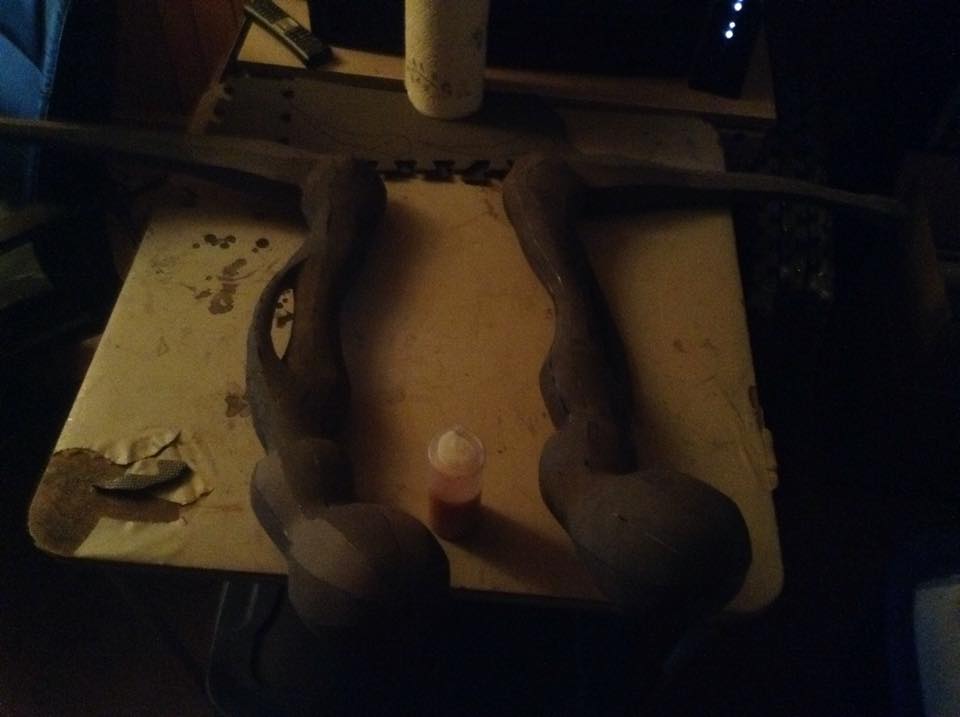
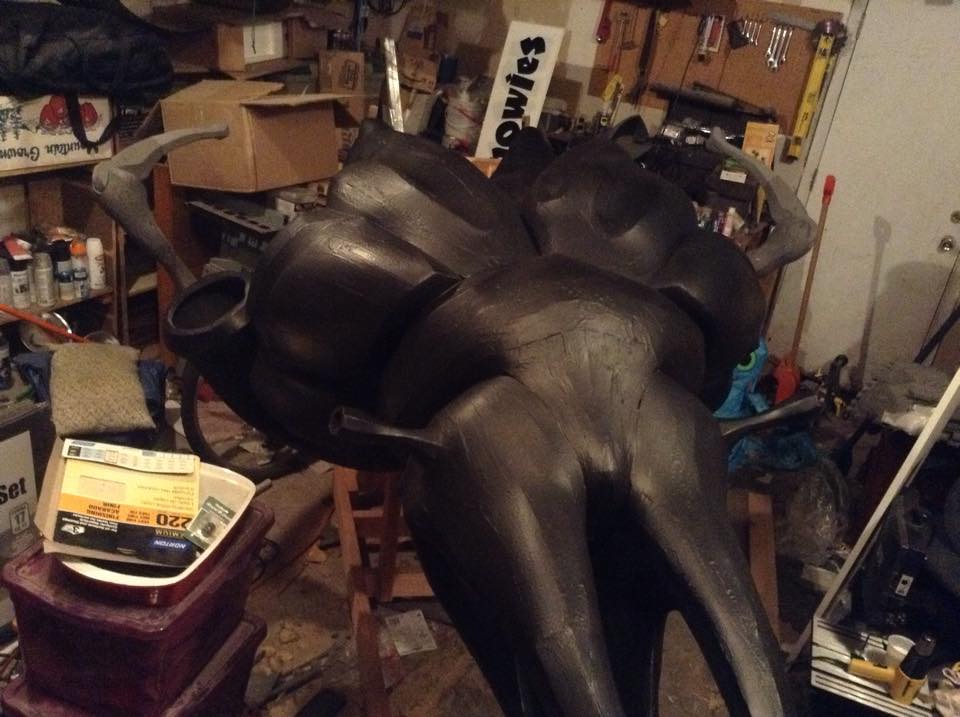
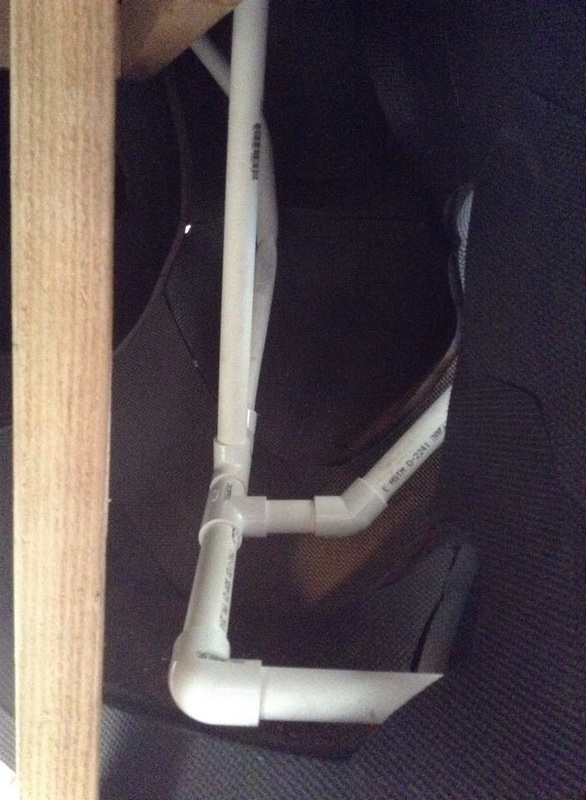
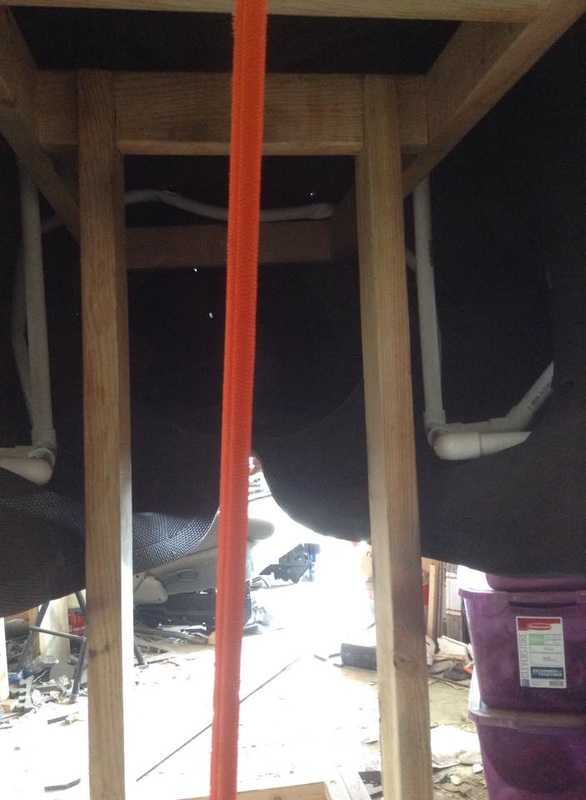
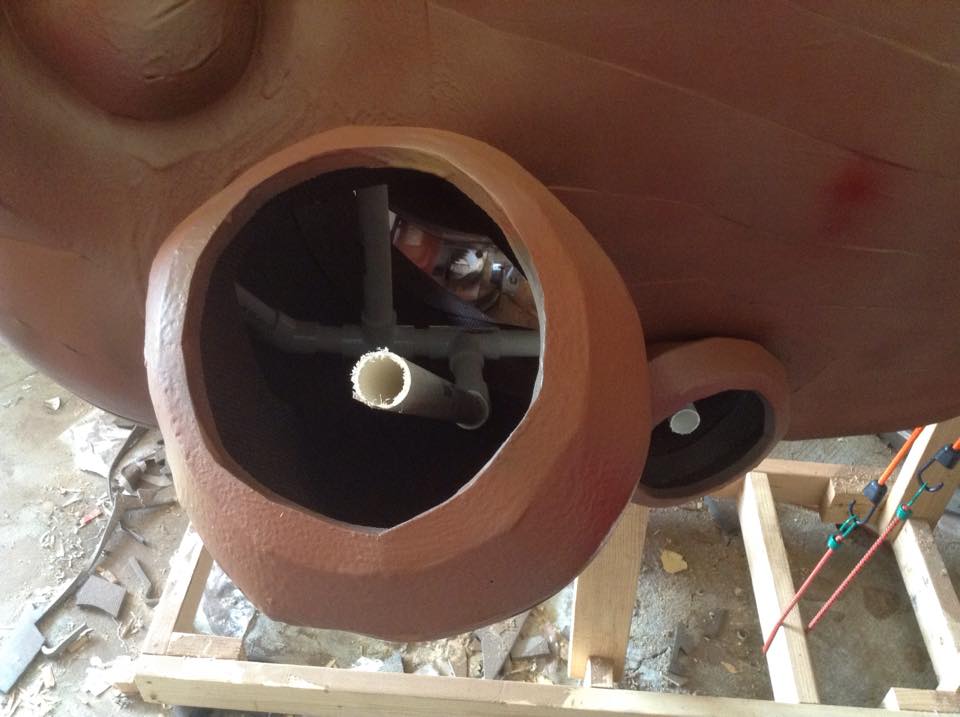
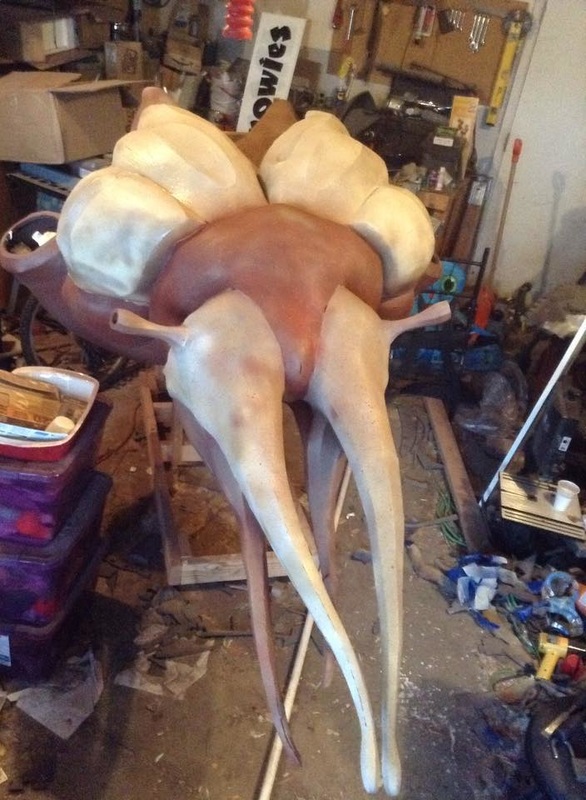
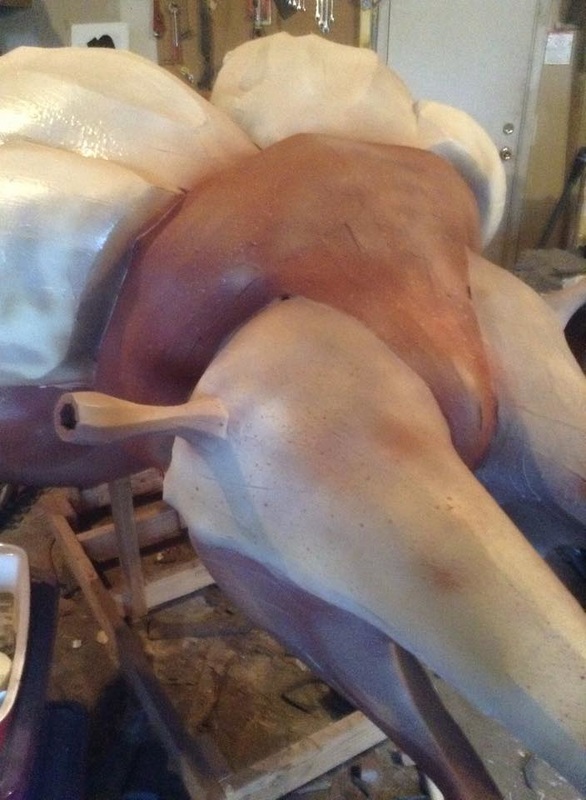
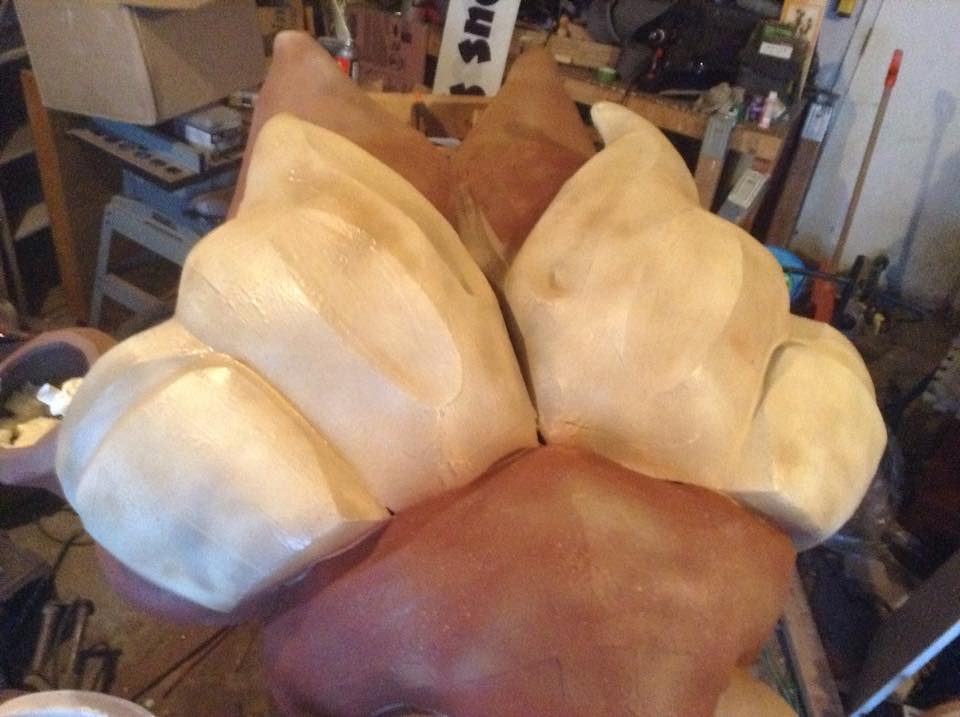
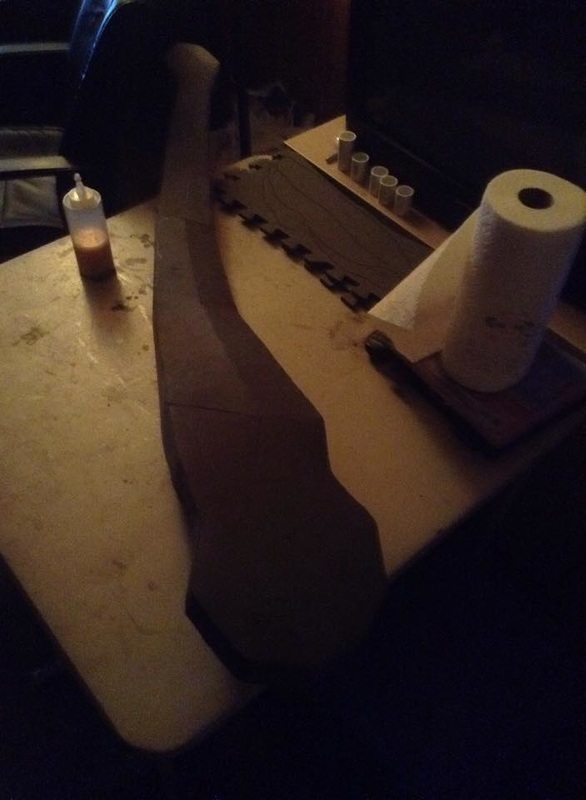
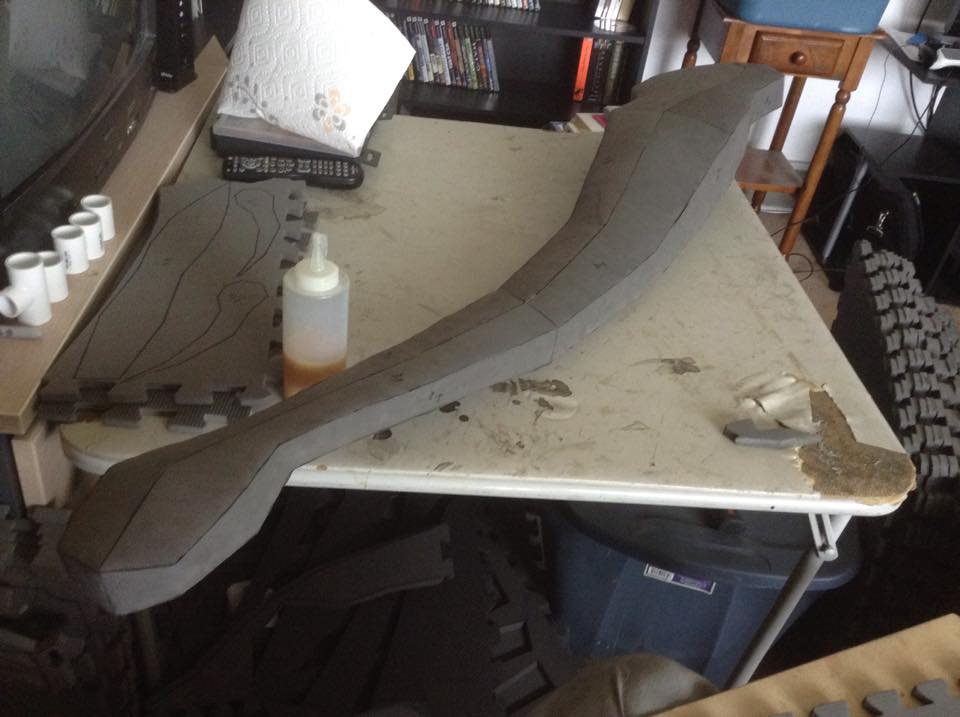
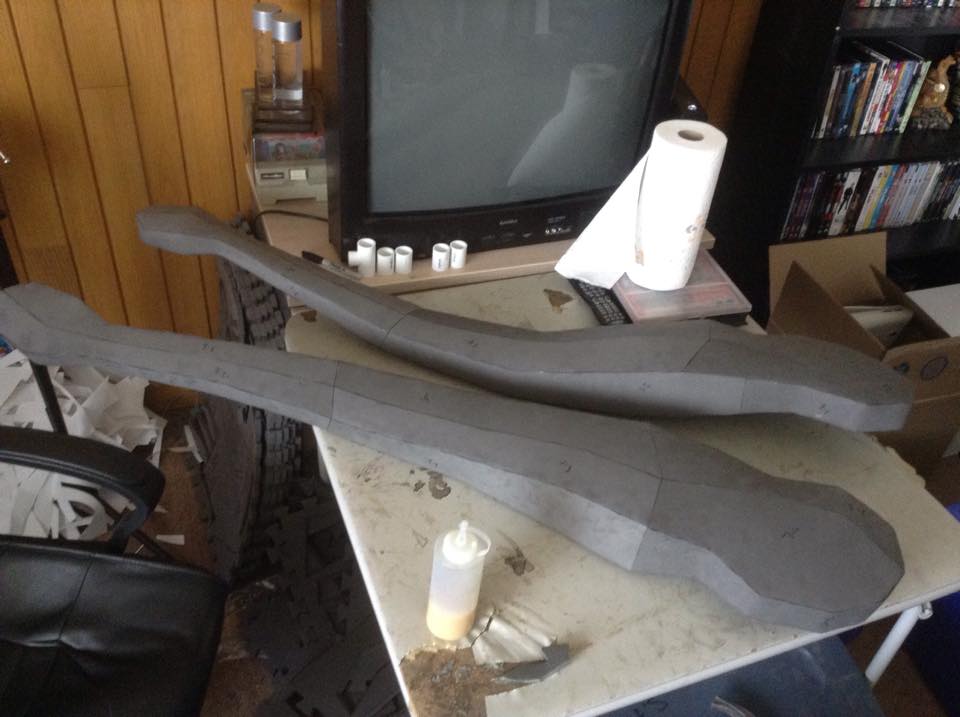
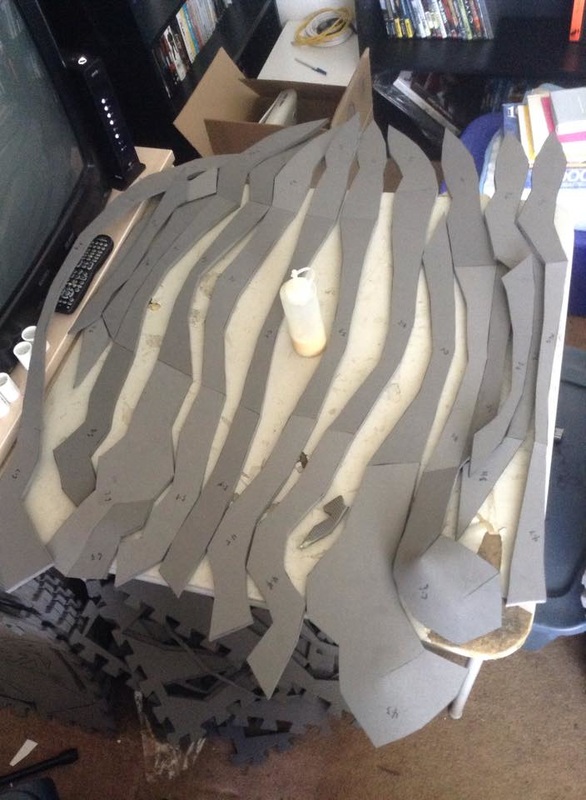
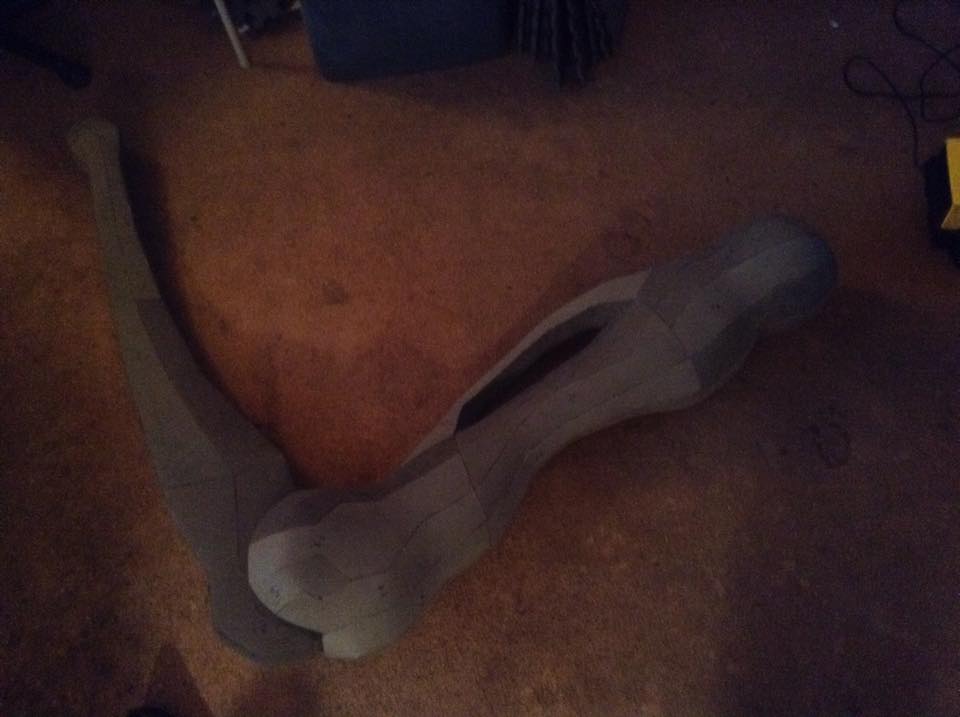
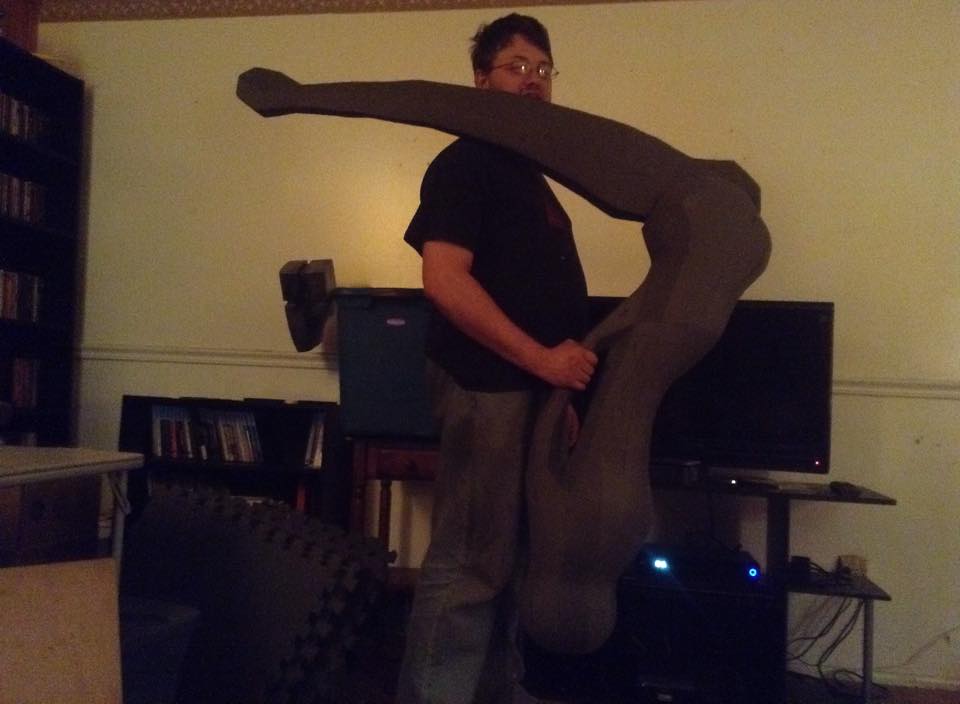
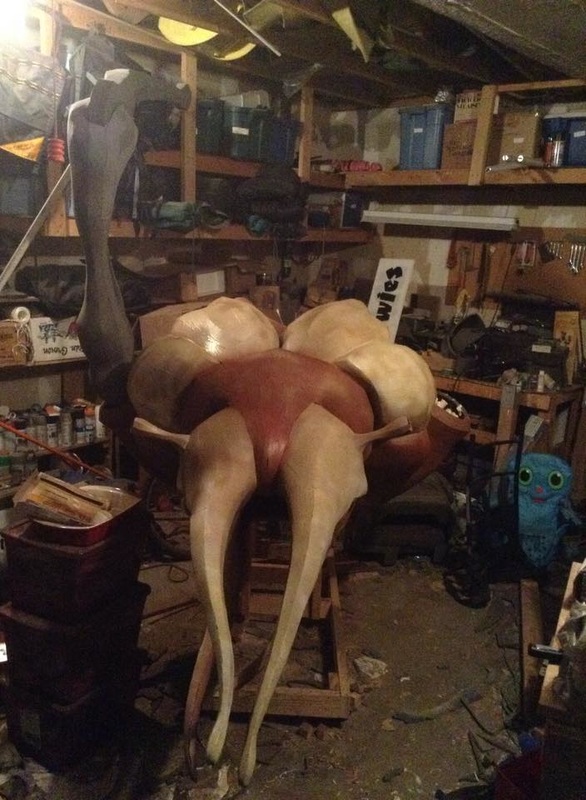
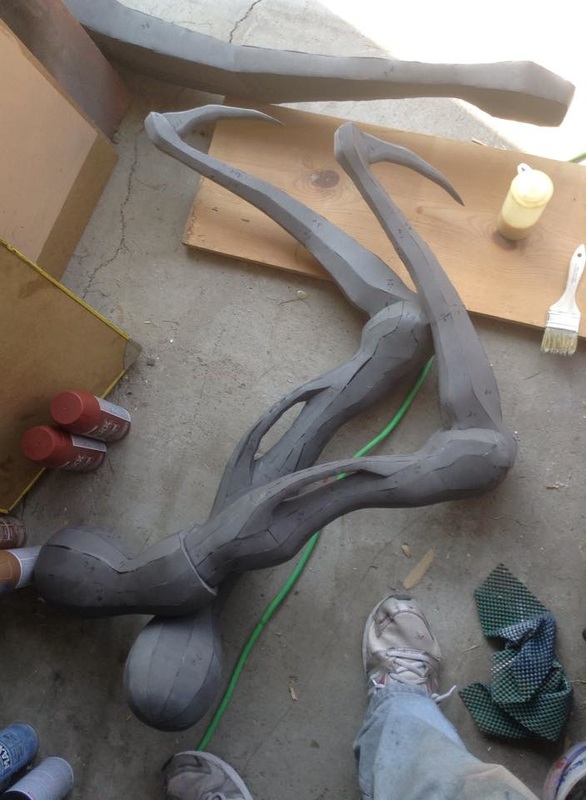
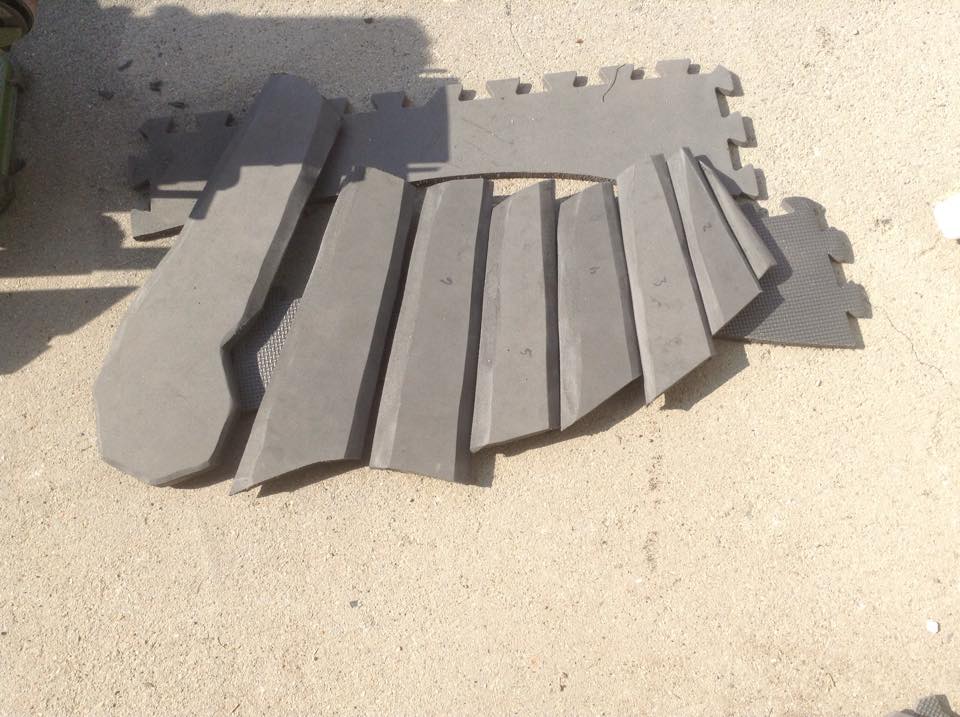
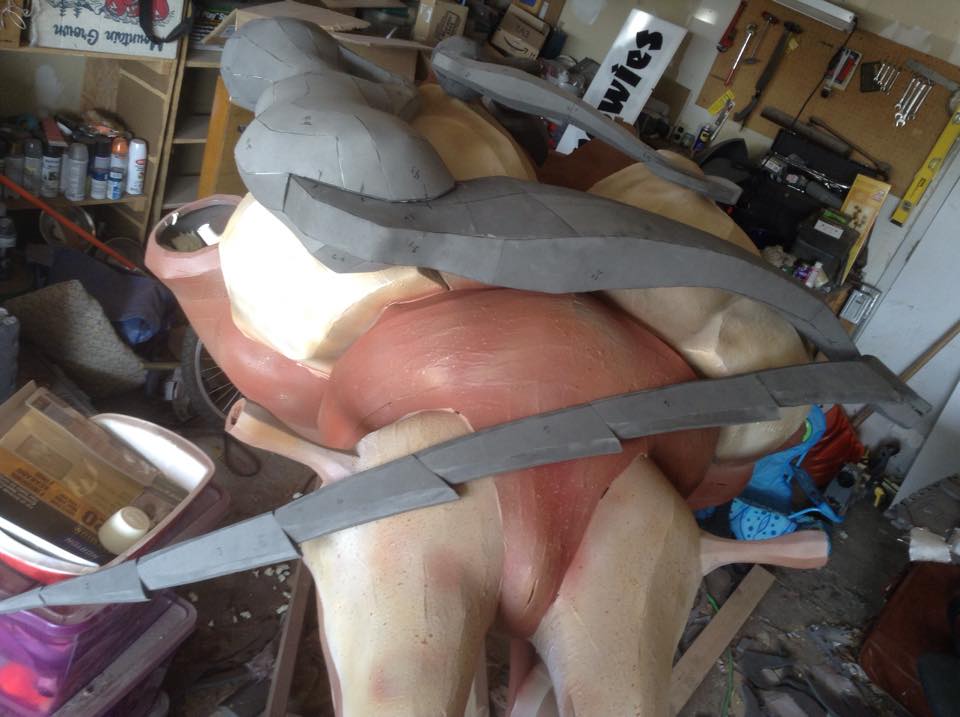
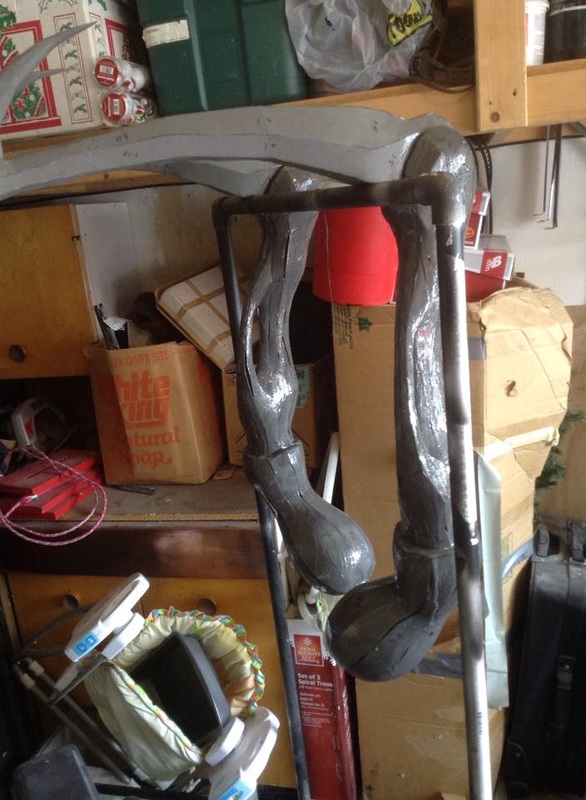
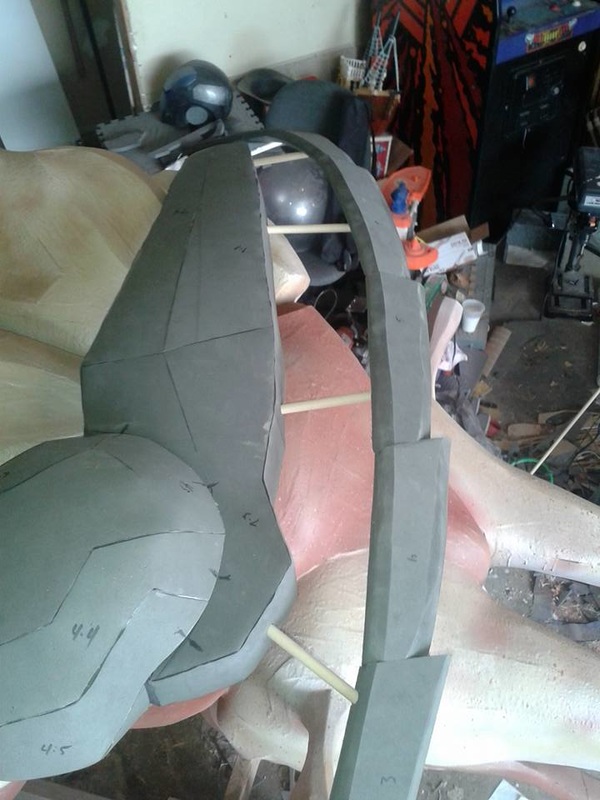
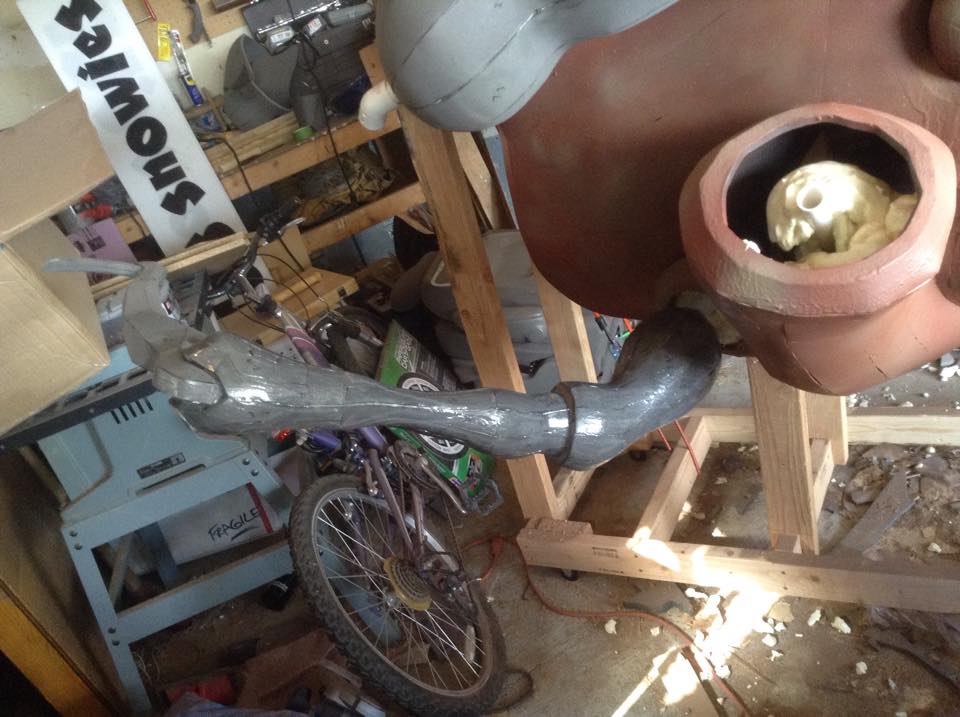
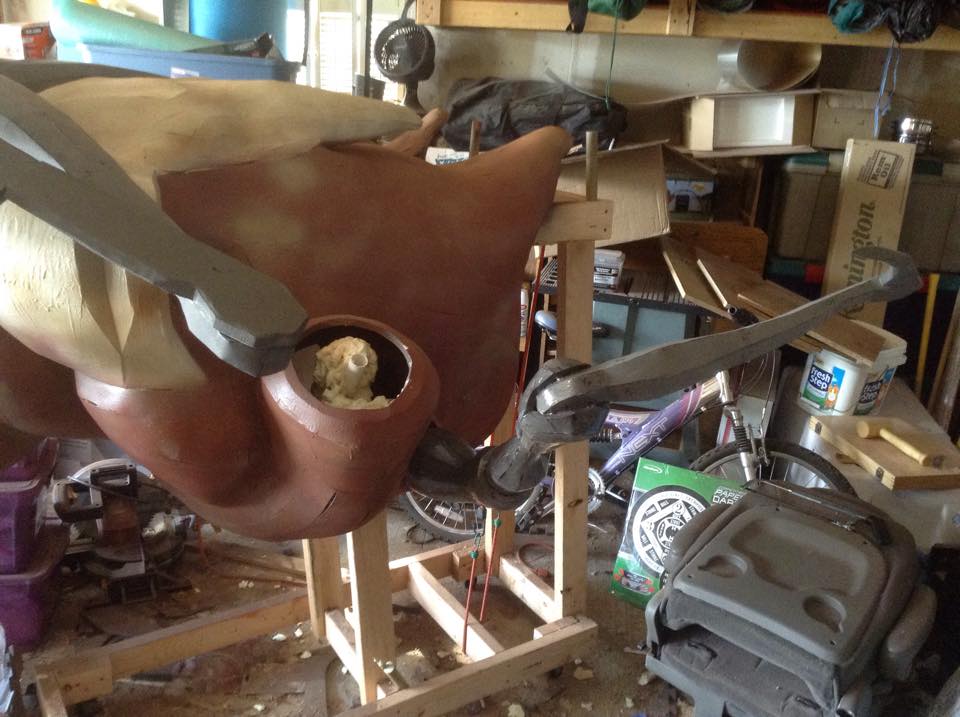
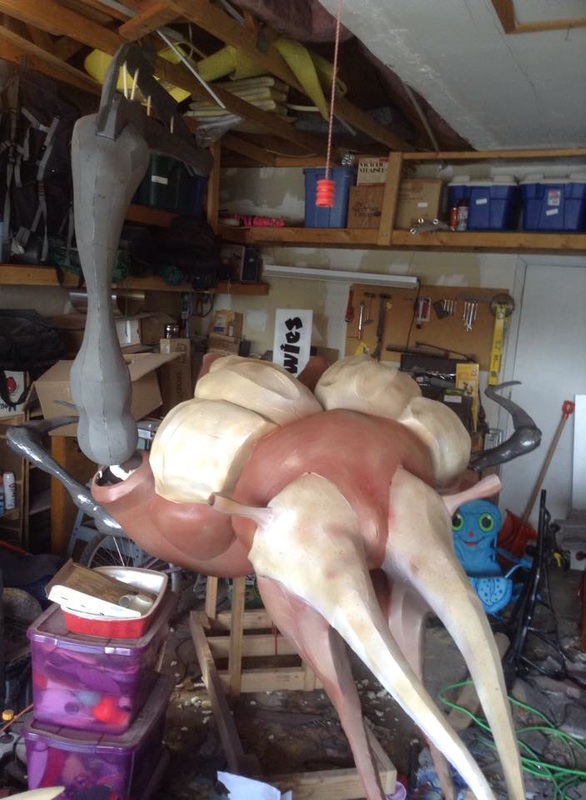
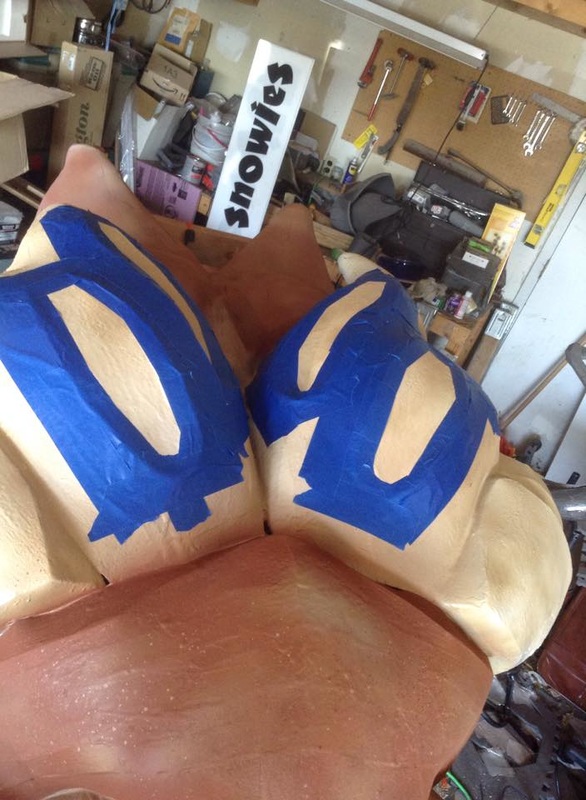
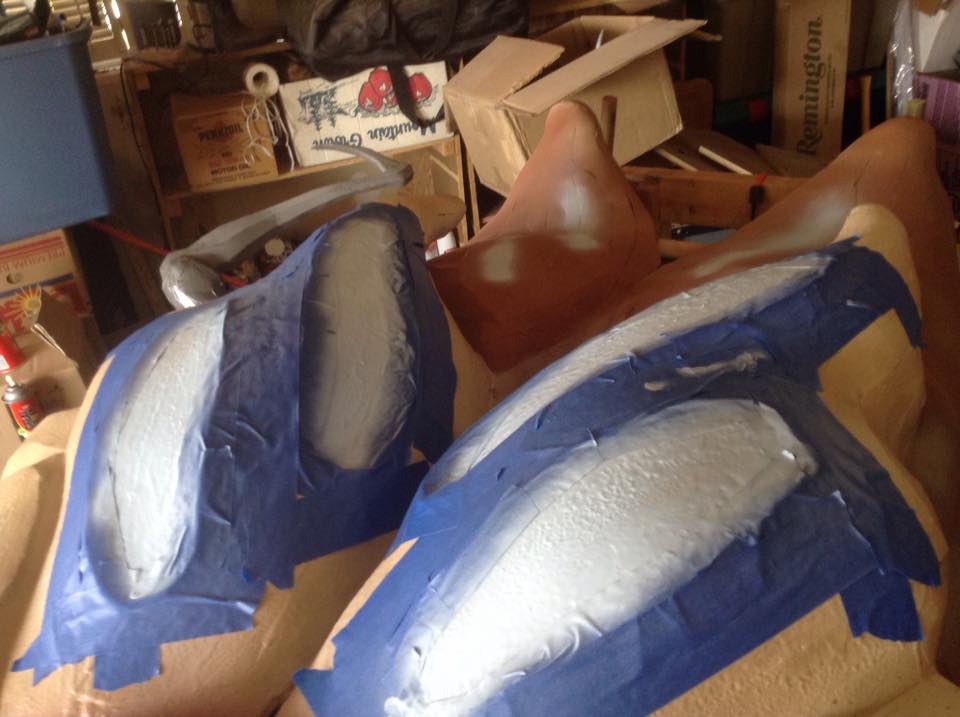
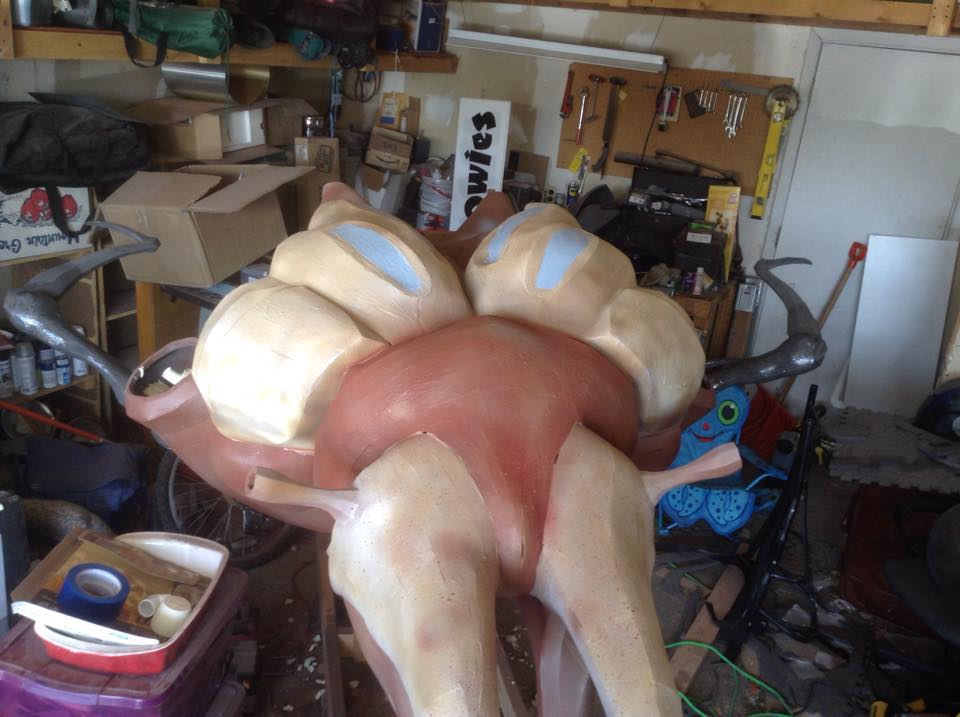
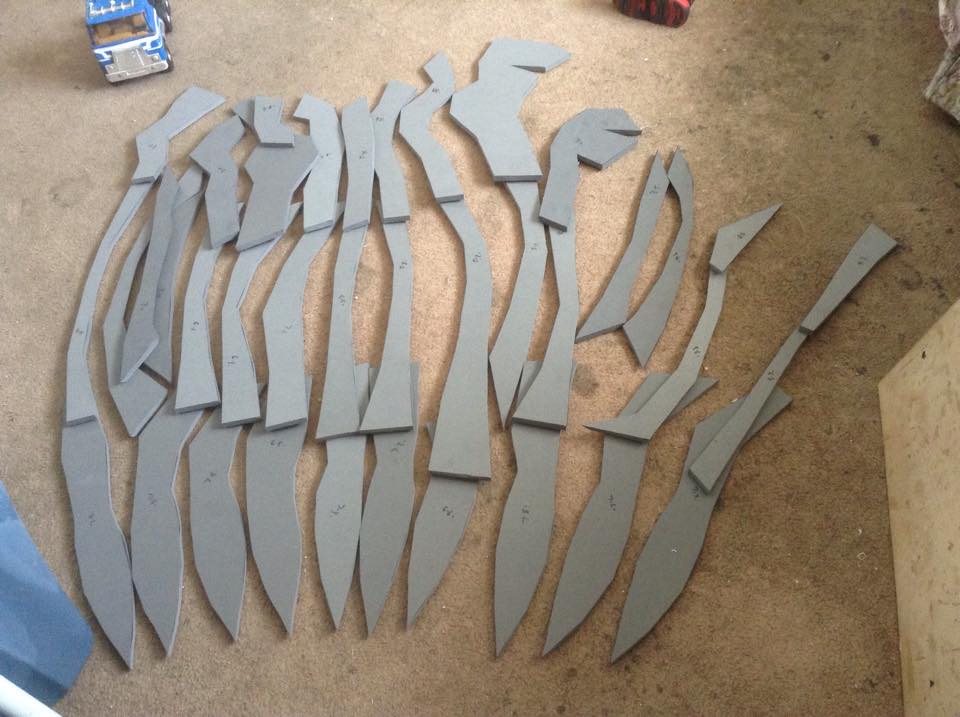
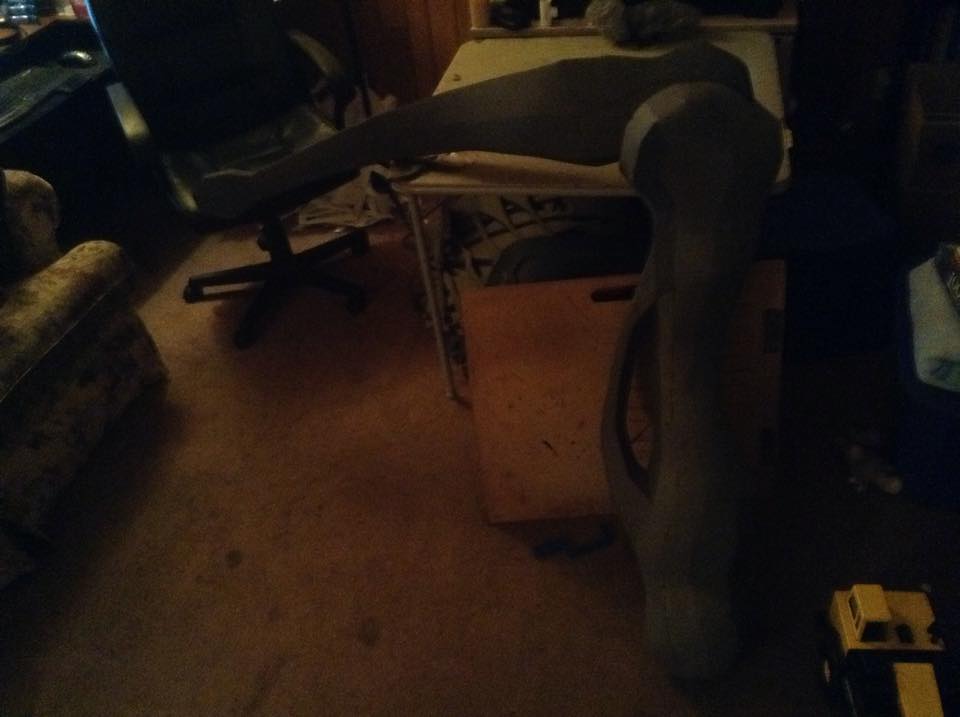
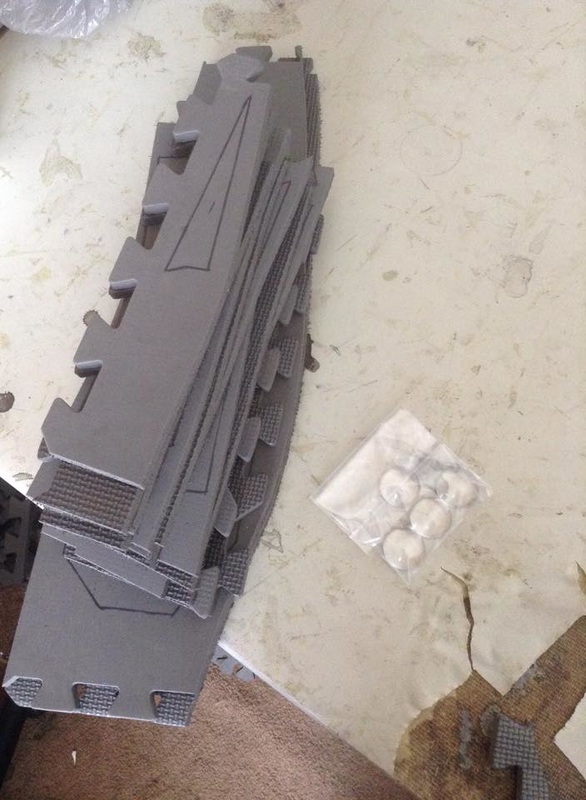
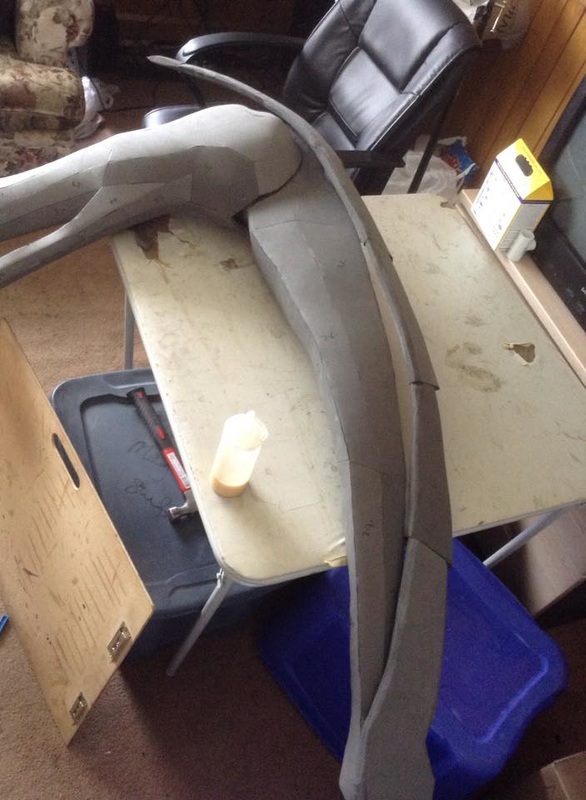
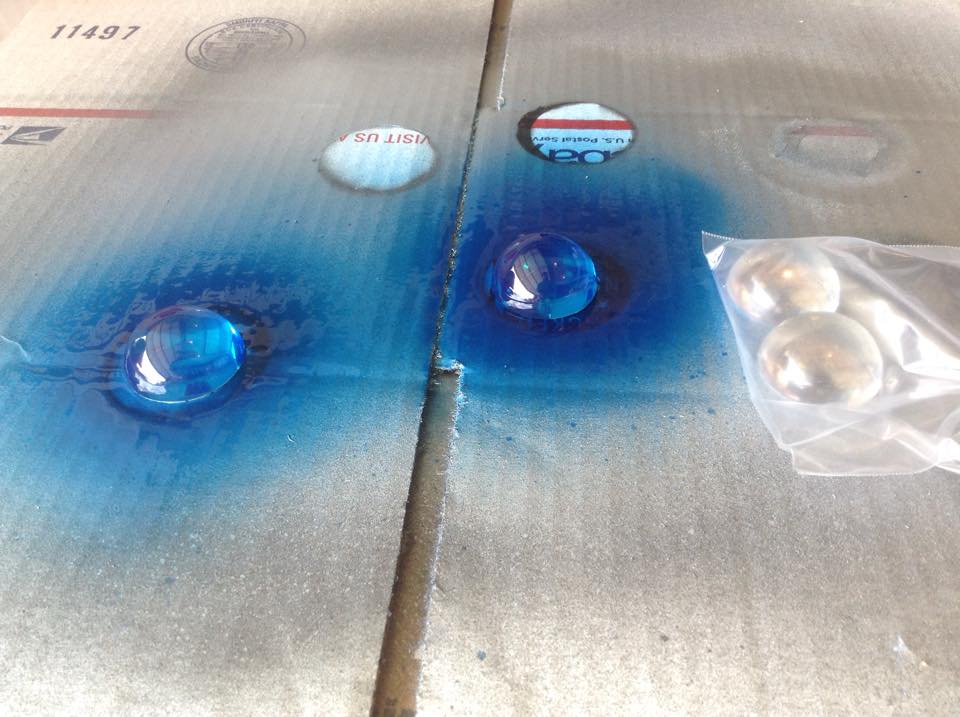
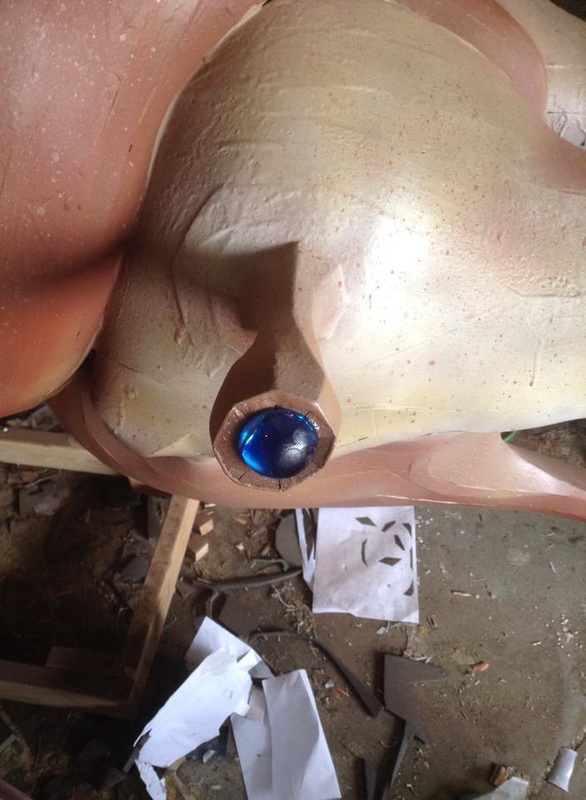
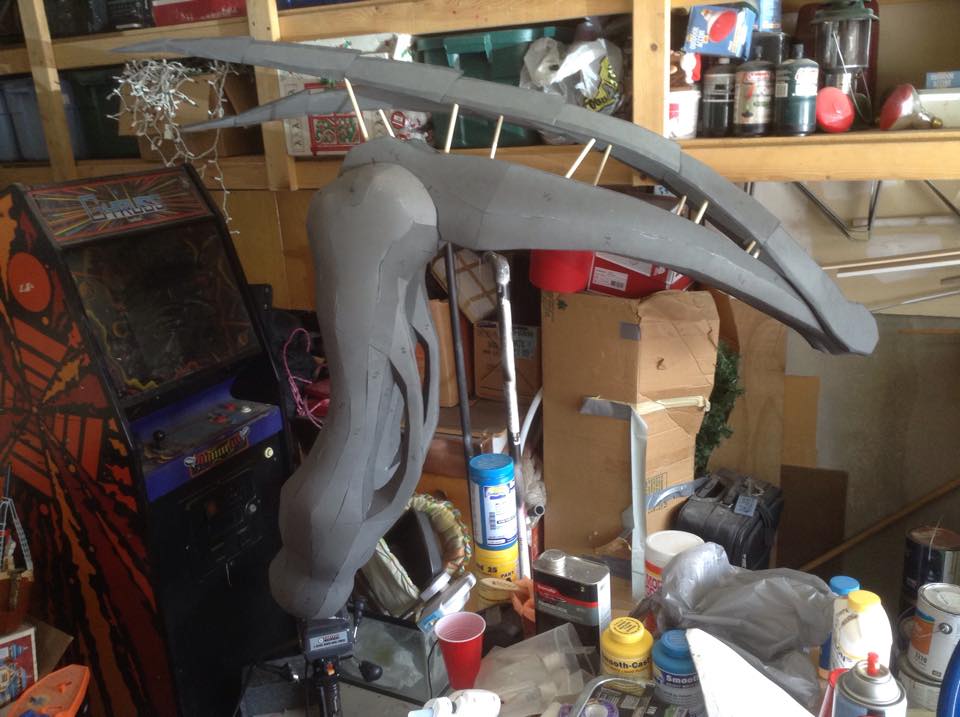
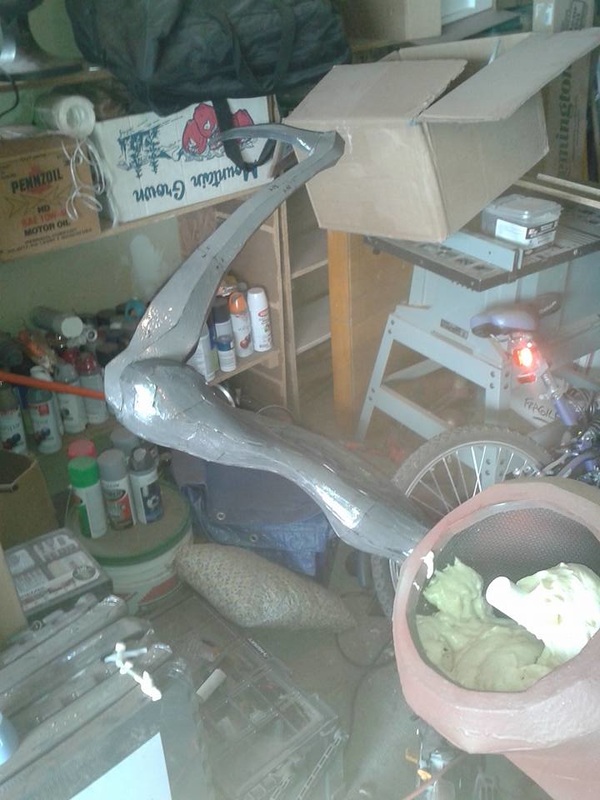
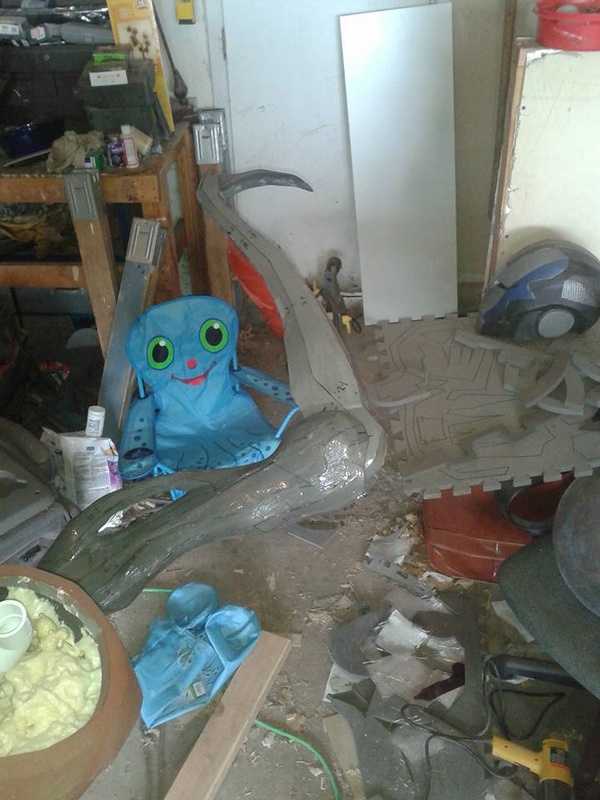
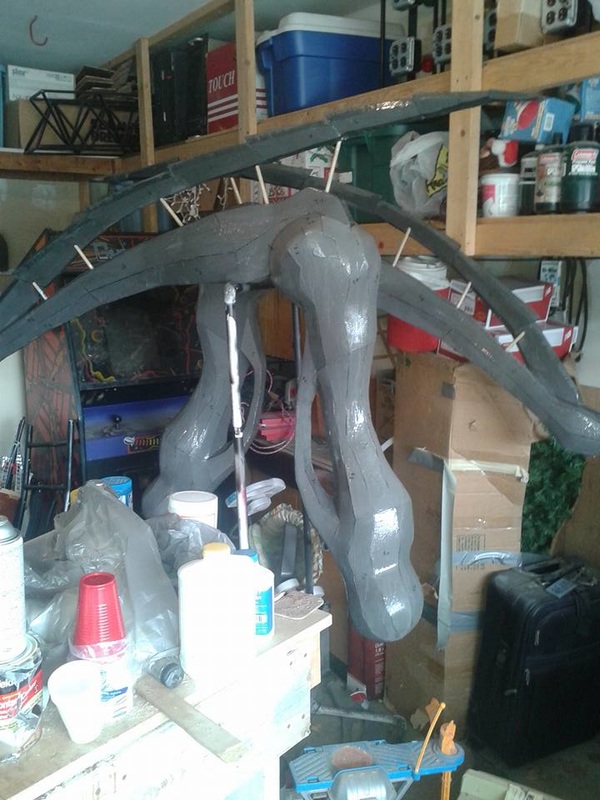
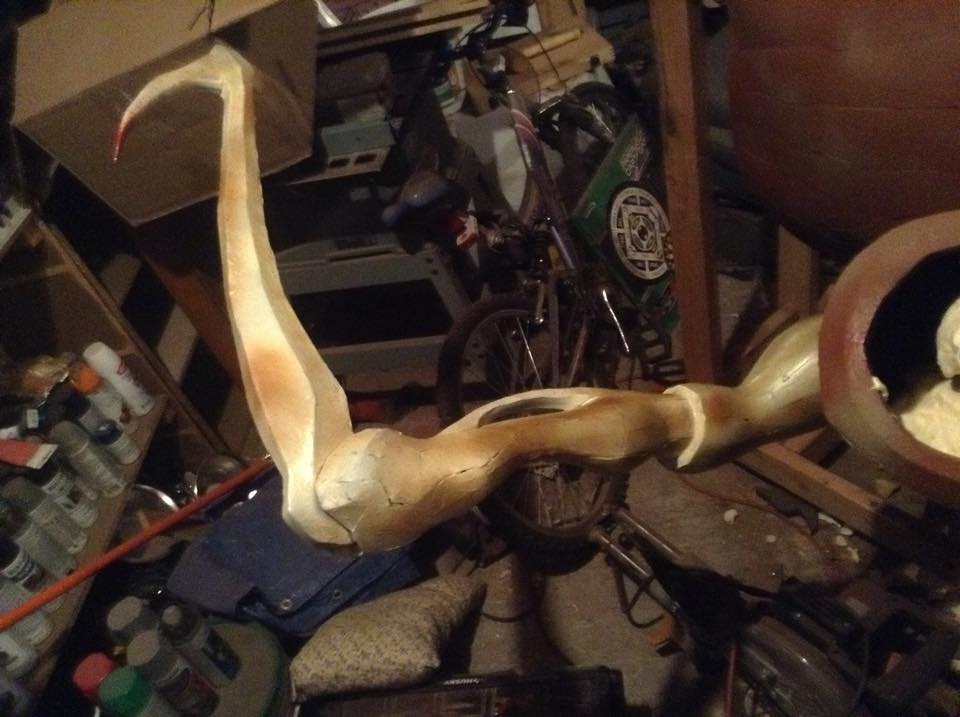
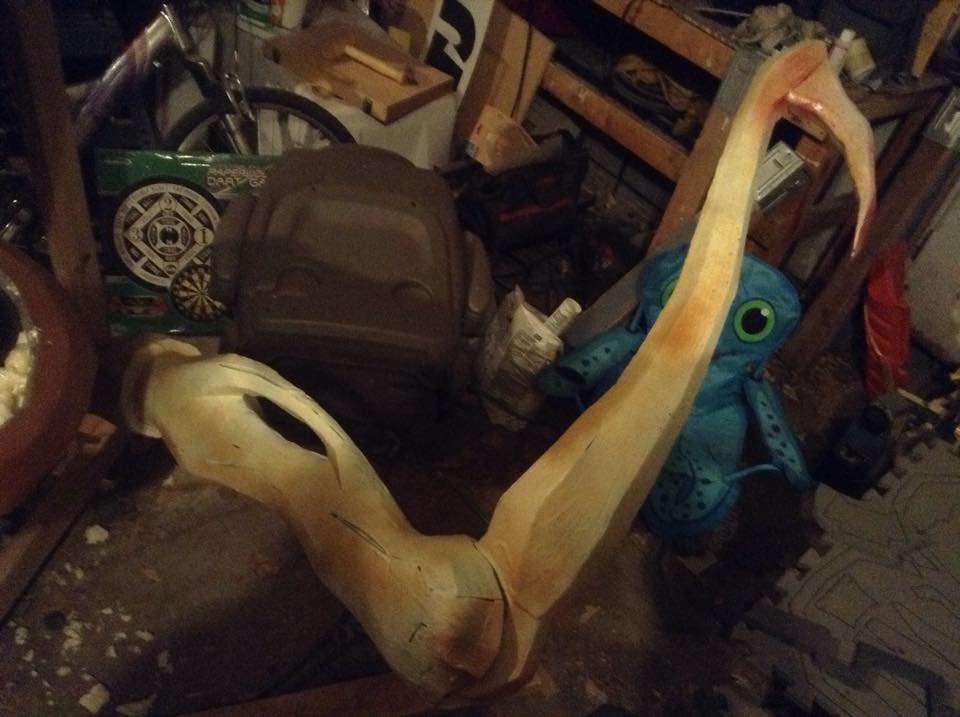
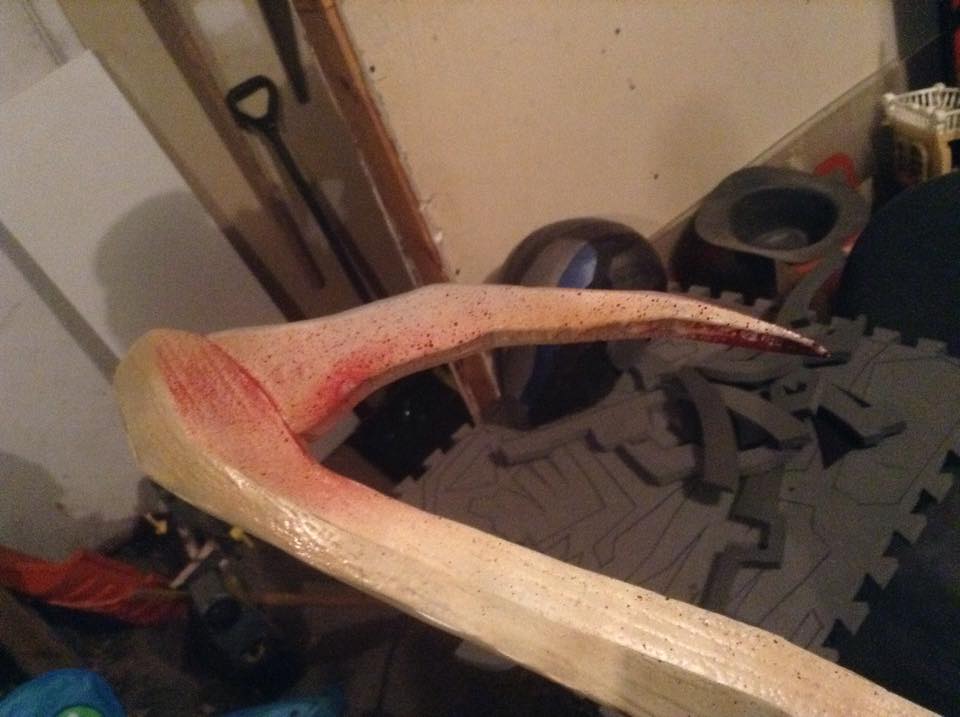
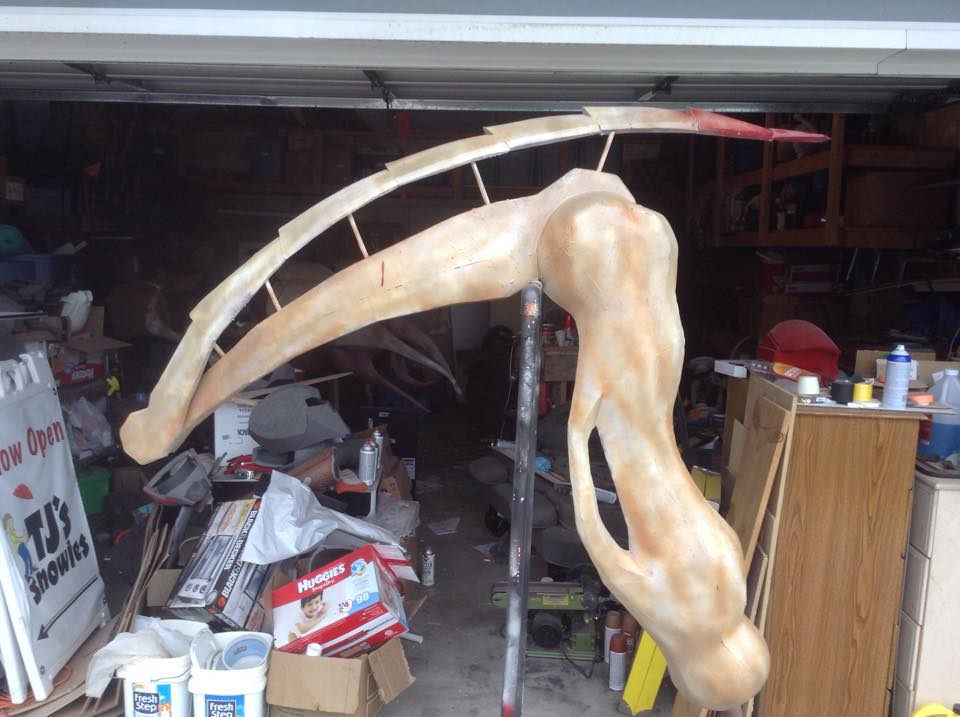
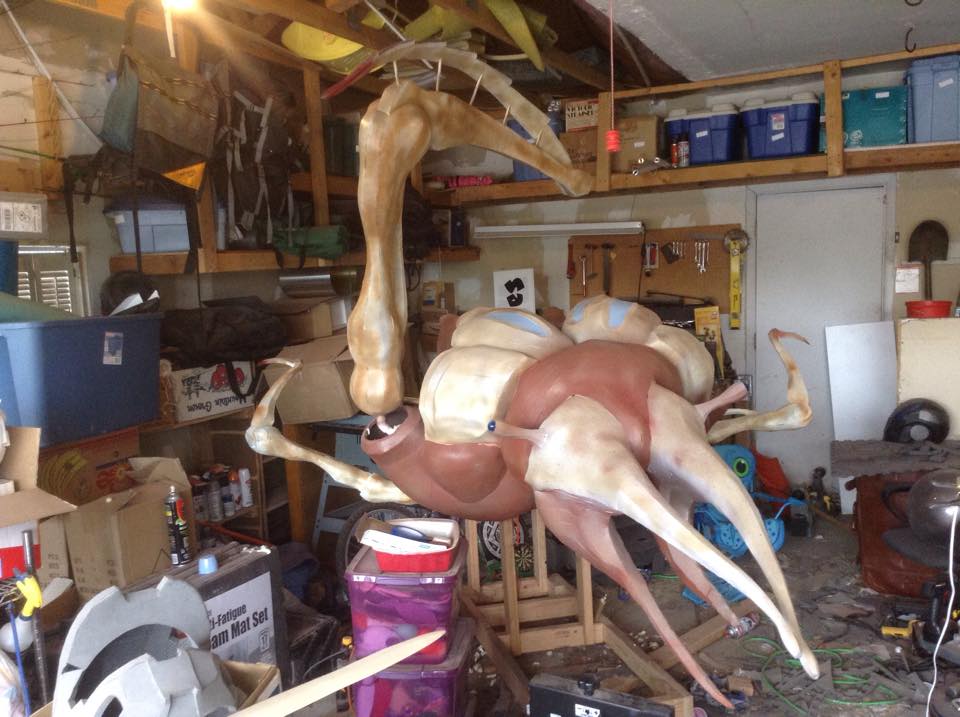
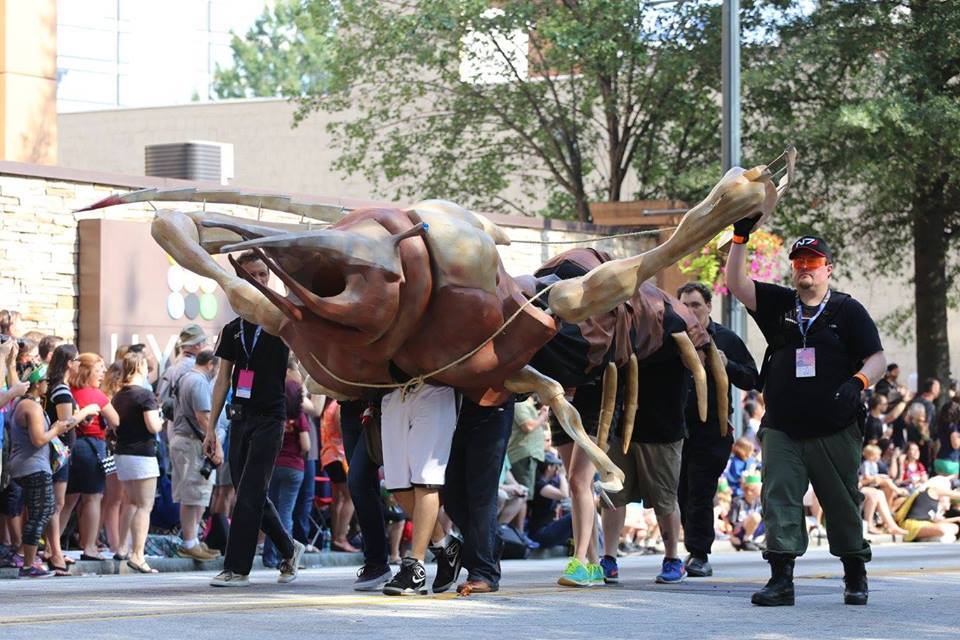
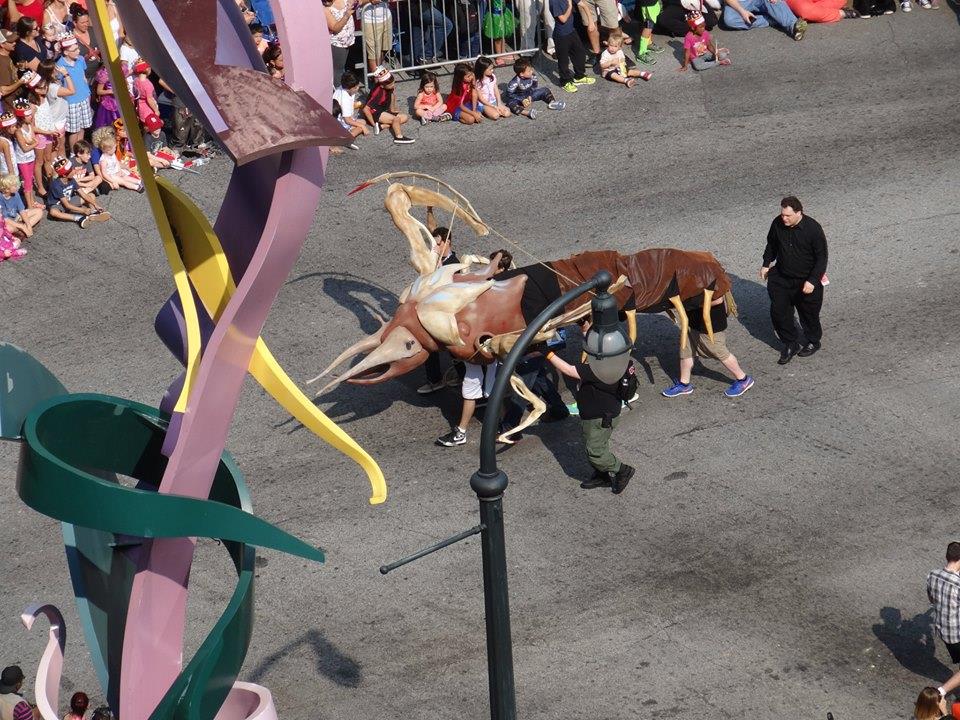
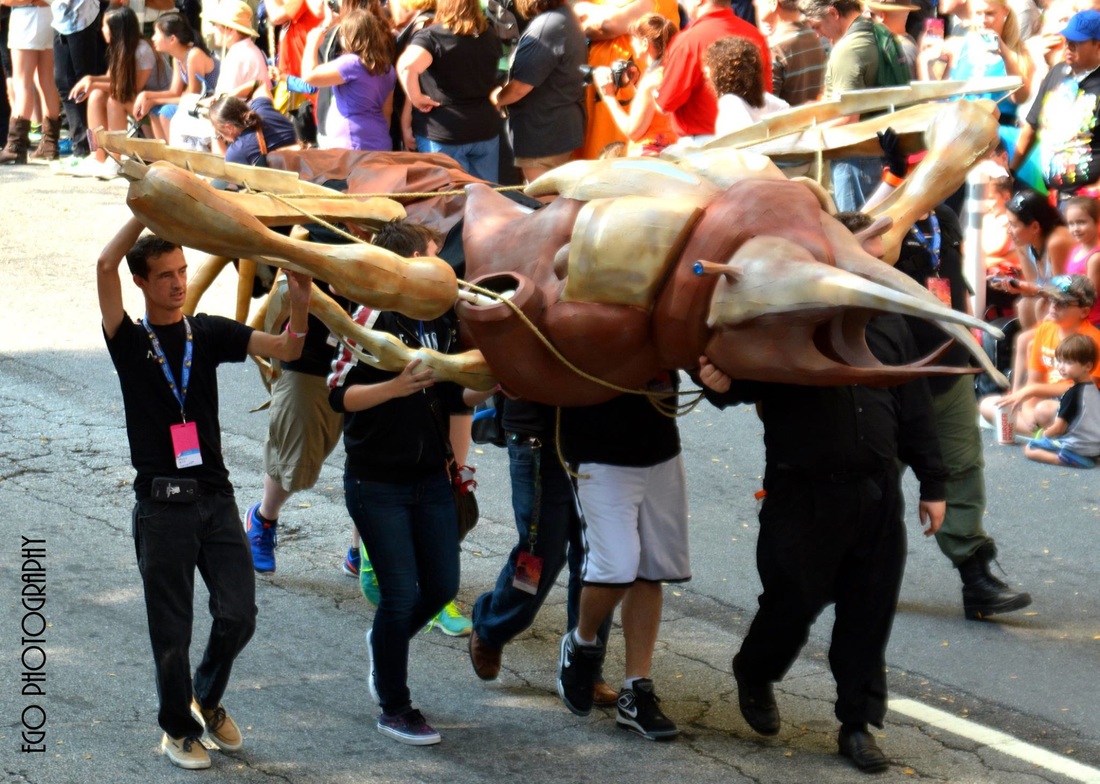
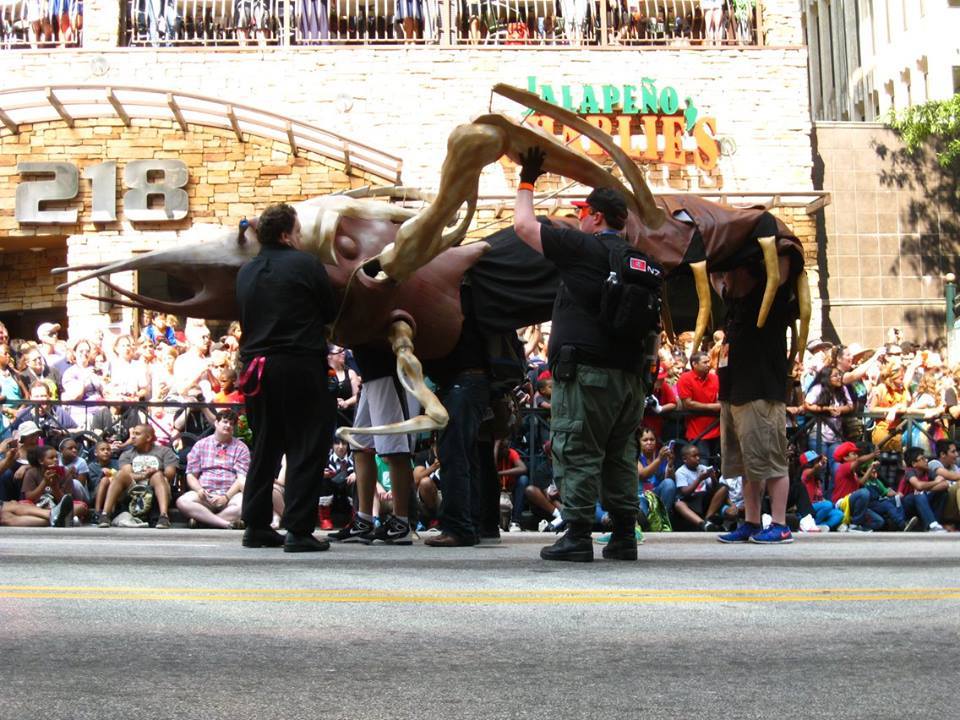
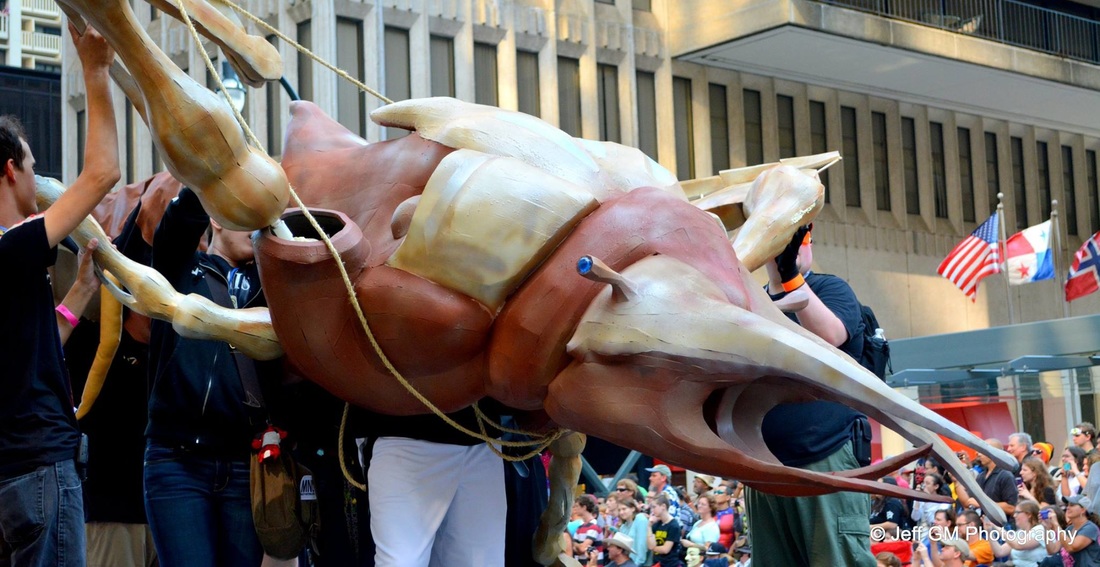
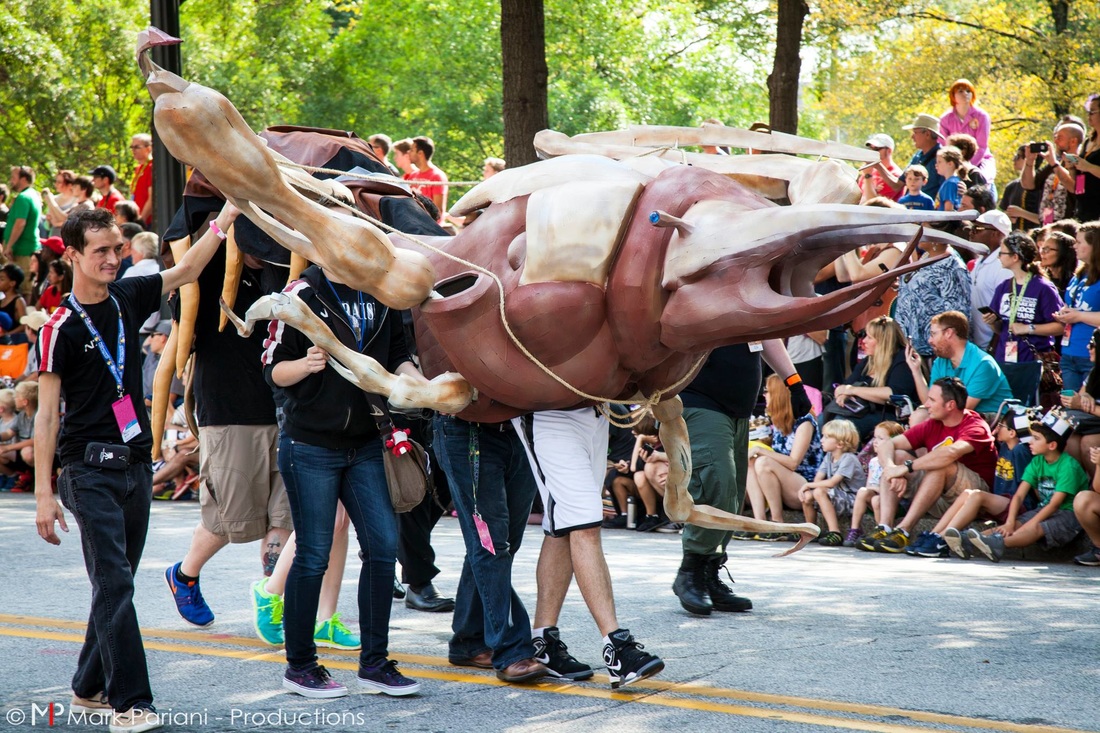
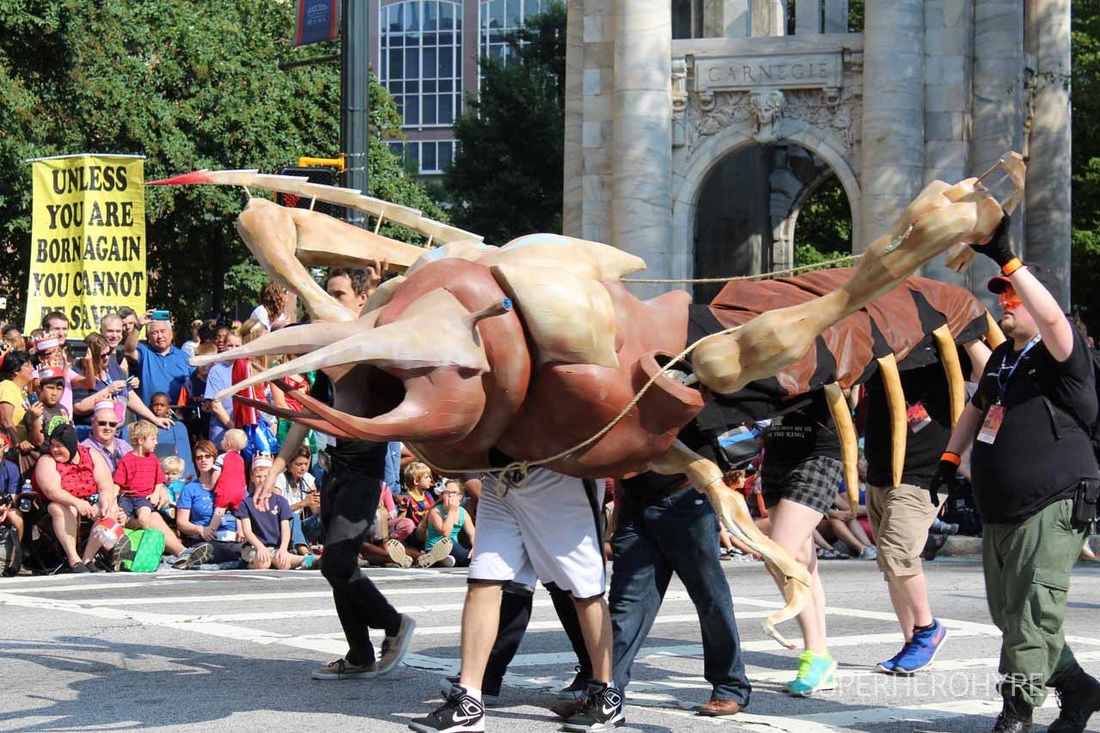
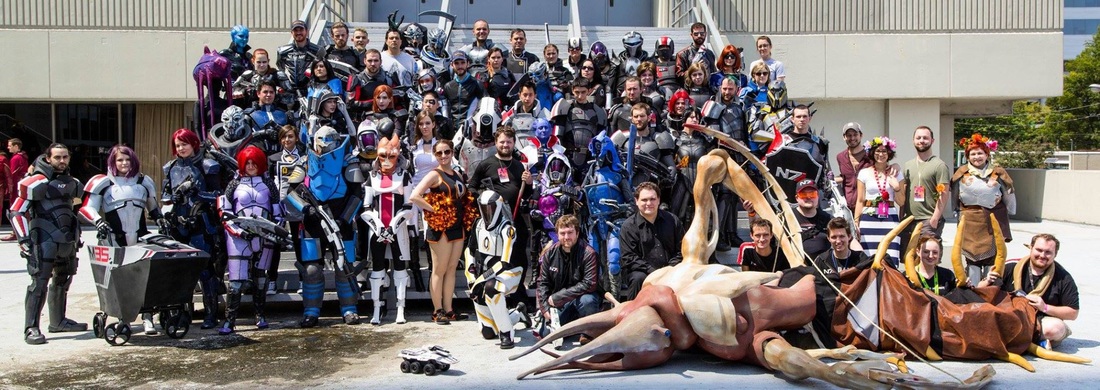
When last we left our intrepid heroes....... 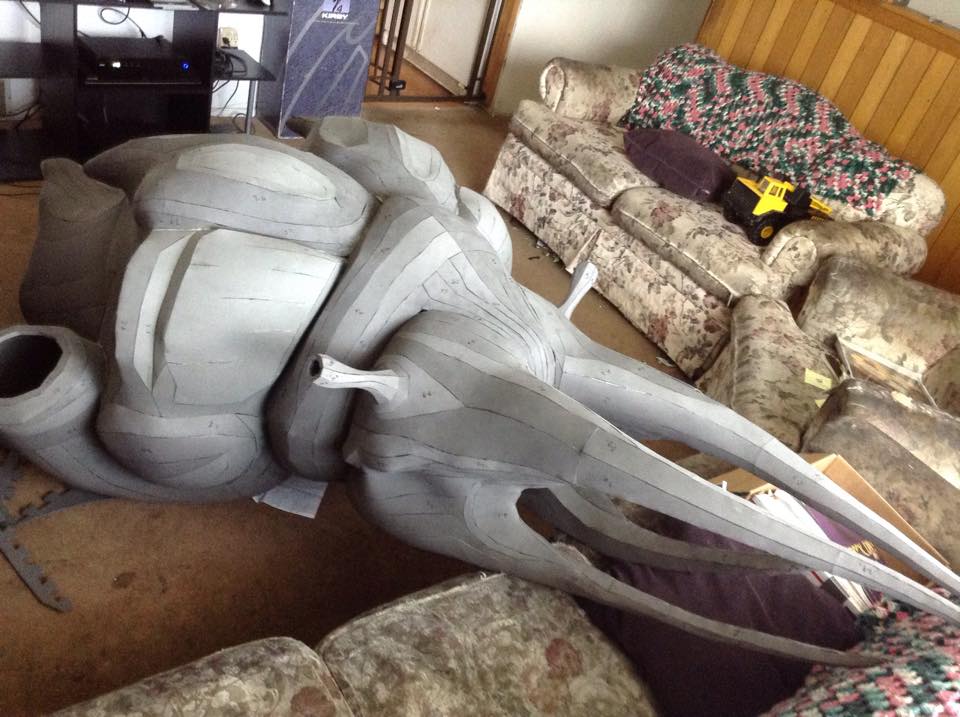 In the last blog post, I detailed how I made Threshy's head. In this post I'll be going over the claws, and if it isn't as long as the last part I'll go over the paint as well. Speaking of claws, let's get back to Row 4 shall we? 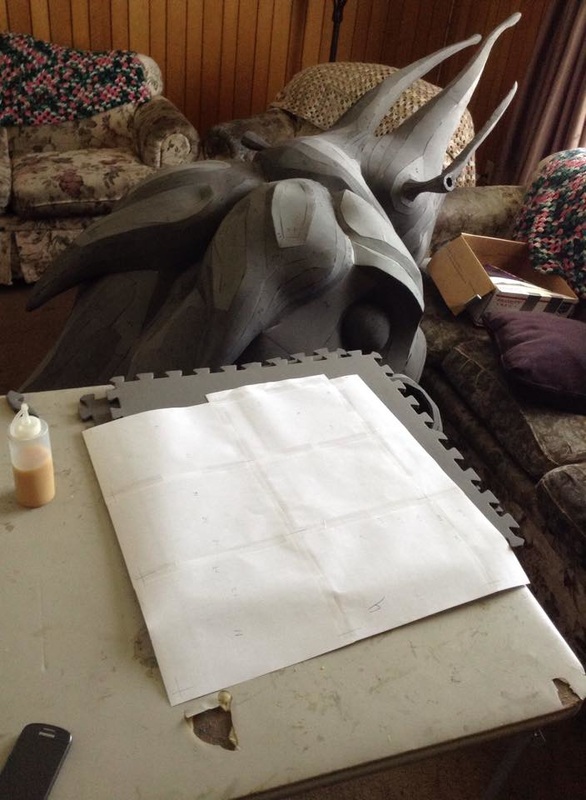 The entirety of the last three sheets of Row 4 were the small claws, which made things really easy to keep organized. Because of this, both the upper and lower sections of the claws came together quickly. As with the pics in Part 1, a lot of the updates and photos happened late at night and the lighting in that room is terrible, especially for photos. Still though, once those were done I started on the more difficult middle sections. Bit of a jump around in progress here - this update happened on my wife's birthday, the day in which I promised that her present from me was getting Threshy out of her living room and into his proper home, the garage. A good friend of mine let me use his jigsaw, and I got right to work on the cart. Didn't quite have enough time to finish it up, but got enough done that I could do the rest at home with my circular saw. Meantime, got Threshy outside safely! Also picked up a metric buttload of paint for later. 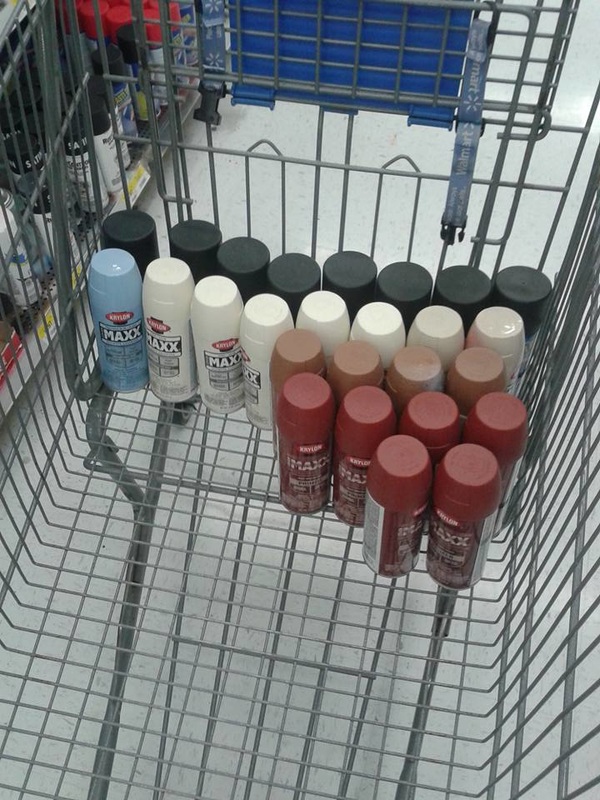 With that done, and the party over, it was time to get back to work. Time crunch! You'll notice the claw isn't on it just yet. I planned to do them all at once since I needed to layer the foam, cut them out with the bandsaw, then hand shape them on the belt sander. Opted to do that all last, in one big go since I didn't have a ton of time during the day to work. Pulled out the circular saw, and sharpened up my chisels, then got the cart all done! Threshy now has a sweet ride! It's a simple set-up, and not the greatest, but I needed to be able to push him around Atlanta in full costume if travels called for it, and I needed to be able to take it all down so everything could fit in my van for the trip. Here's a test shot with the first claw: 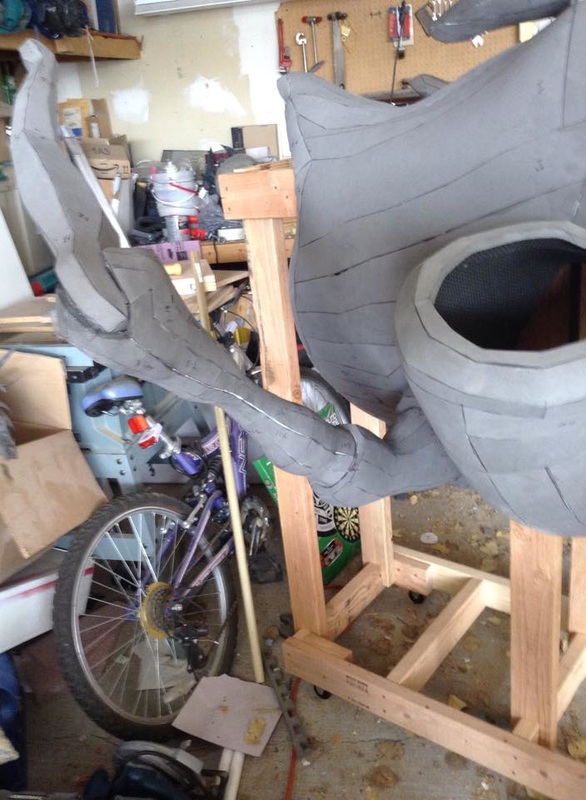 Since I also need to be able to remove the claws for transport, I started work on the inner frame. I also started covering Threshy's head with Mod Podge, and then Epsilon, all to hopefully strengthen the seams and give him a slightly harder shell on the carapace. Once that was all dry, I put on three full layers of Plasti Dip. I would have gone straight to primer, but there were sections of foam I left uncovered (in particular the part someone stands in) to keep its flexibility, and I also wanted to make sure if I missed any foam areas they would be covered well enough for the paint to not seep through. That and I know how Plasti Dip works for me, and since I don't have a lot of time I went with what I know. 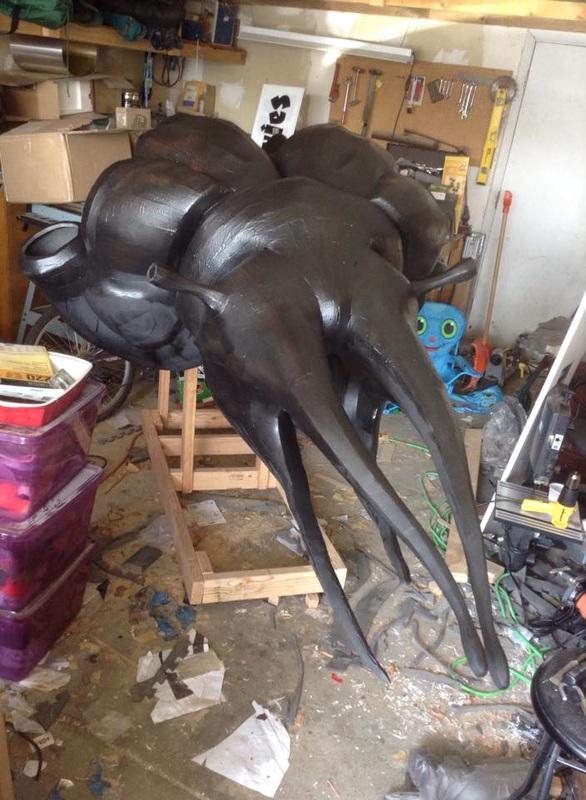 In the midst of all this (since I can paint, then go inside and cut/glue while it dries), I got going on the other middle claw section, and had a startling thought: 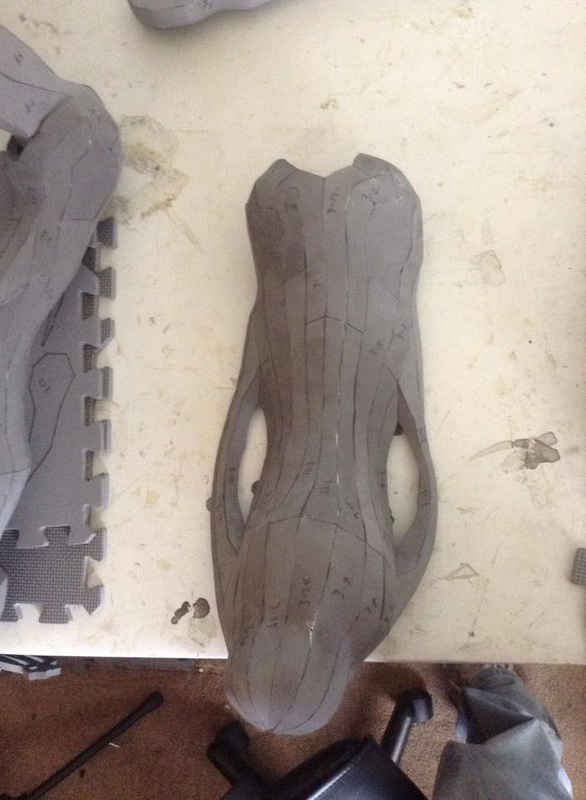 Green Lantern's..... Maw? That's literally the first thought I had when I put the middle bit together like this. Got that put together, assembled the second claw, then threw them on Threshy to see how they look. That's the end of Row 4 finally, and it's lookin' good so far! Next I threw on the primer, a darker brown I would also be using for the base skin color. 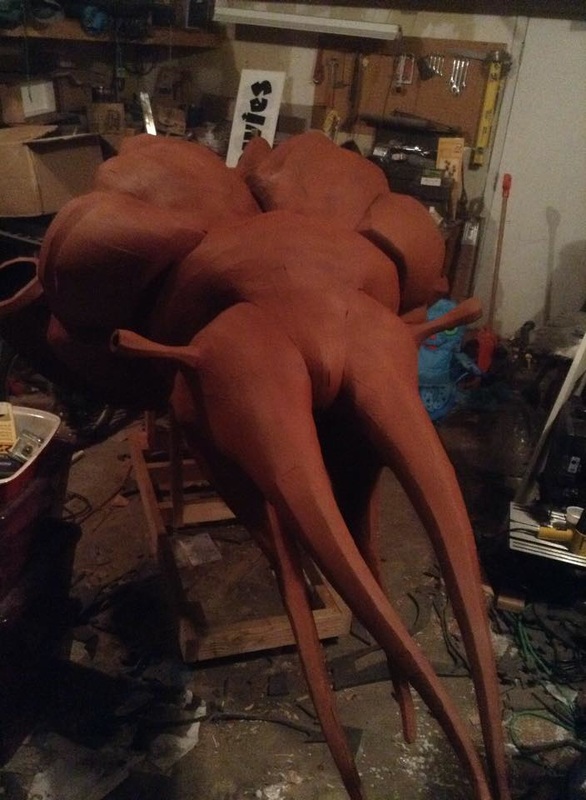 I also got more work done on the inner frame, and realized that I should have made that first. 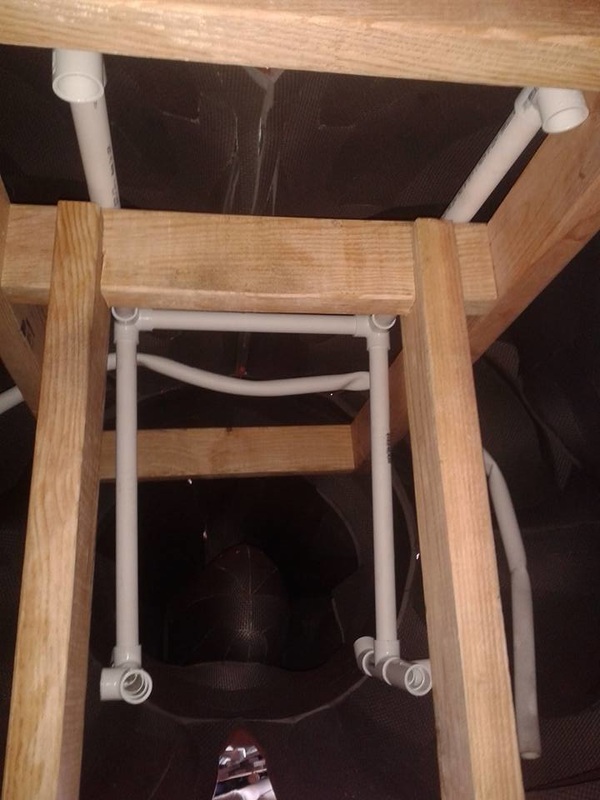 Since it was raining that day, I had opted to go out, measure, come back in, cut, then assemble it and toss it inside Threshy. I also had planned to use the backpack frame I used way back when for my Giant Robot contraption, to help hold Threshy up while walking. Too thin, unfortunately. I had to remove it, extend the upper beams, then everything fit better. This frame still had its issues, but it was much easier to carry Threshy around this way than without anything at all. Once that was done, I got to work on painting the skin areas. 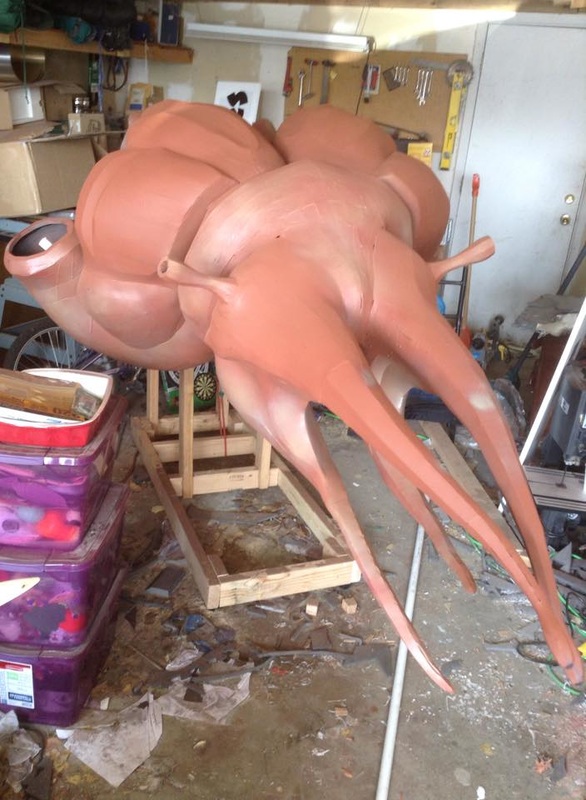 It's a little hard to tell here, but I went for a mottled skin effect with the spray paints. Hard to do well, especially for someone like me who isn't very skilled at that sort of thing (especially with spray cans), but I think it turned out pretty well. I started with that primer base, then dusted areas with various lighter browns. Not entirely, some areas more than others, and some more lightly speckled than dusted in an attempt to make it more flesh-like. Then, I masked around the edges of the carapace, and went to town again. 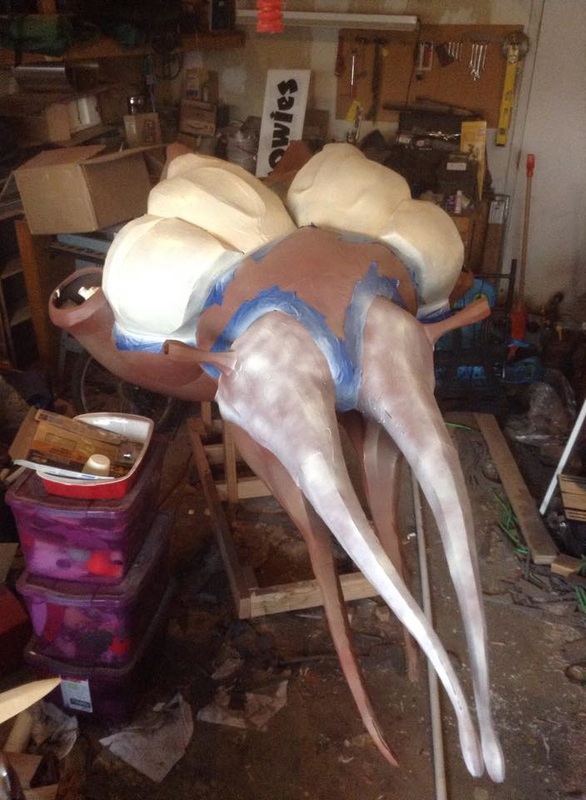 I didn't tape off a lot, because I wasn't worried at all about overspray. It was easy enough to cover that back up using the same methods I applied earlier. Since the carapace is more bone-like, I started with an ivory as a base, then to age and weather it I covered most of that with a khaki brown, and highlighted some areas with a dark brown on top. Then I went over the whole skin area again, with the lighter browns, and ever so slightly pressed down on the spray tip, making it only spurt out droplets. You can see it best in the second pic, and I think it made it a touch more realistic. Again, not the prettiest job, but I'm learning! Now on to the large claws, which are basically the exact same as the small ones but with only 2 sections and a much larger pointy. The upper section was simple, if huge, and both sides came together quickly. The lower section was a bit more complicated, but made easier than the smaller version again because of its size. Can we say Krogan scythe? XD In that last shot the claw isn't really attached, it's just resting on the frame bit and being held up by the PVC pipe I'll be adding to it later. The next day after this was done, my wife was home all day, so I decided to push out all the pointy bits and get them done and ready. Started up the Epsilon on the small claws now that they are fully assembled, and added some dowels to the large one to hold the pointy end in shape. Much floppier than I expected, unfortunately, so the dowels added strength and shaped the claw in the direction I wanted. I hindsight I should have used clear acrylic dowels to look more invisible, but again time constraints and with all the painting and sunlight it really wouldn't have looked much better. These large claws are as big as Threshy. It's insane. I put the pipes into the three claws, then put them in place for a shot. I ended up securing the pipes inside with Great Stuff expanding foam, so they didn't twist around. Still needed more support to sit still though, so I starting thinking about fishing wire. In the midst of all this, Threshy wasn't looking quite right. Something important was missing, and unless I got it done it was going to bug me forever. So I painted in the fake eyes. There. NOW I could focus on the claws without being distracted. Back to the second large claw! I stopped by my local acrylics dealer as well, to pick up a wonderful bit of awesomeness to add, which finished off the head completely. Go for the eyes, Boo! Go for the eyes!! RrraaaAAGHGHH!!!! I used a transparent blue spray paint by Testors, which worked swimmingly for these half-round spheres. Still lets light in, and looks amazing! Really sets off the full effect. Finished off the other large claw with its support dowels, then got to Epsilon'ing everything. And with that, Threshy was completely assembled and there would be nothing else I had to cut out. Time for paint! Unfortunately the pipe connection on this one twisted while drying, so I had to cut that off and fix it. No biggie though. For those wanting a nice, in-depth step by step on the painting on these, I decided to take a shot of each step on the last claw. 1 - First, three layers of Plasti Dip, followed by the primer base coat. 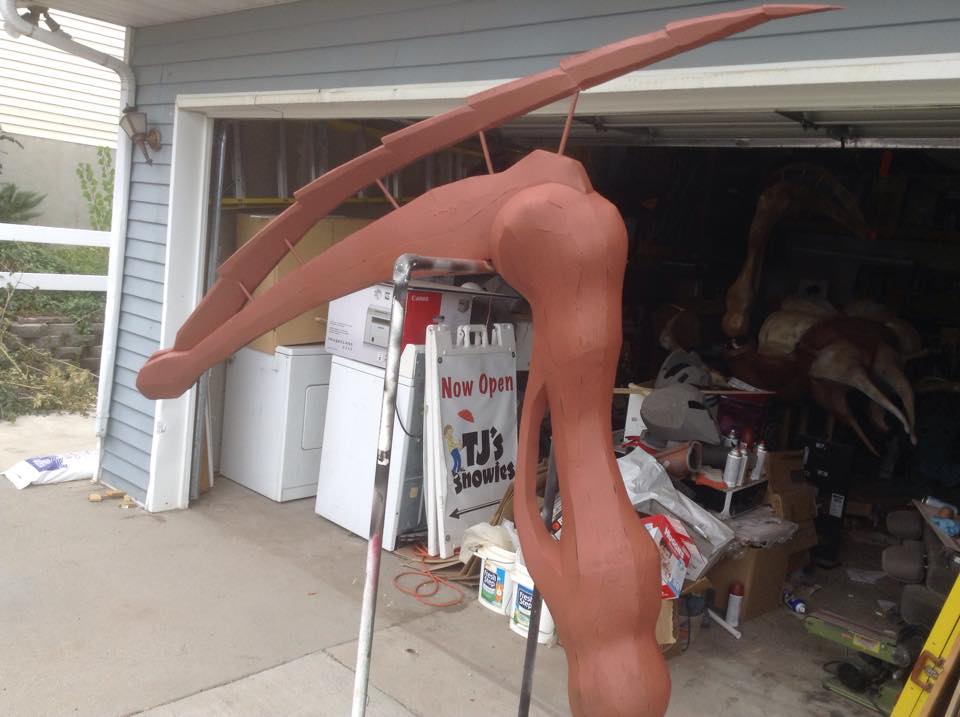 2 - Once that dried, a single coat of the Ivory, being a bit lenient in coverage (about 95-99%) 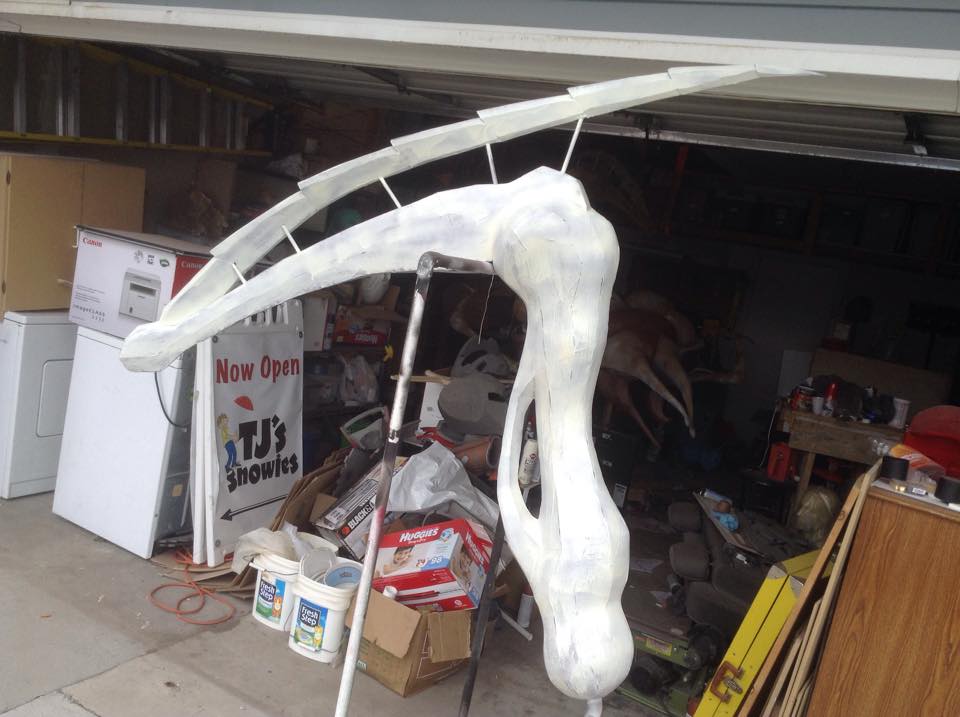 3 - Immediately after finishing with the Ivory, spray on the khaki layer. This helped the blending, and once again no need to cover the entire area. Quick, light sprays preferred, keeping the coverage uneven. 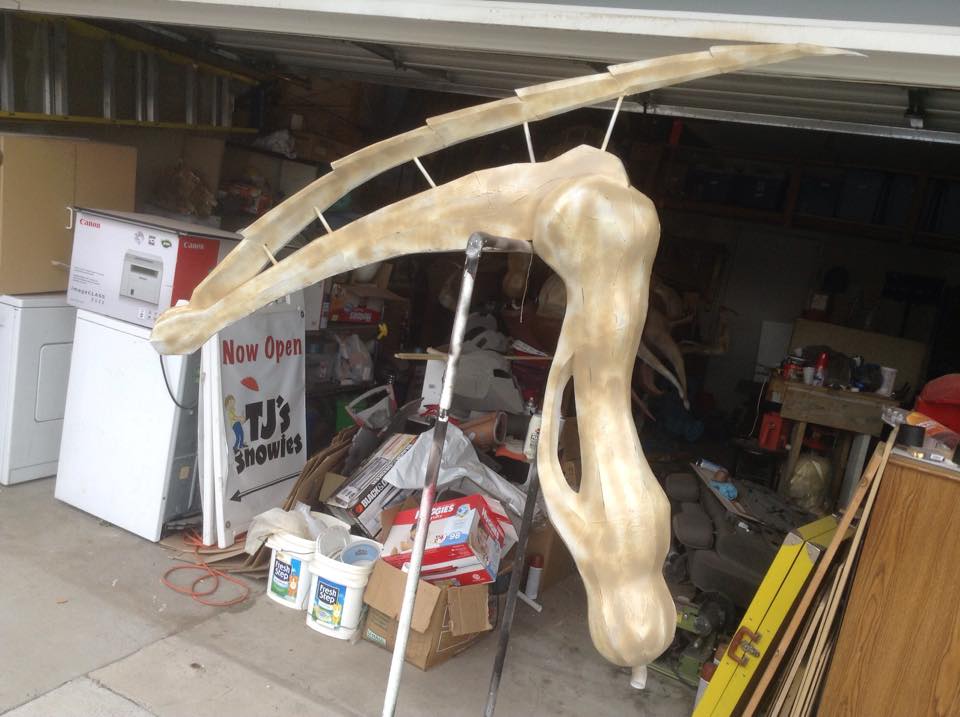 4 - Once again, immediately after finishing the khaki layer, spot-spray a darker brown with much less area coverage. This gives it a fuller effect, and really makes the coloring pop. Add blood spray as needed. 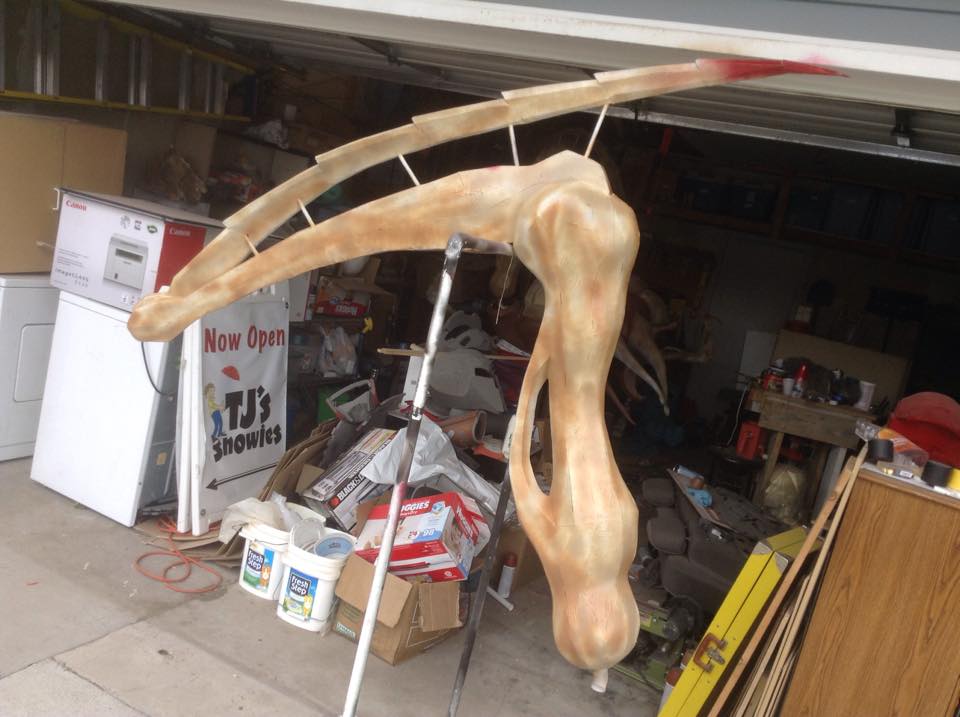 At this point, Threshy was 99% done. I still had to work out the large claws, both with the need to continue being removable for transport but have enough support to stay up without twisting around in movement. 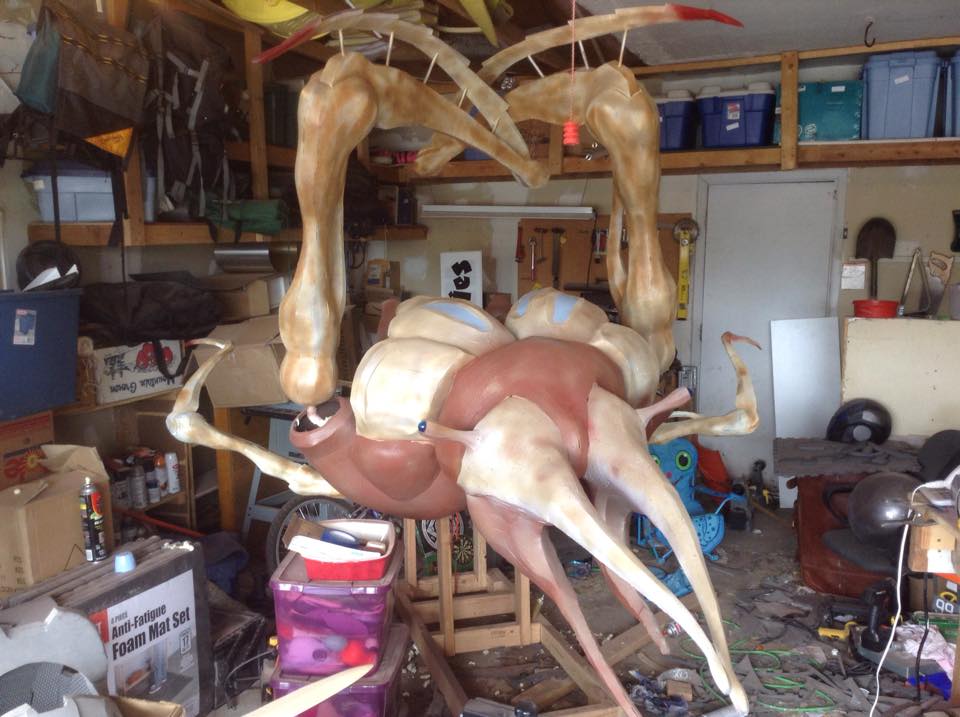 I ended up taking off the angle brackets, which gave two results. Not only did it end up looking better, but it put the base of the claws closer to the head and looked much better. I also tied fishing wire between the claws, which wasn't strong enough and stretched out too badly to be used, but stayed together long enough for a final shot.  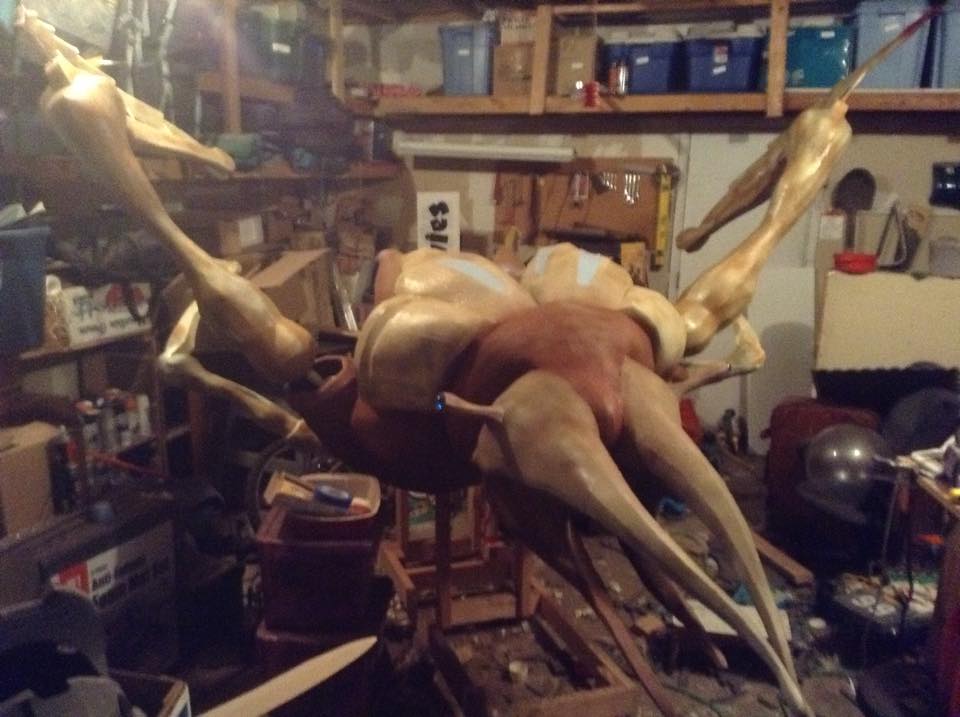 This result was thanks to a good friend from the group coming by to help me get this last bit figured out, who held up one claw while I tied them together. Unfortunately, as I said, it didn't stay fixed long, so I ended up going with his suggestion of just buying some rope to use. The rope worked just long enough to get Threshy through the parade, which was good enough for me. :D At the parade, Threshy got connected to his body for the first time ever, and was a big hit during the event. I wish he had survived longer, but thanks to the eight people inside who puppeted him it worked out wonderfully for how long he *did* last. The BioWare devs that were there and got to see him really loved it, and I got Mark Meer (voice of BroShep, the Hanar, the Vorcha, and prancing around in his very awesome Vorcha costume) to sign one of the large claws! 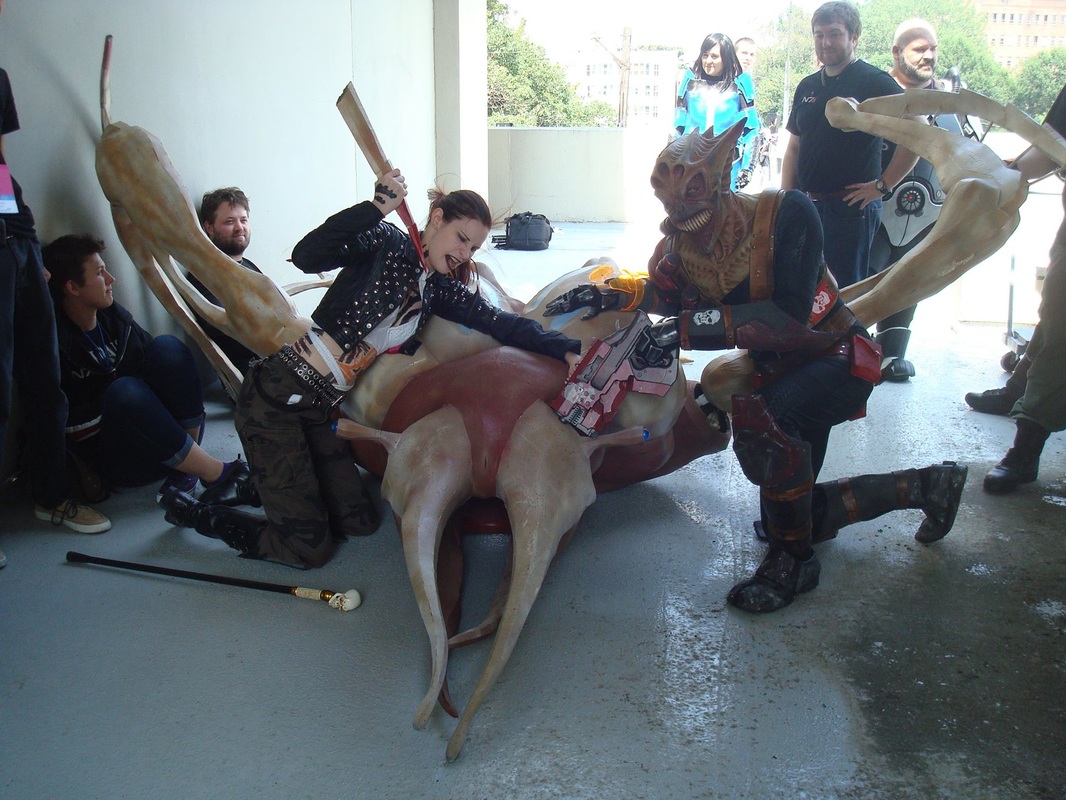 The claw he signed is now in its rightful place, displayed as a hunting trophy above my television.
Big thanks to Laura at Rebel Among the Stars Studios for coming up with the idea for a Chinese Parade Dragon Thresher Maw, Lexi at Keelah Monster Cosplay for making the body (and his name), the N7 Elite for funding the materials, and HUGE thanks to the handlers (Ryan, Alonzo, Chase, Kate, Matthew, Jesse, Heather, and Robert)! If it weren't for the handlers Threshy never would have even marched, and they did an awesome job of it. Unfortunately, due to how he held up during the parade and the large problems the claws ended up being (as well as some damage sustained later due to my brother's negligence) I have basically retired Threshy at the moment. I intend to remake him later, both to hide all the large amount of seams but to also, hopefully, incorporate more moving parts and a much more sturdy frame. Threshy 2.0 will happen, hopefully sooner rather than later!
0 Comments
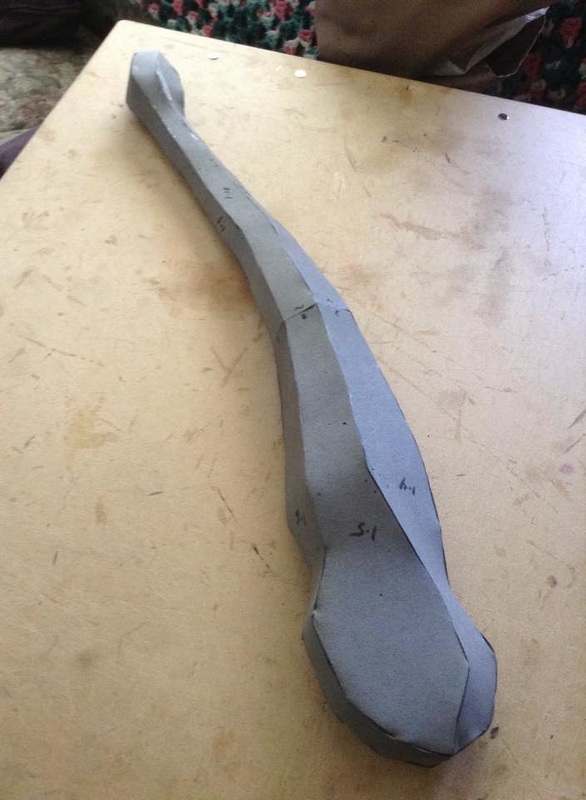
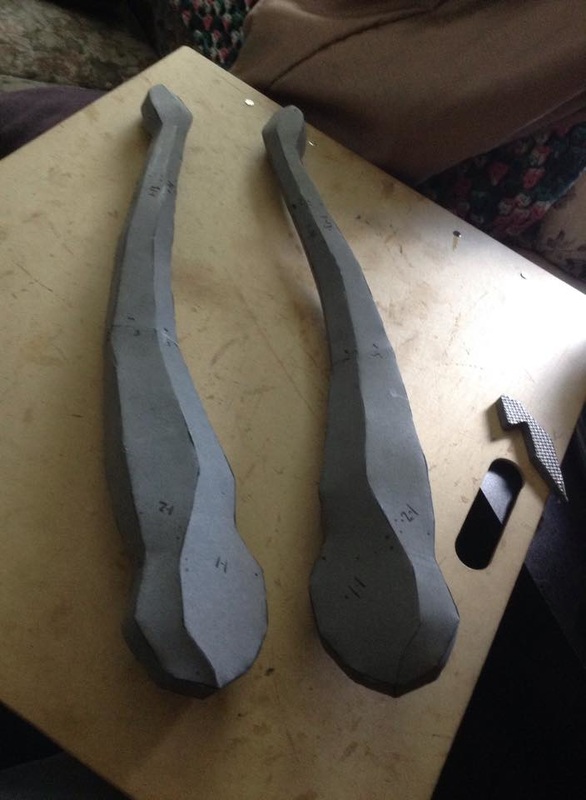
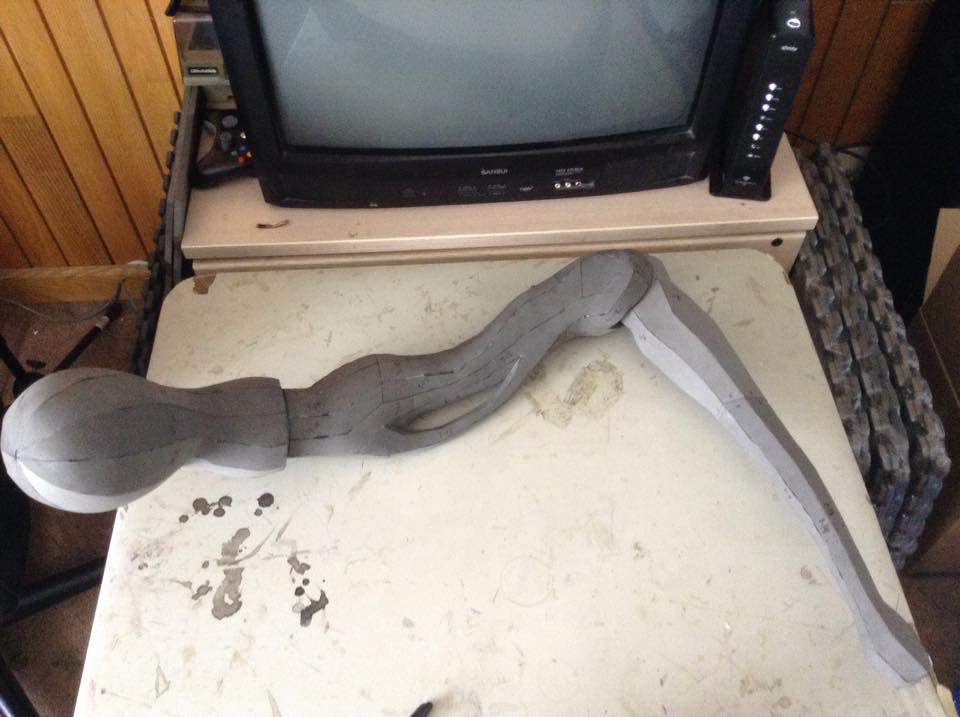
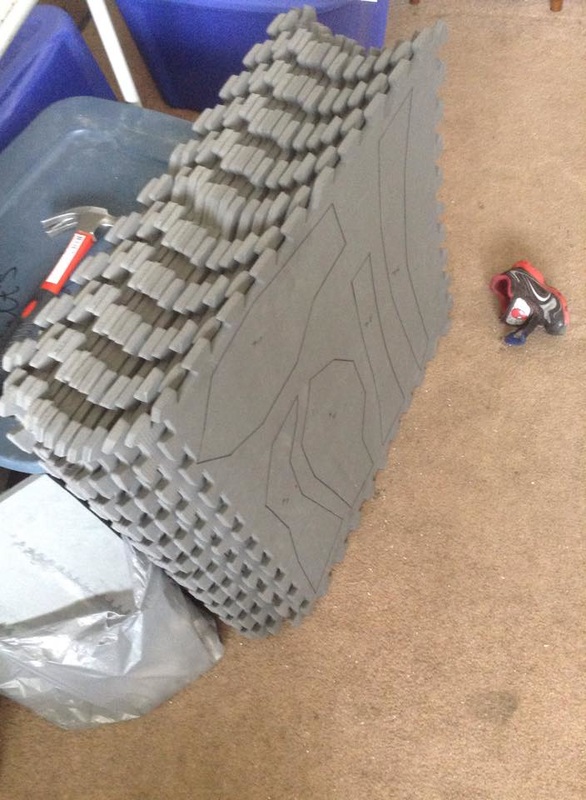
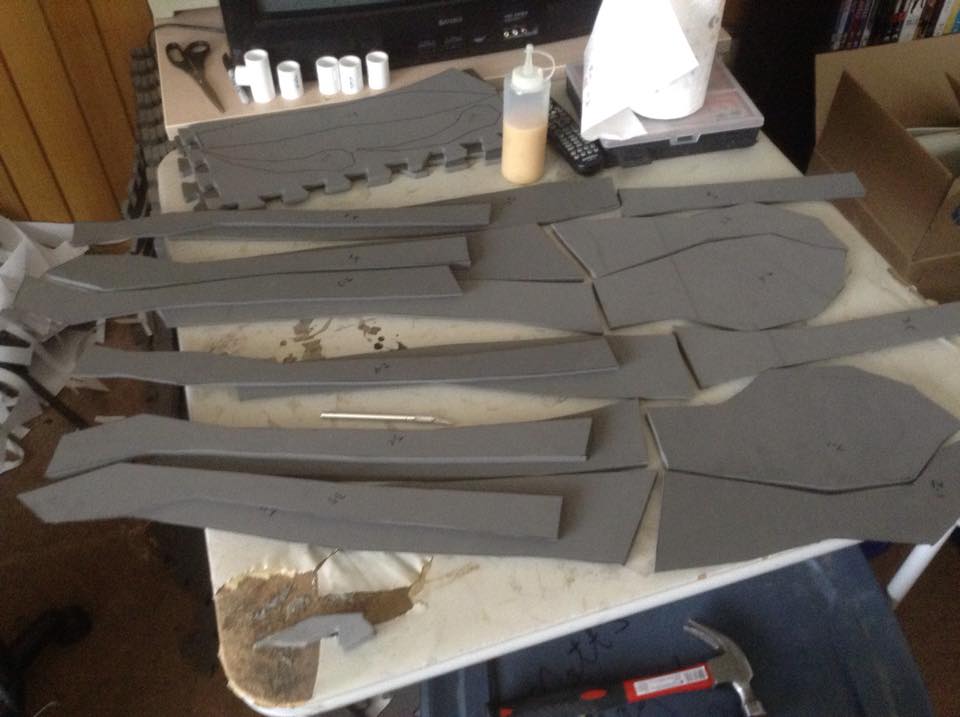
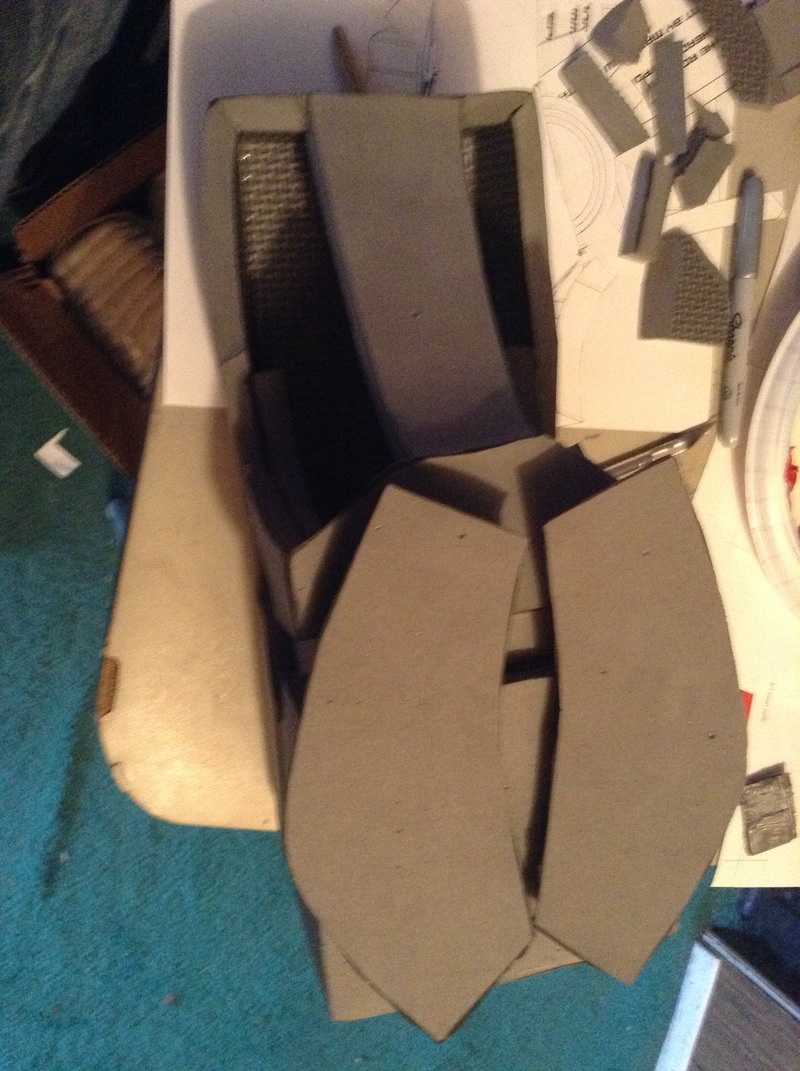
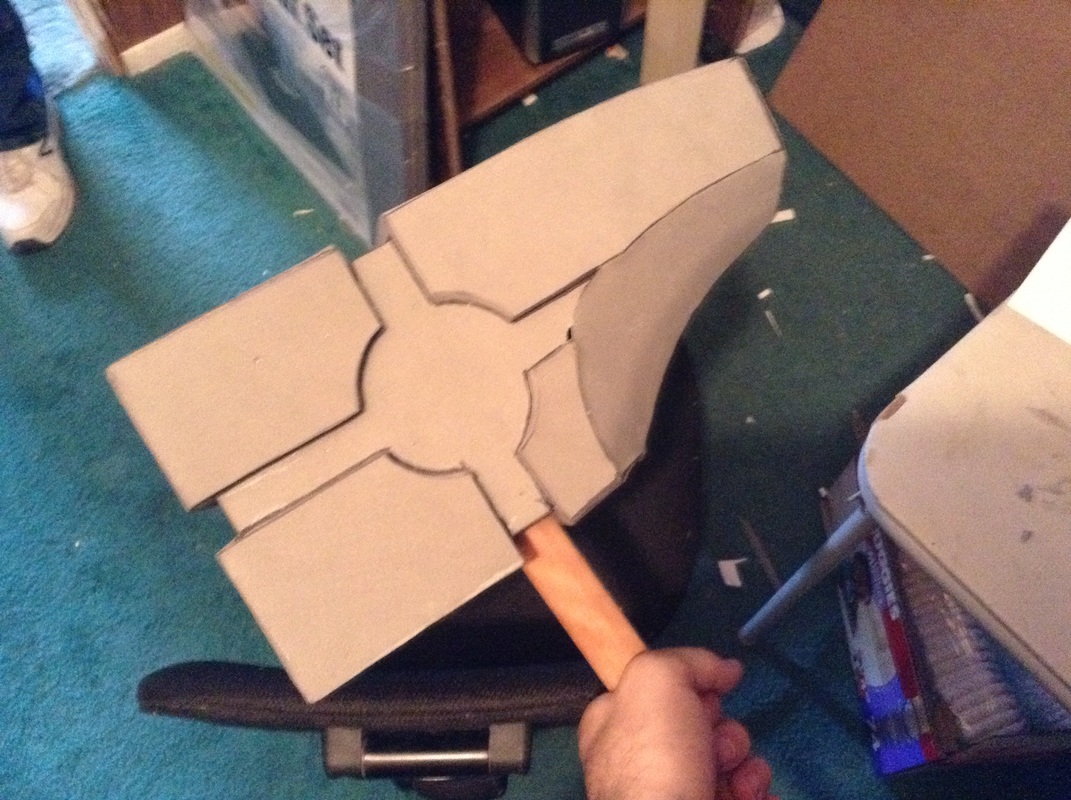
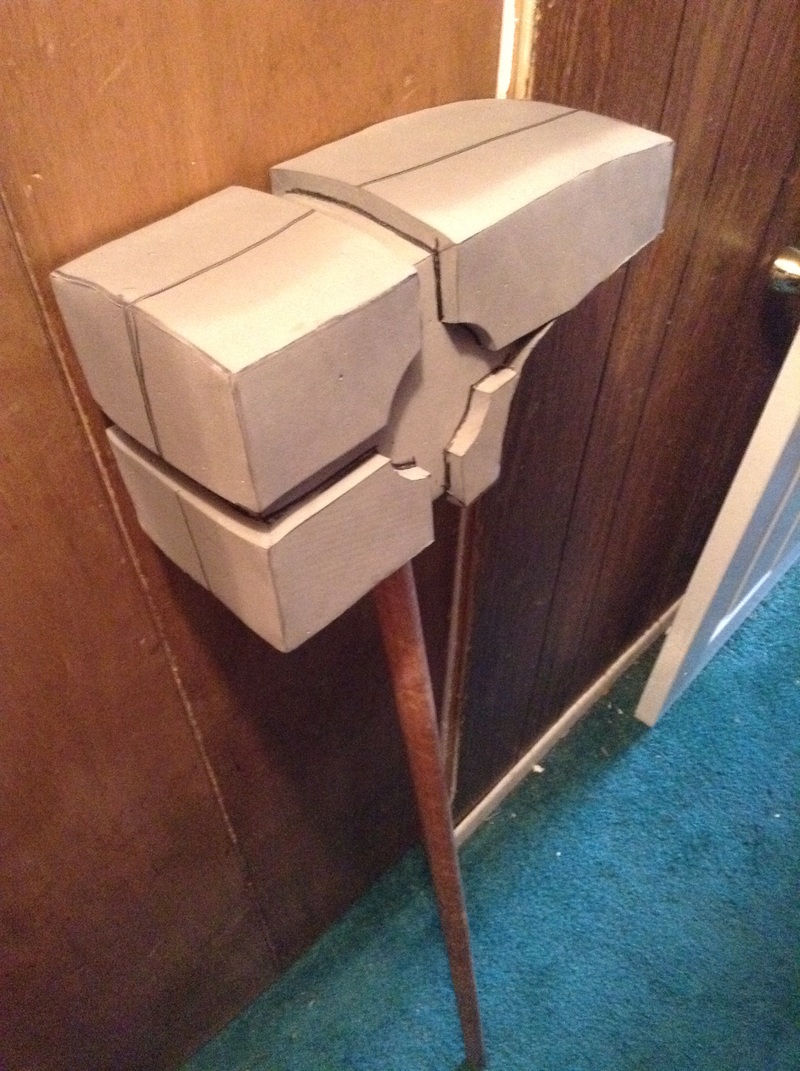
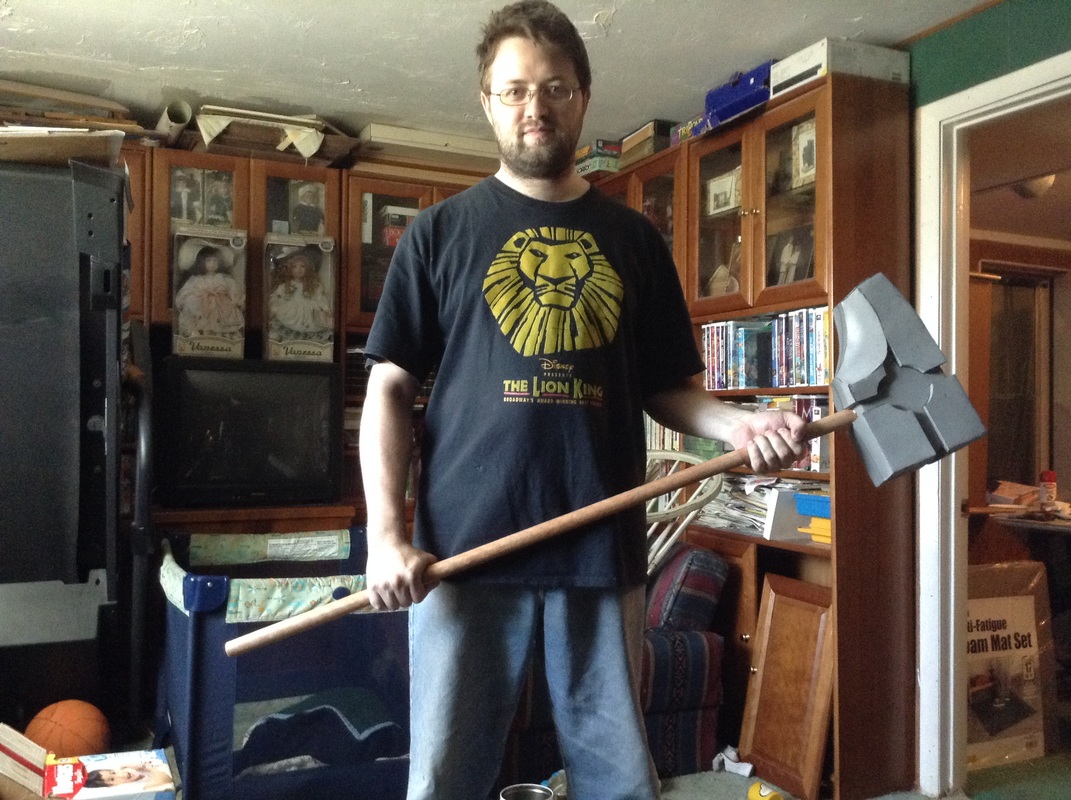
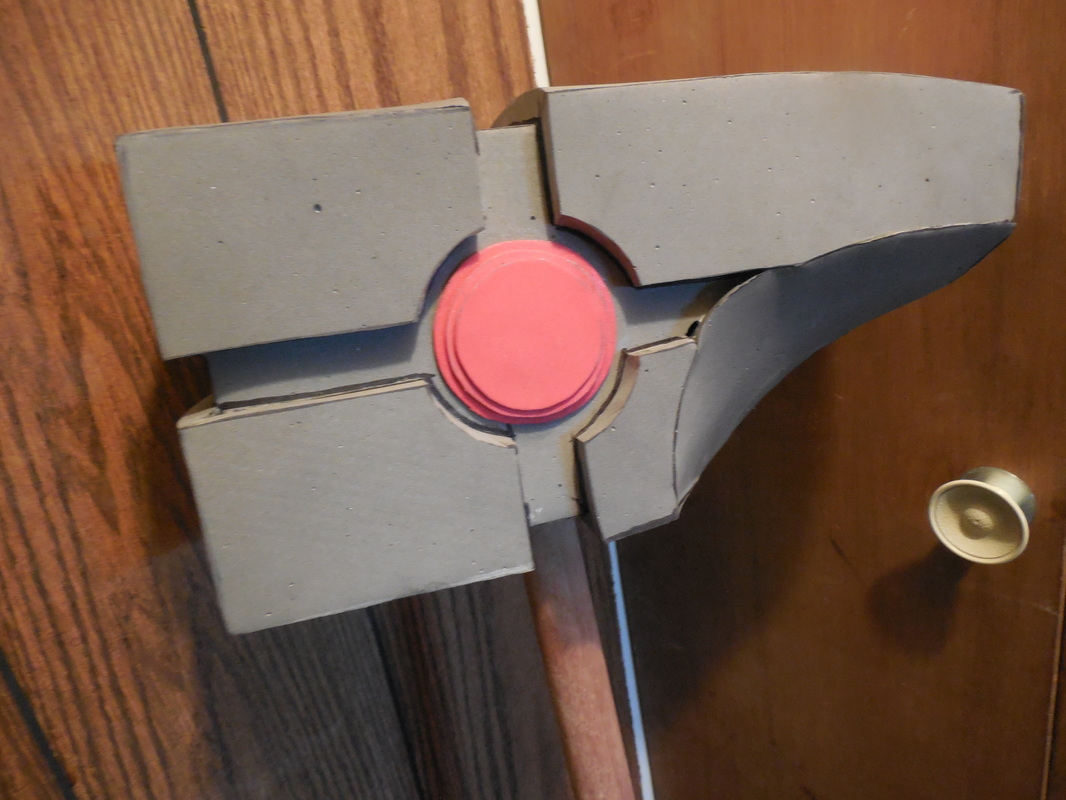
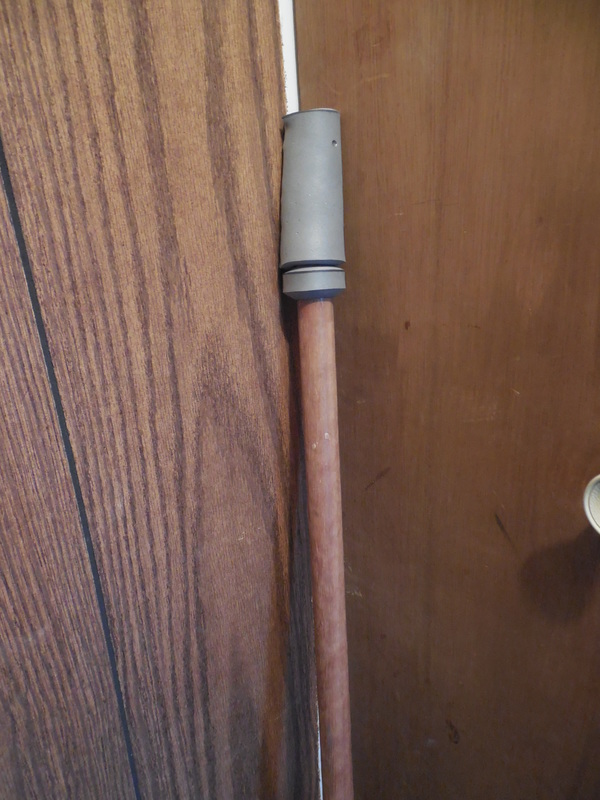
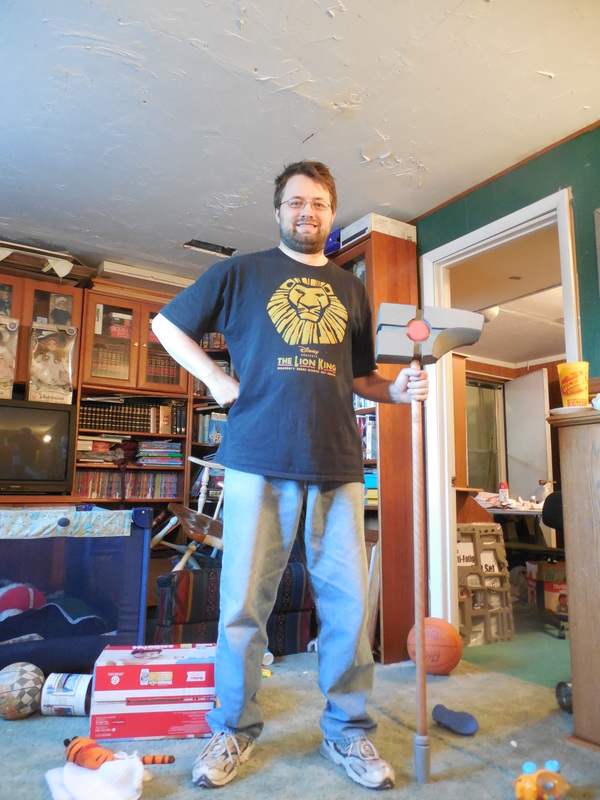
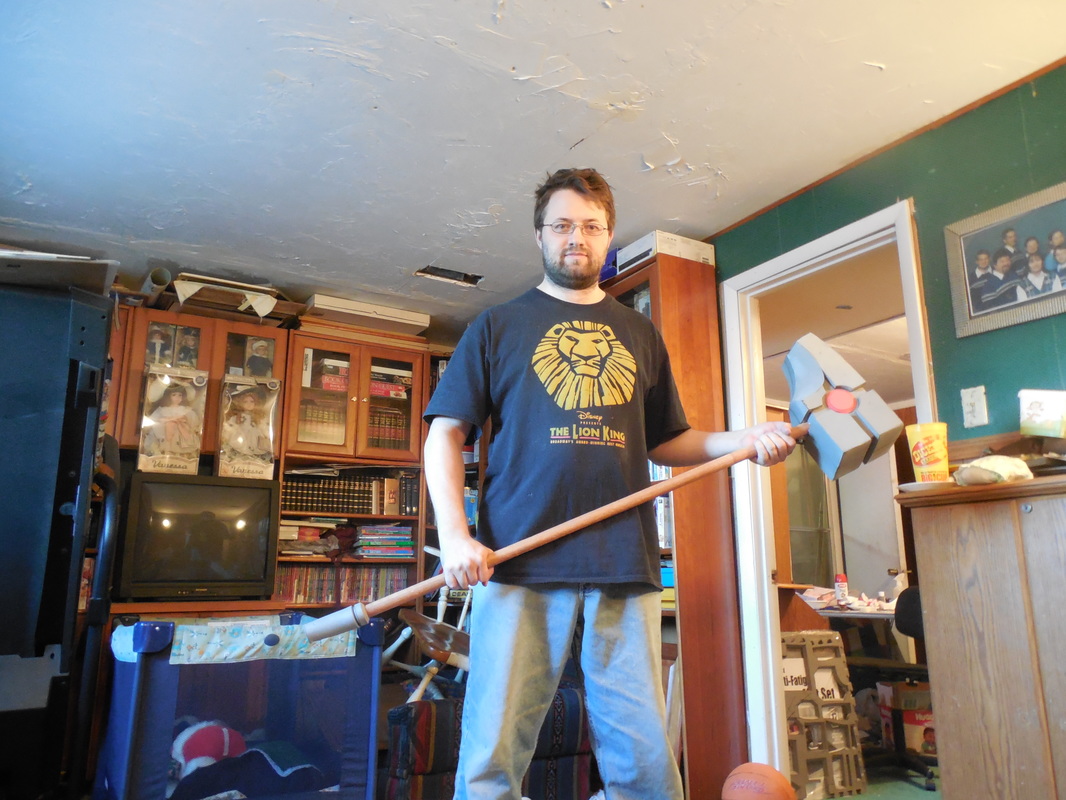
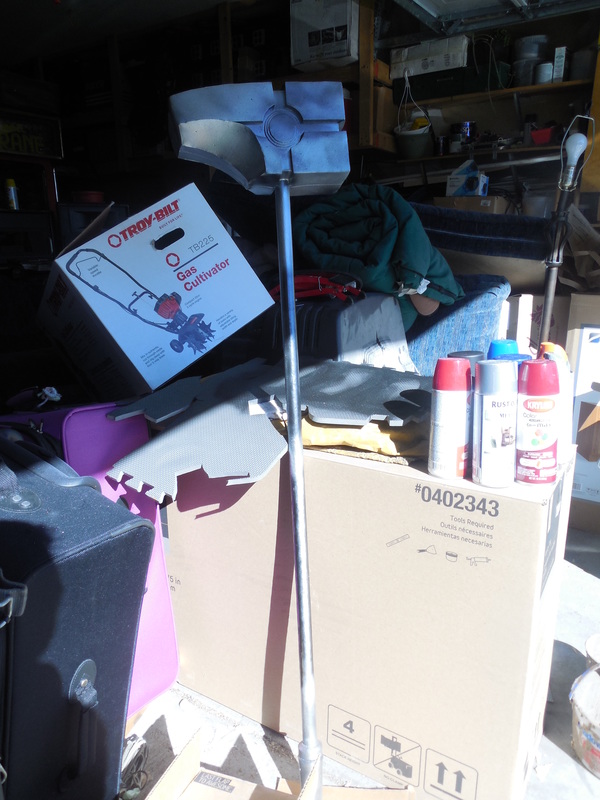
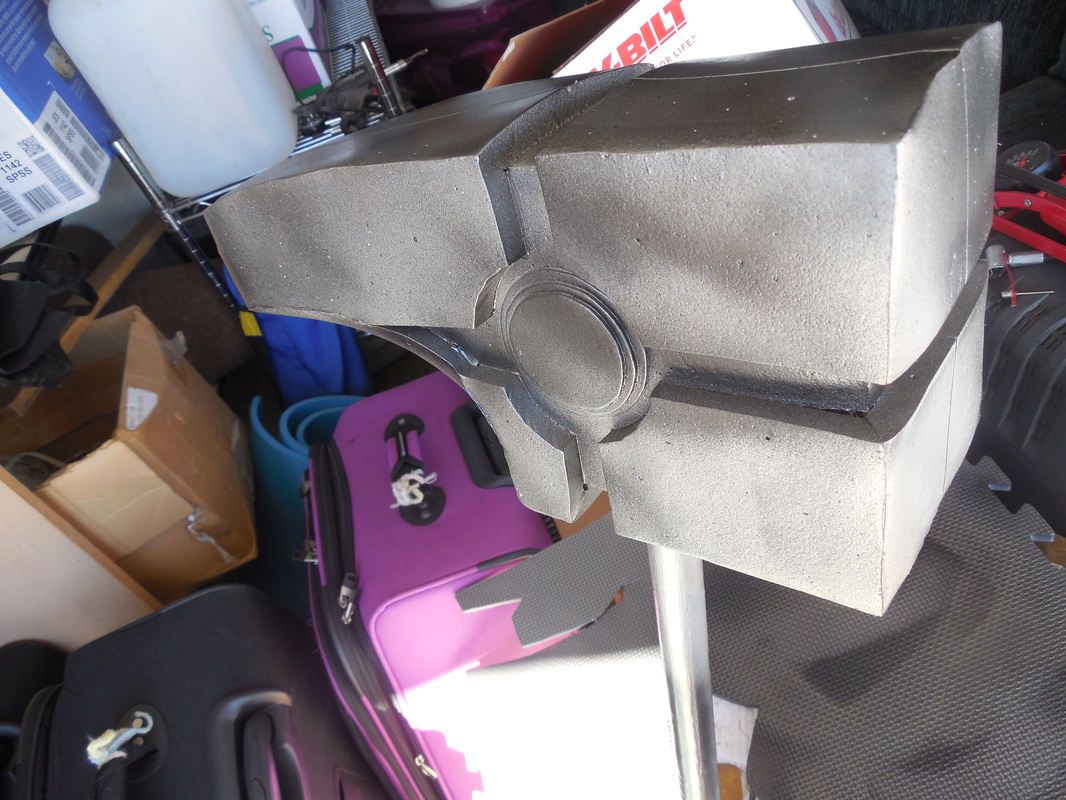
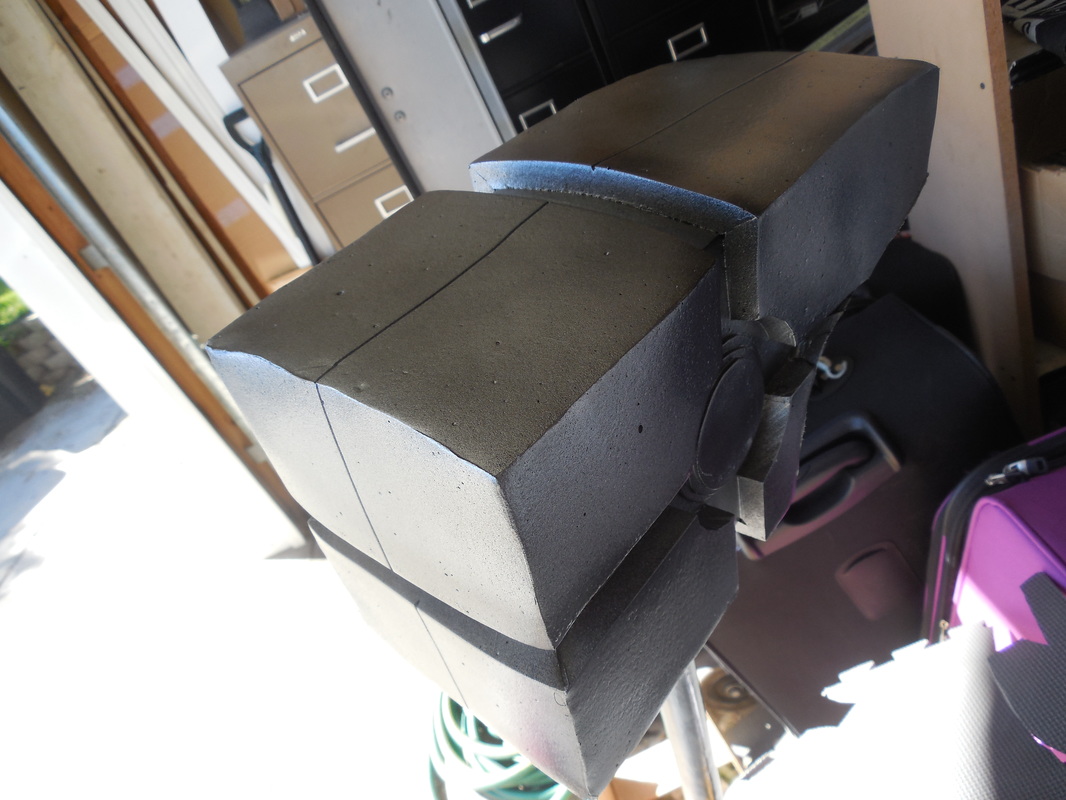
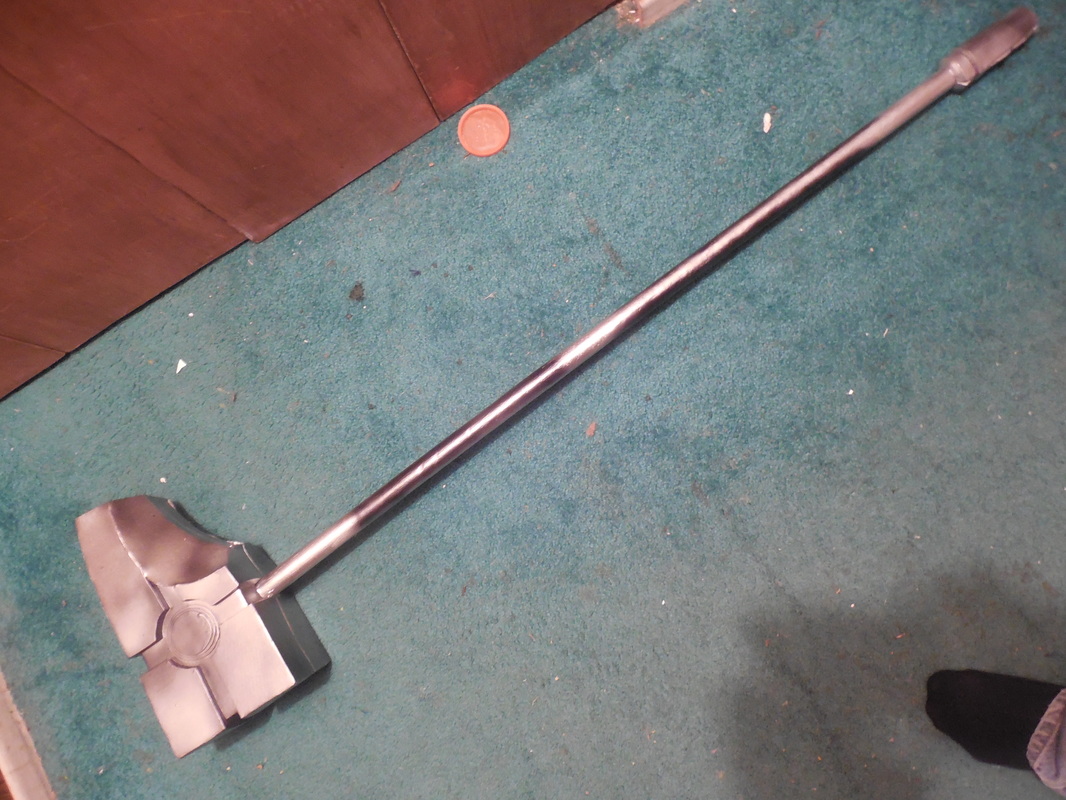
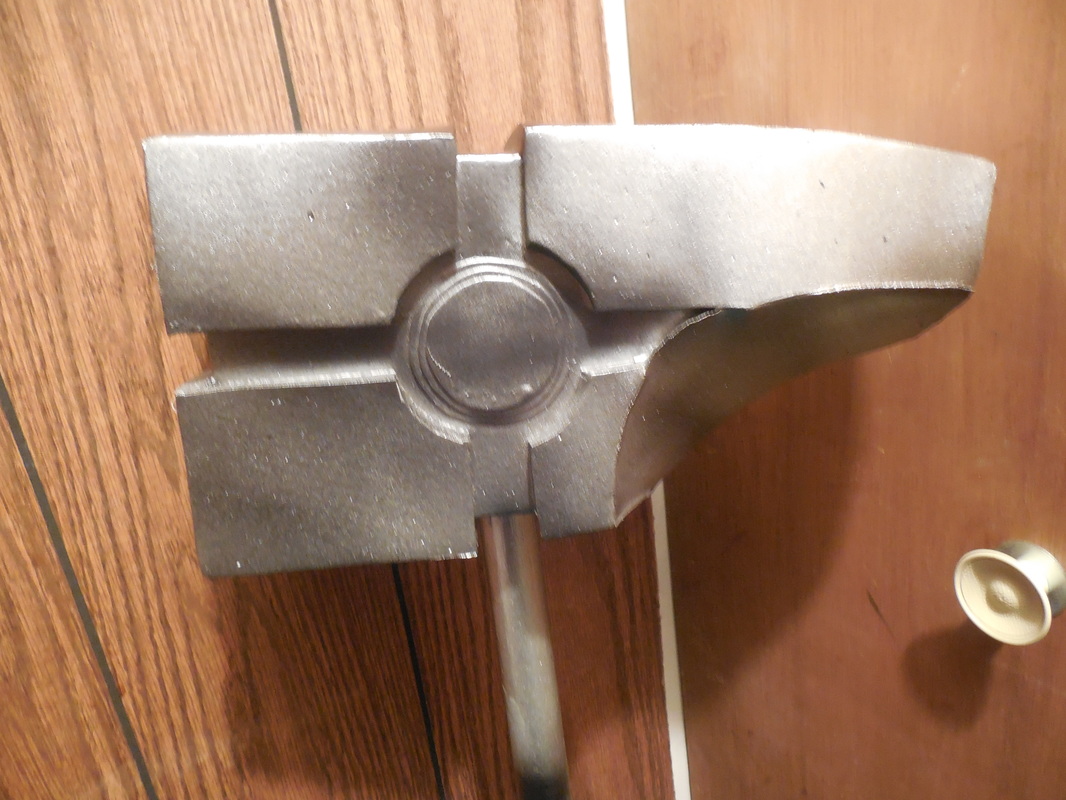
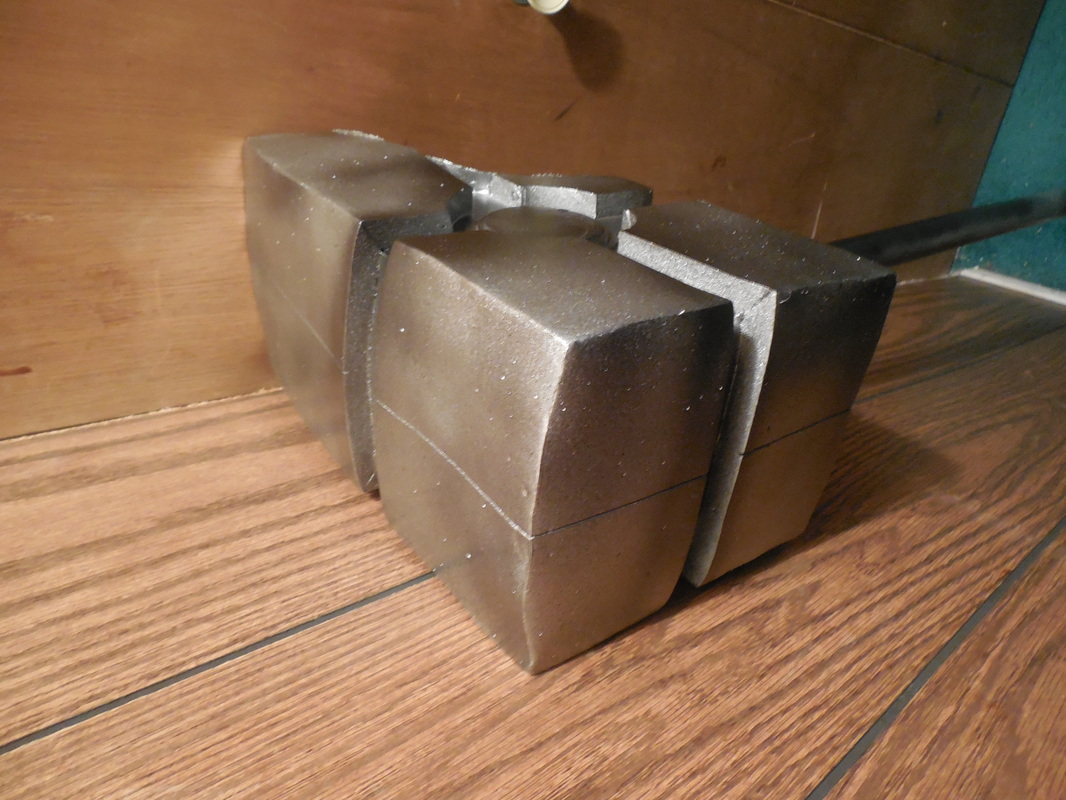
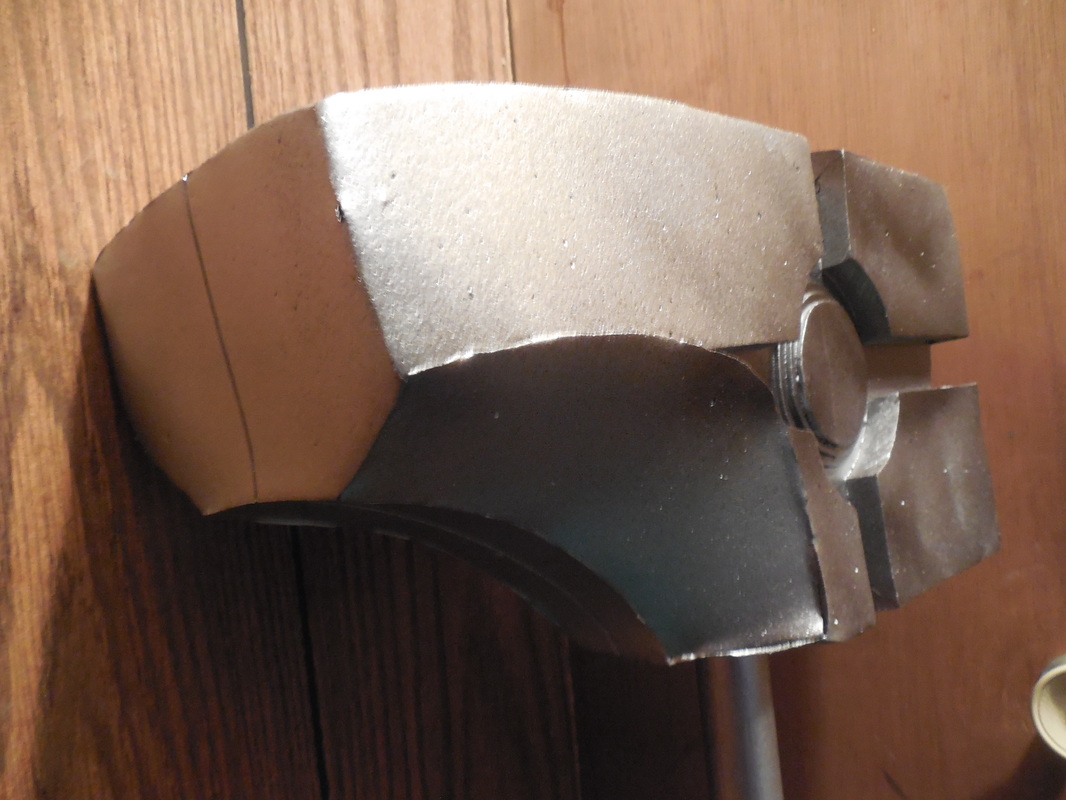
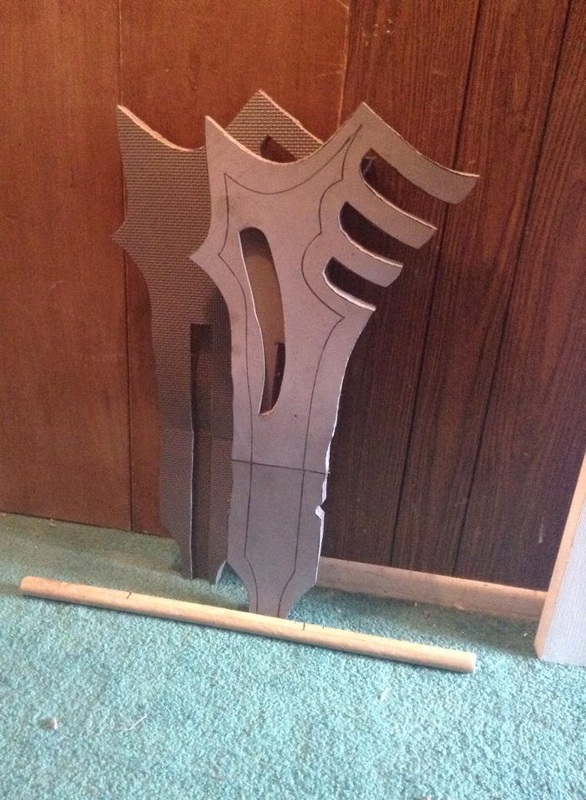
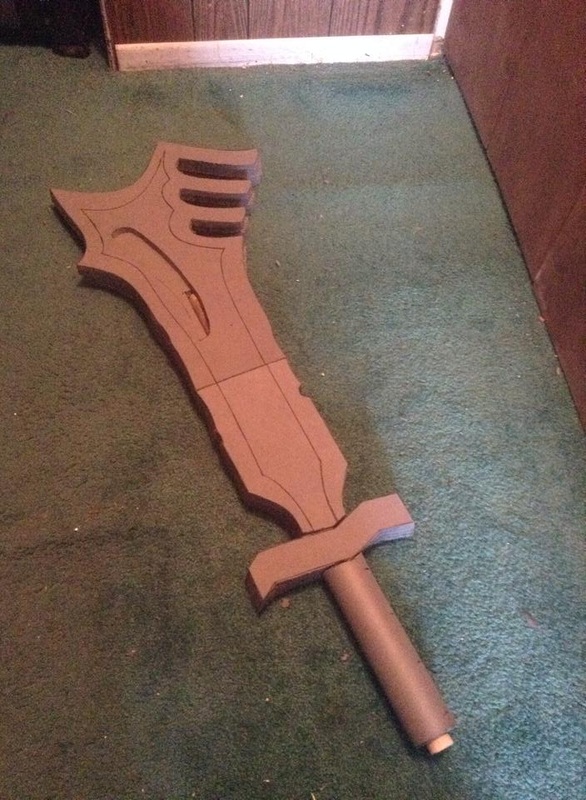
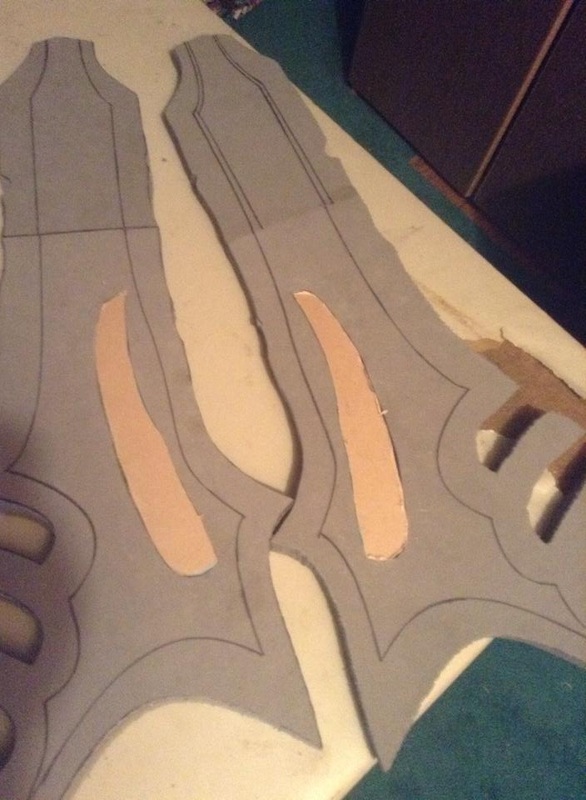
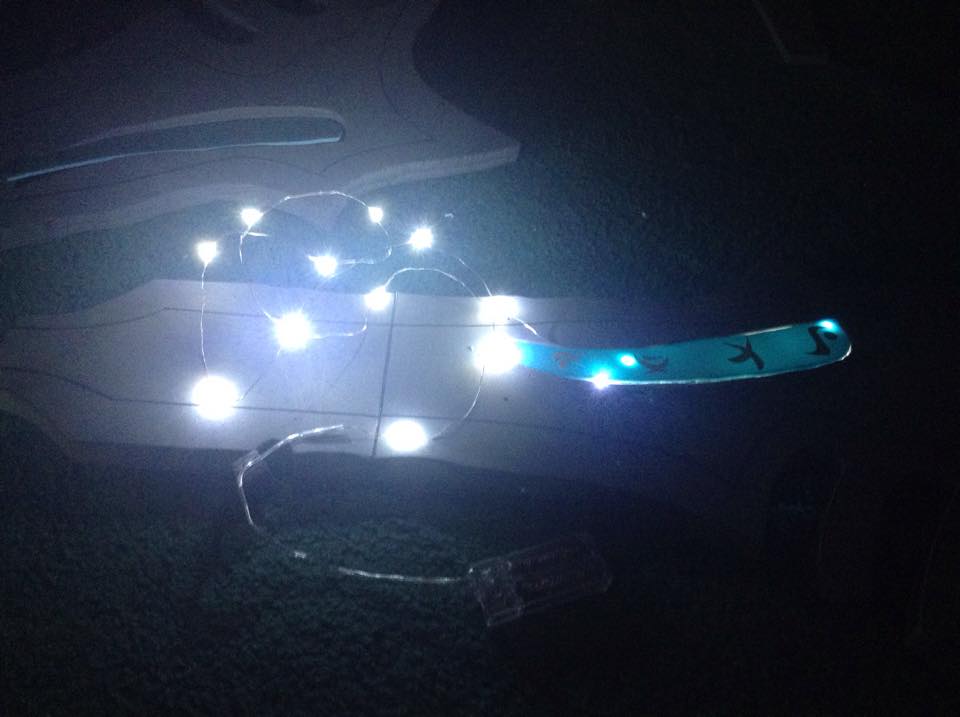
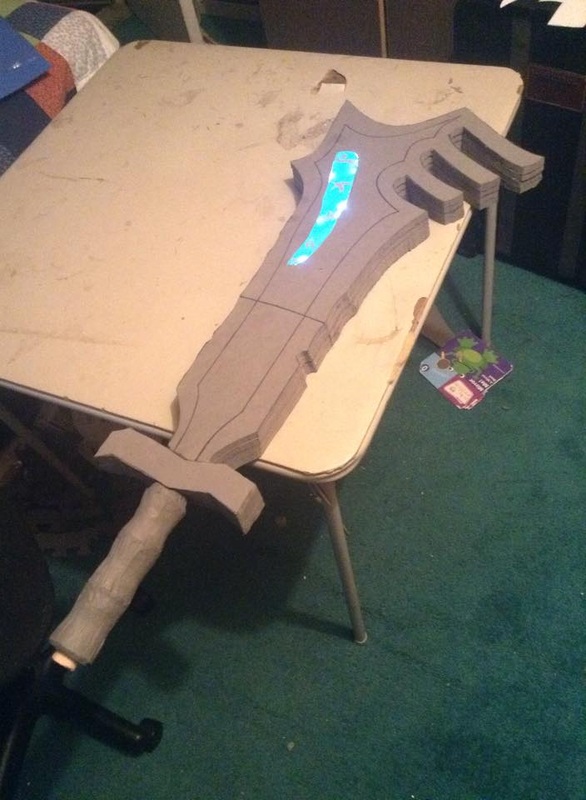
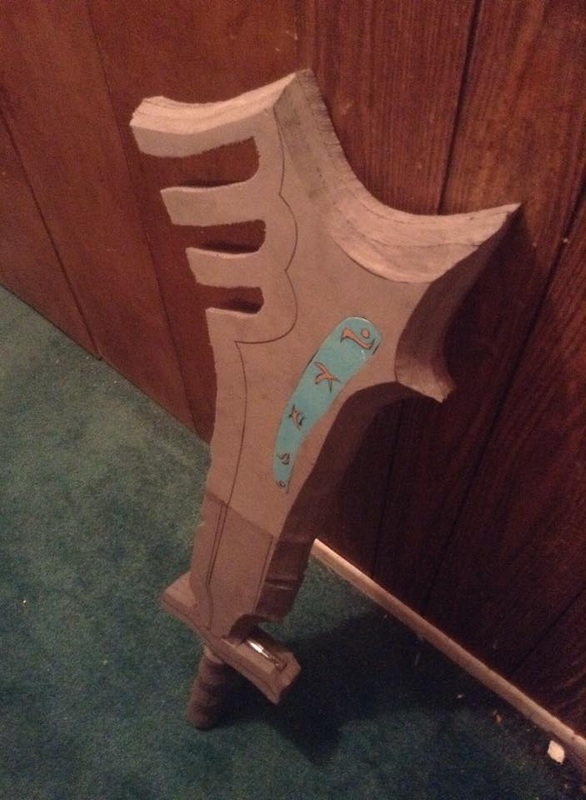
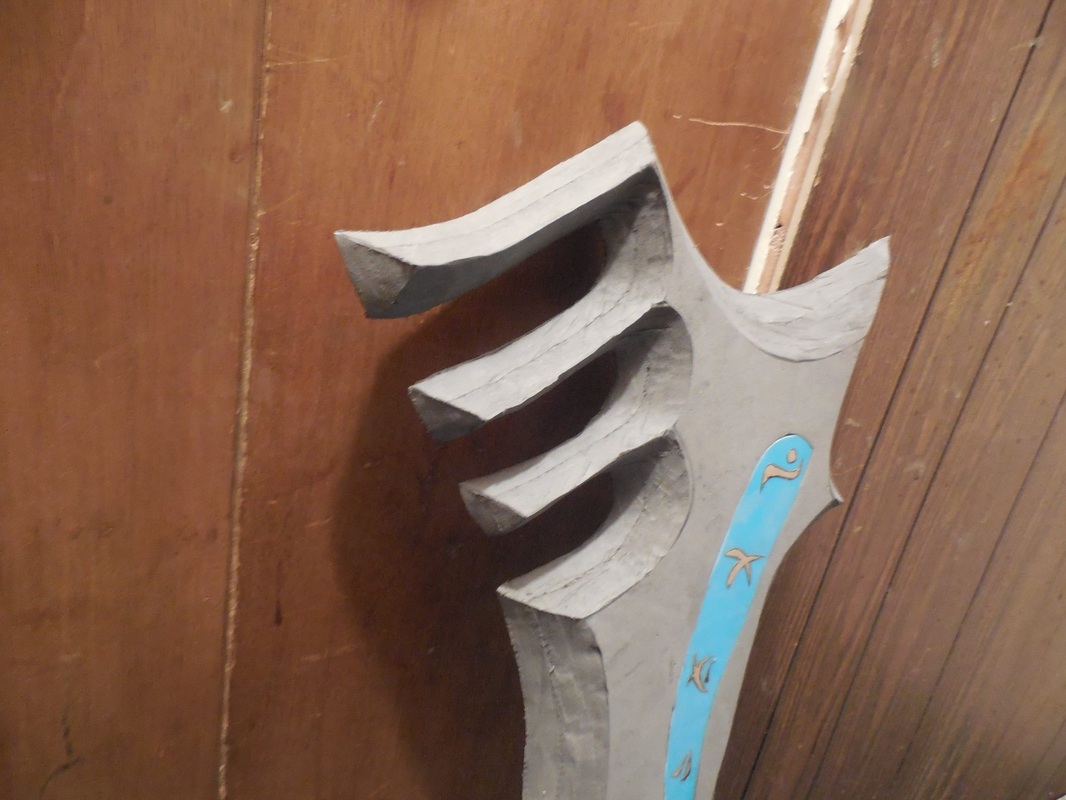
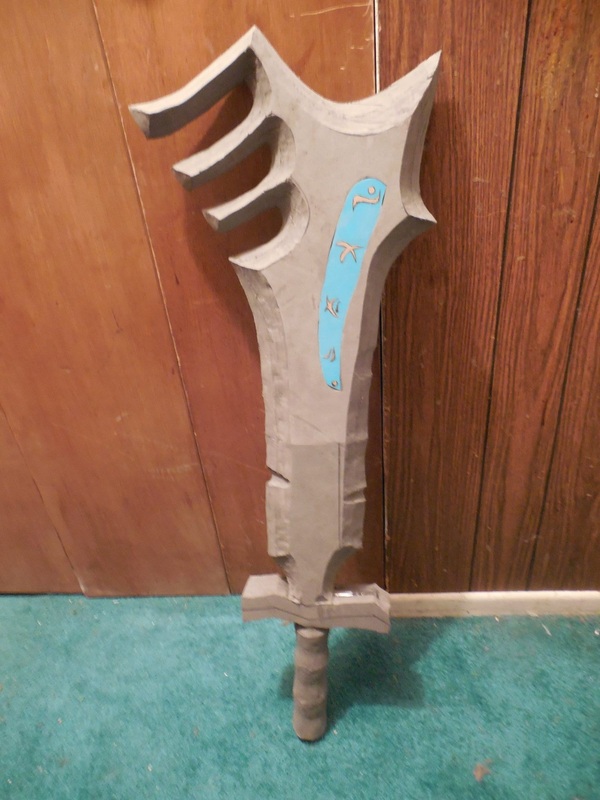
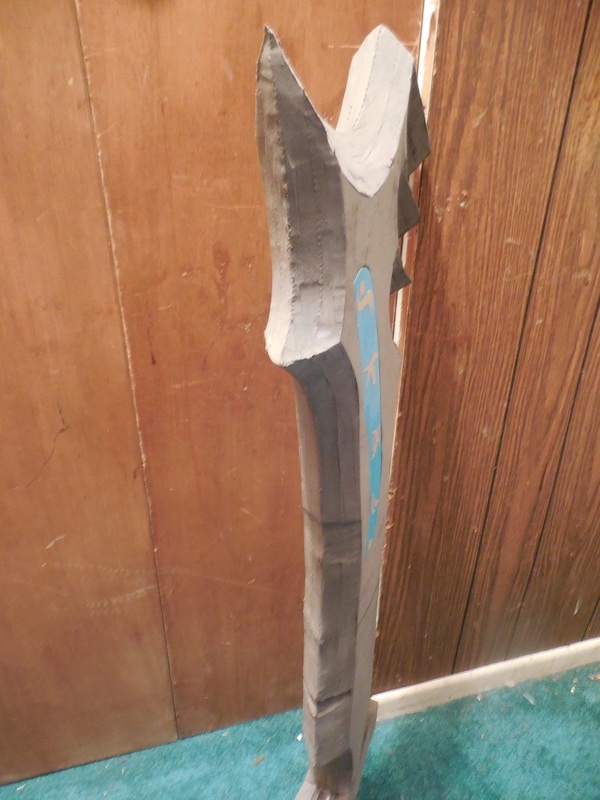
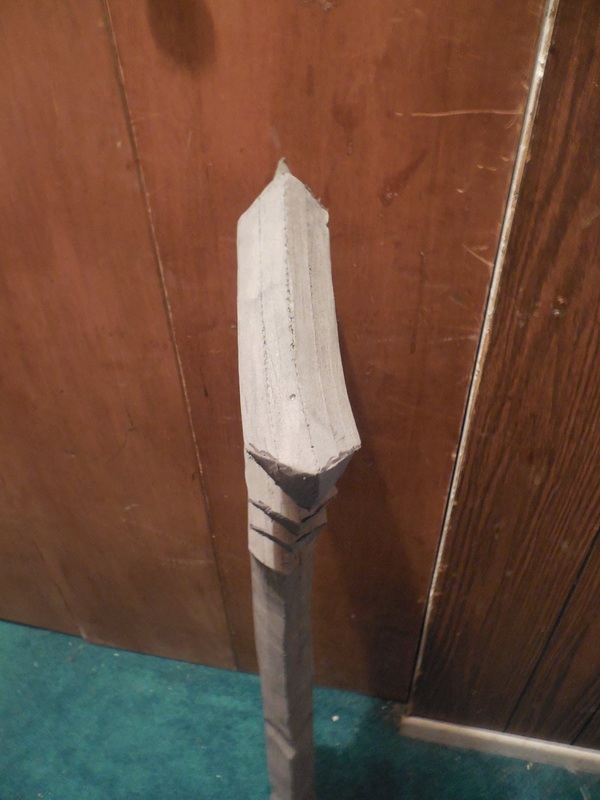
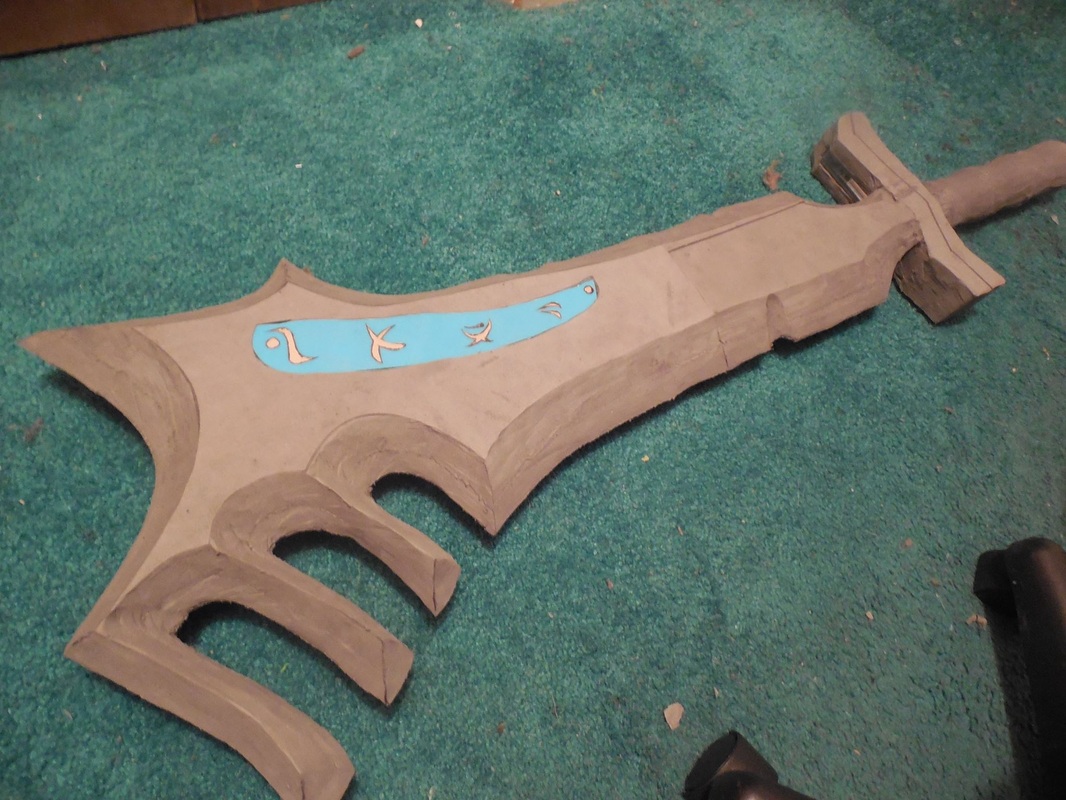
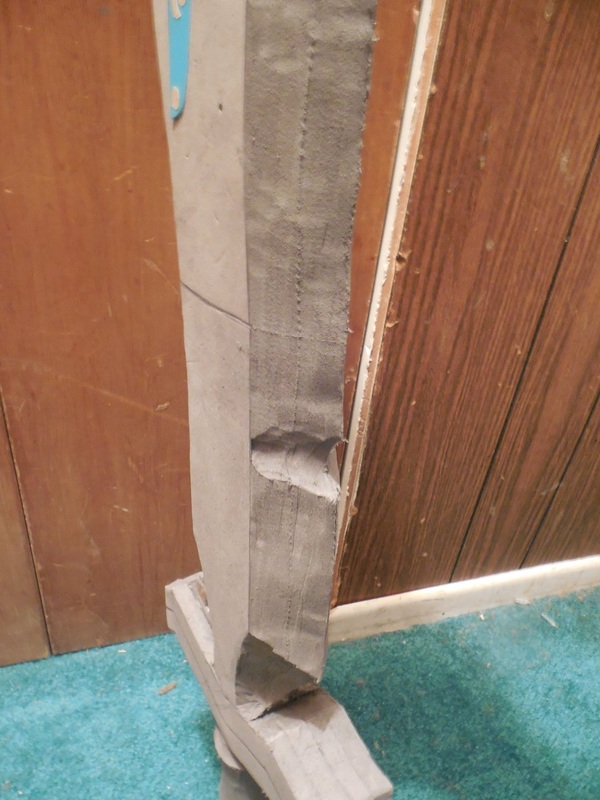
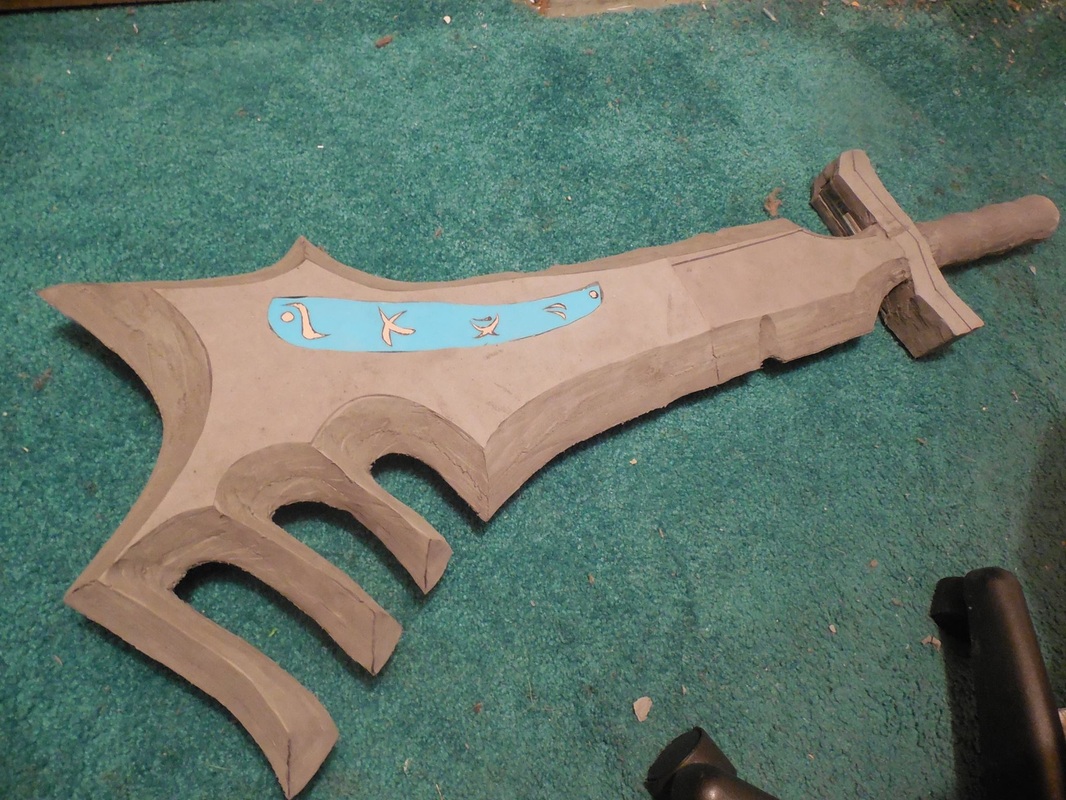
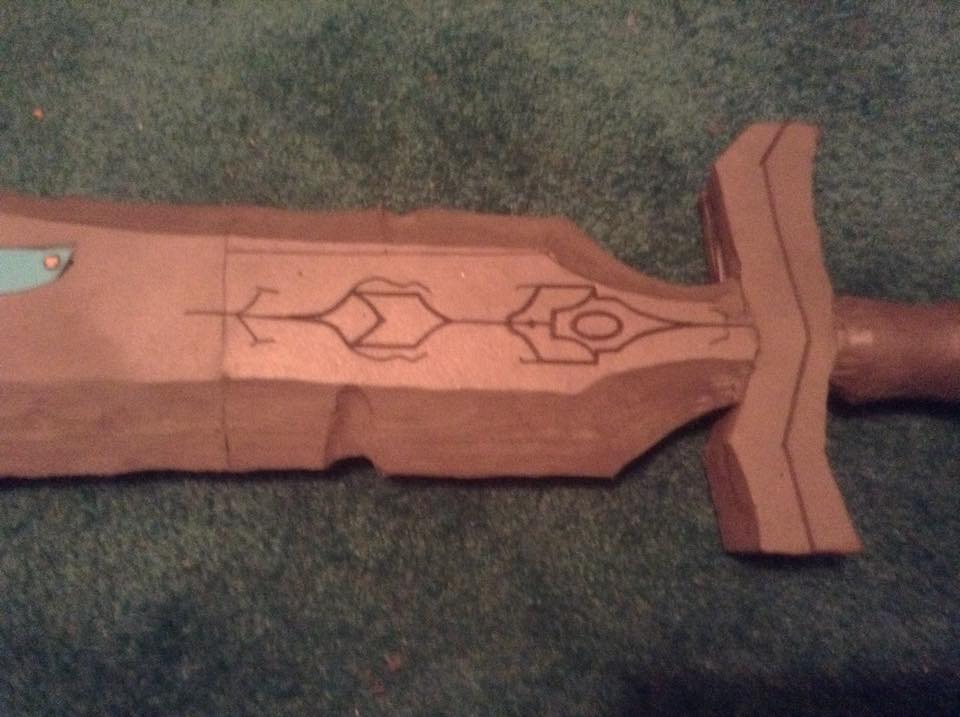
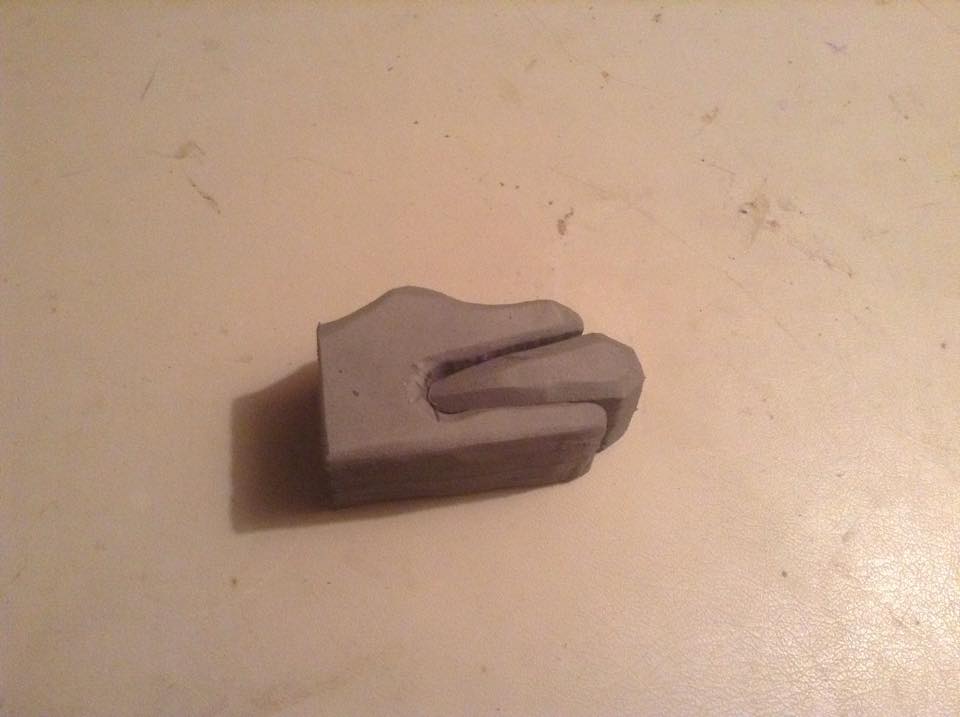
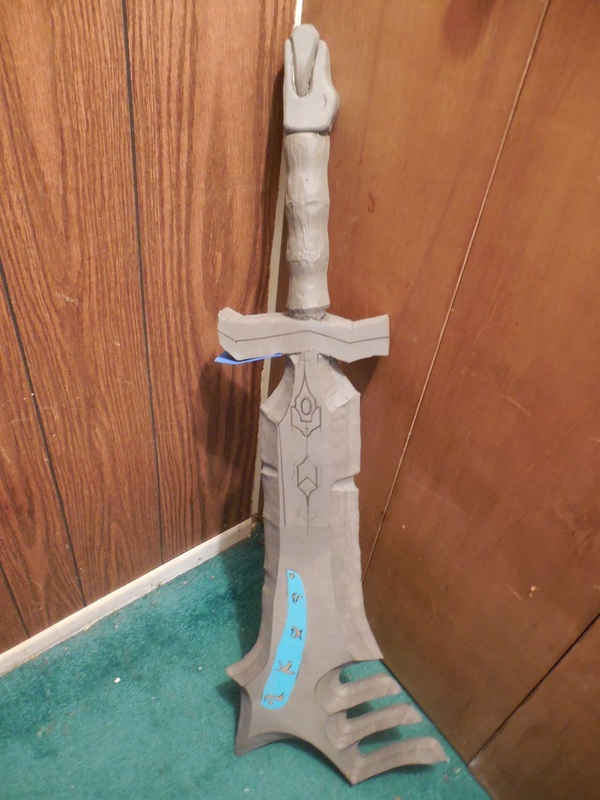
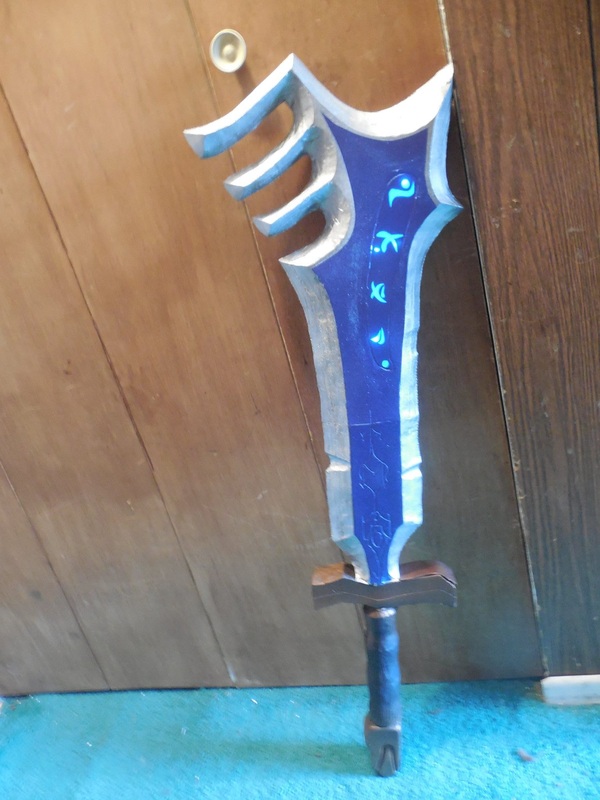
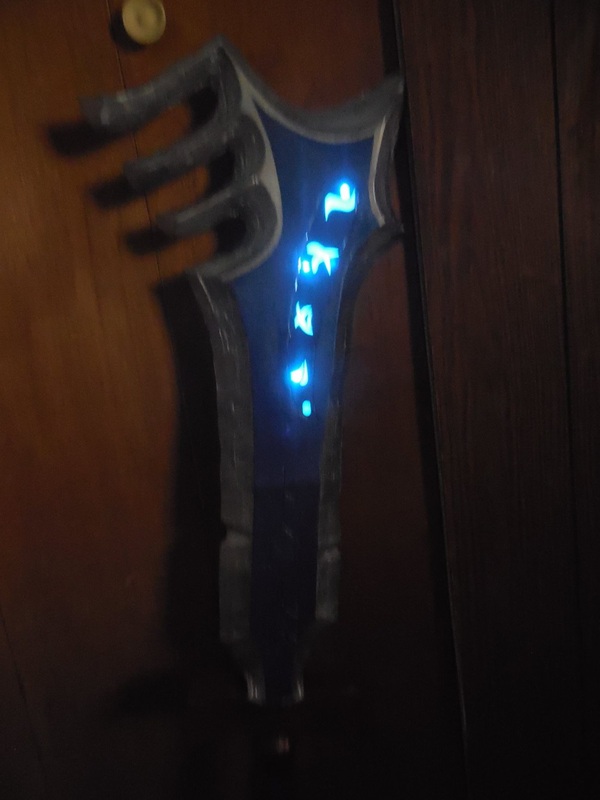
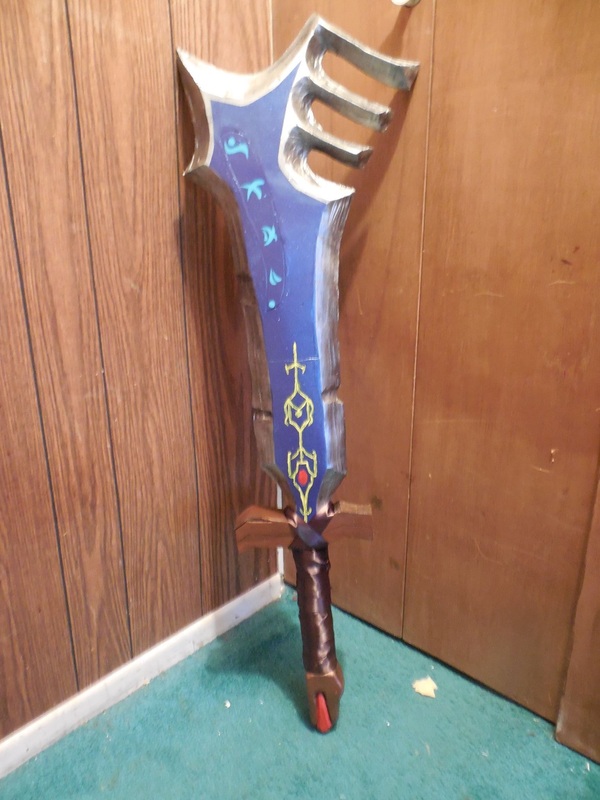
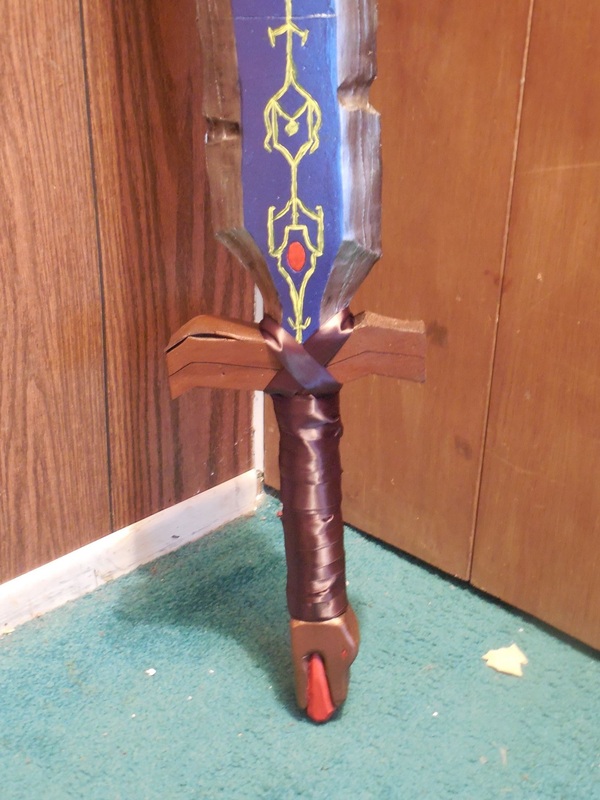
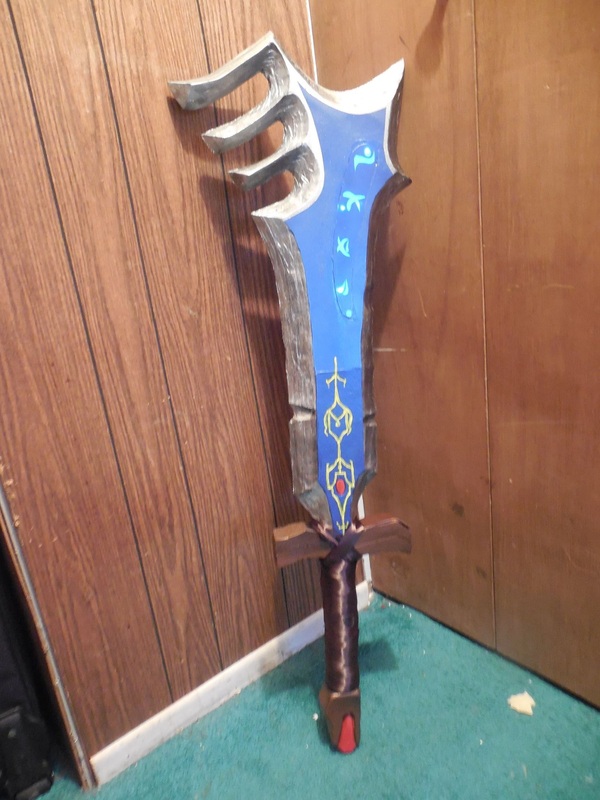
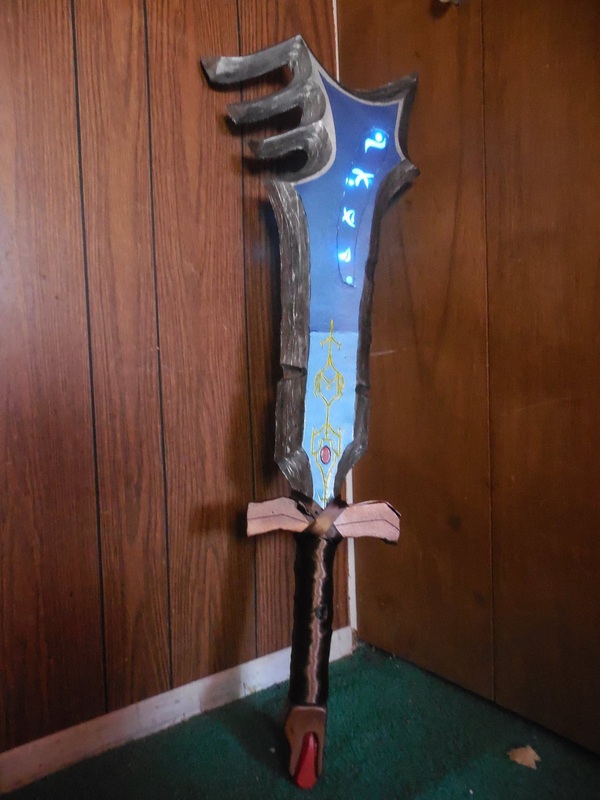
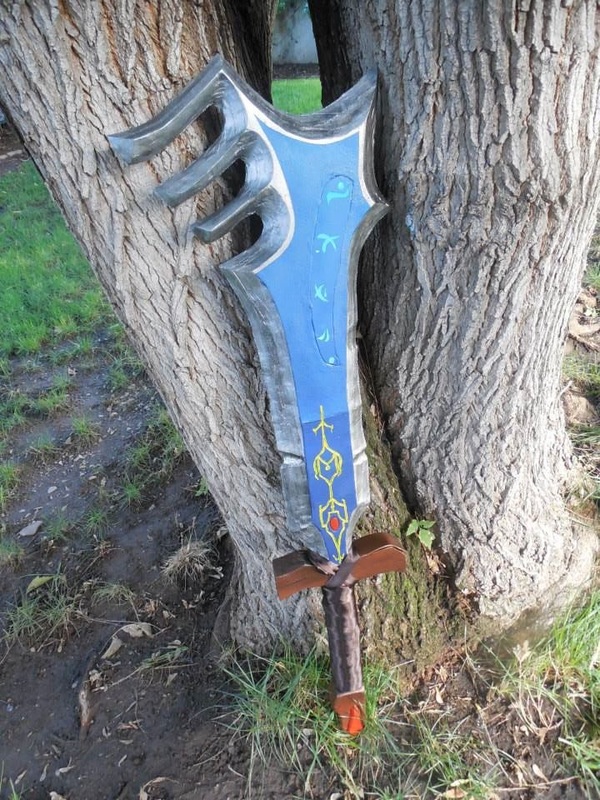
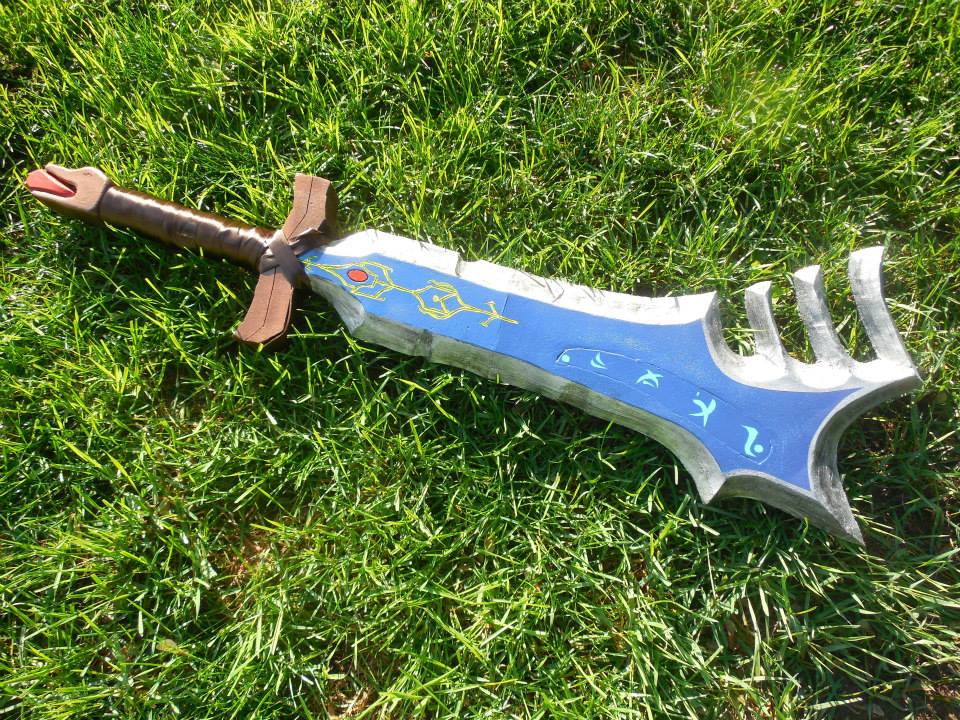
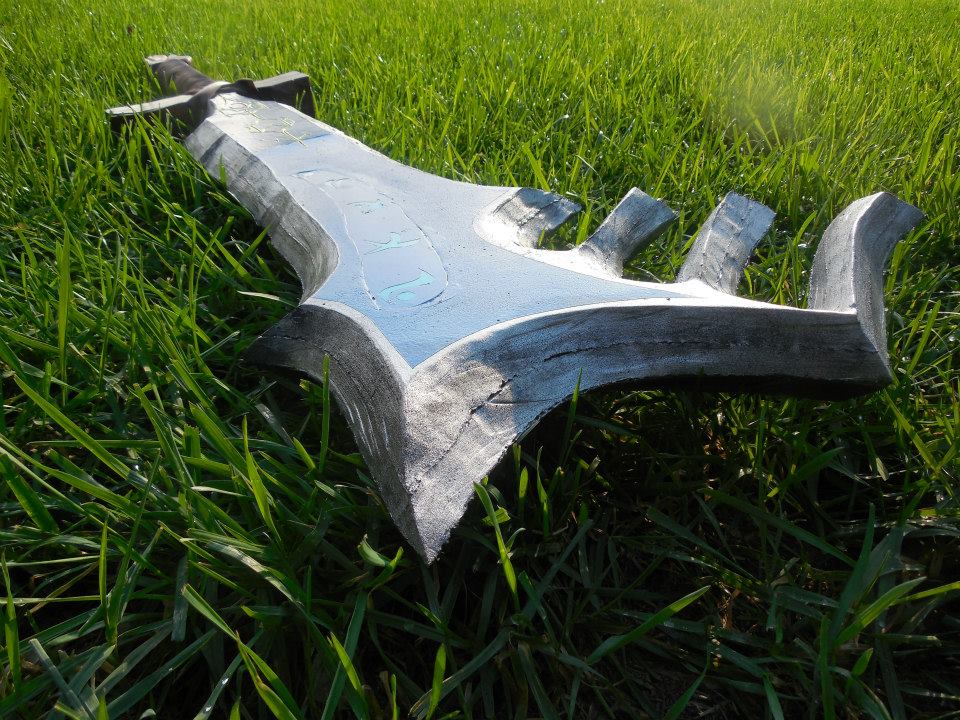
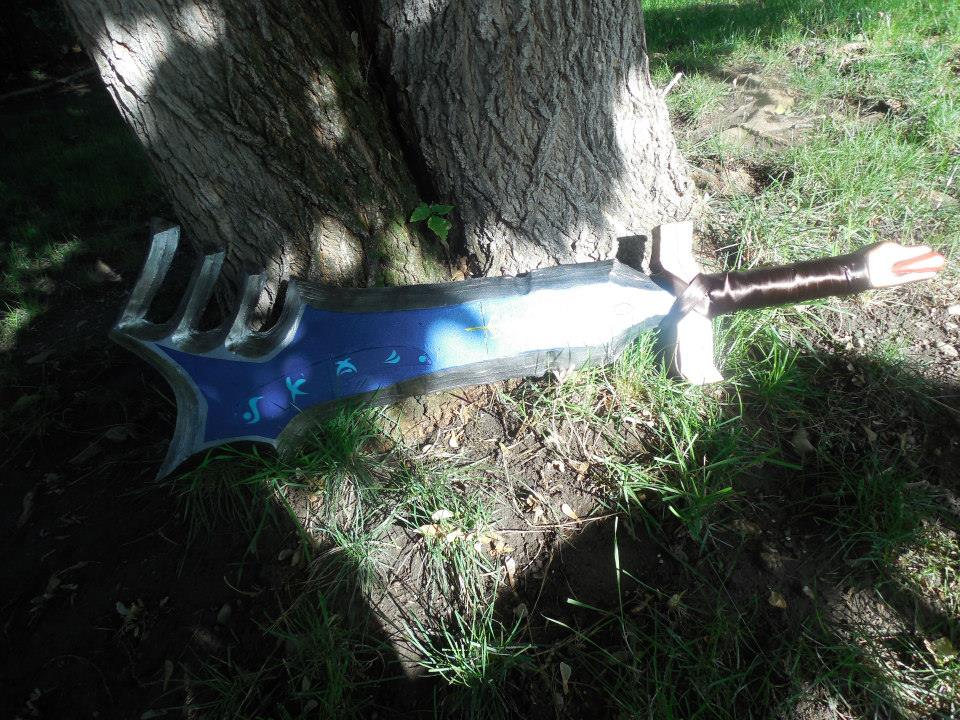
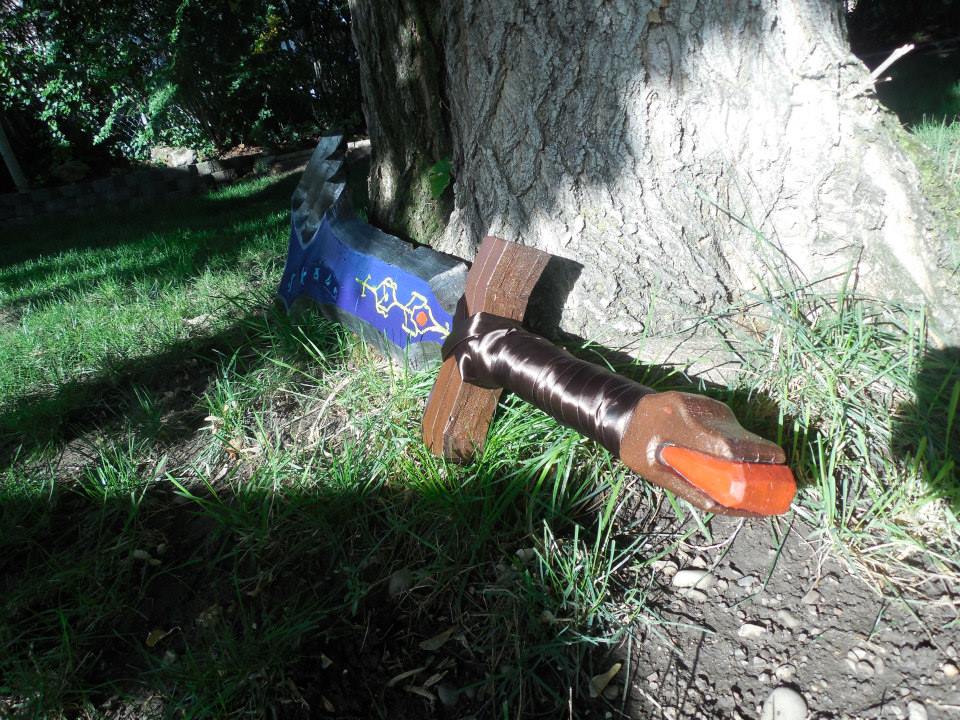
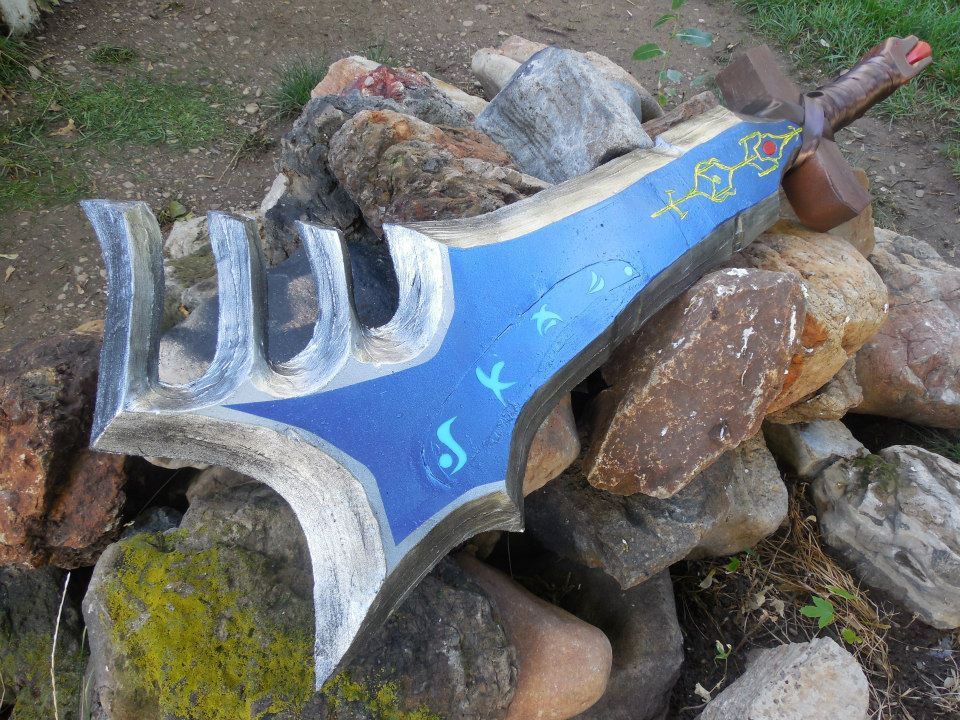
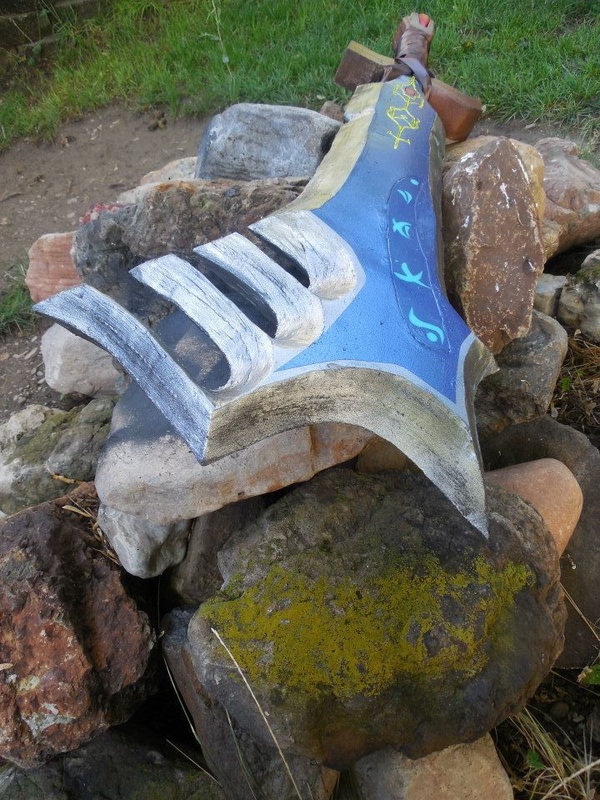
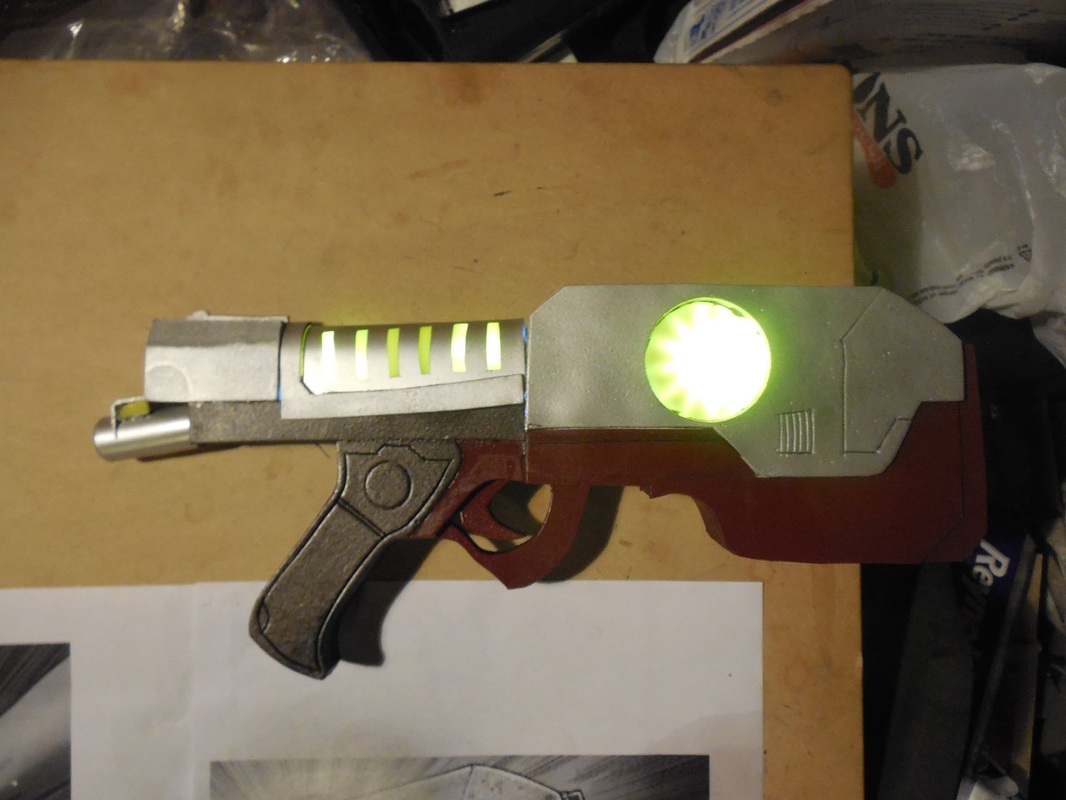
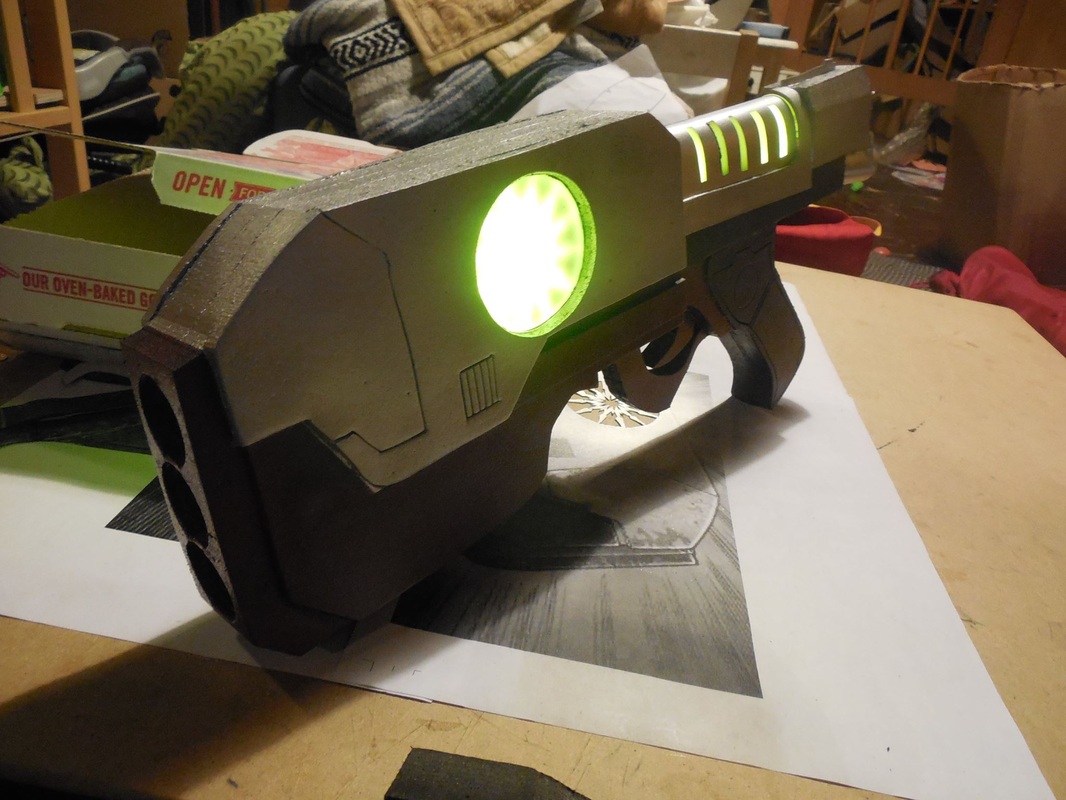
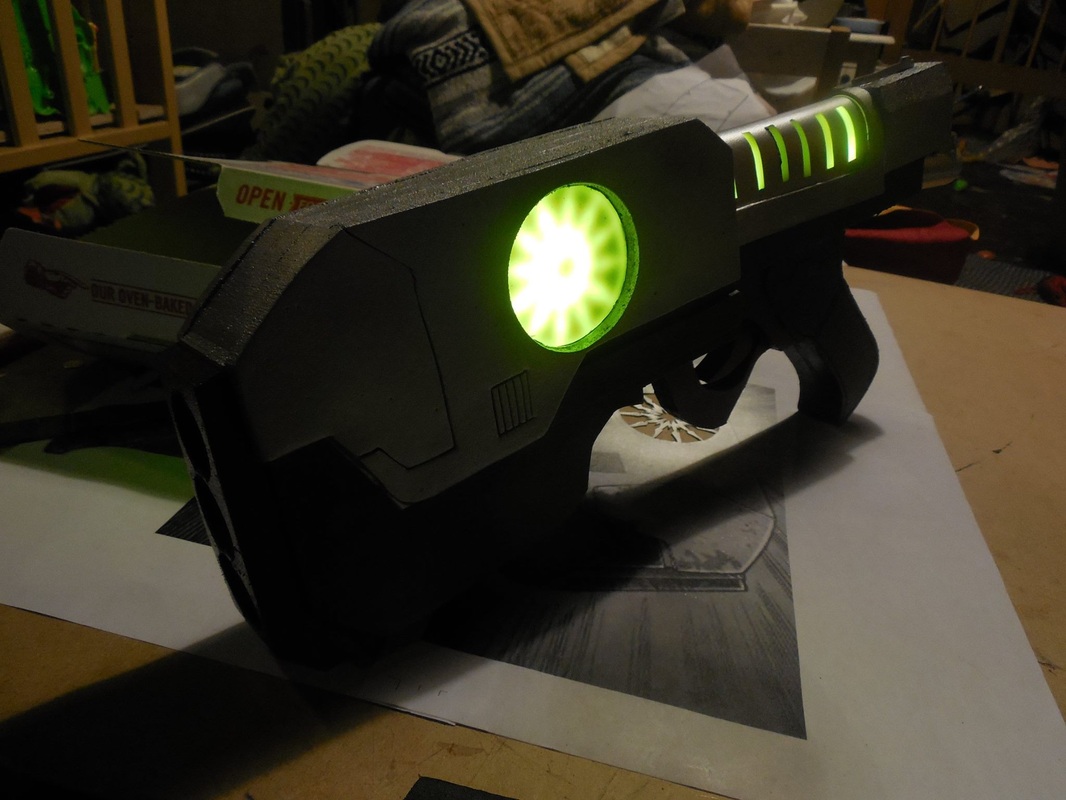
 The final of the mass cram session before Anime Banzai, to give me a wide variety of things to show. Only had a few days left, so I couldn't make this as correct as I could, but for a speed build I think it turned out great! Let's get started. I started out by making a blueprint of the hammer head, so that I could size it out to the staff I was going to use. 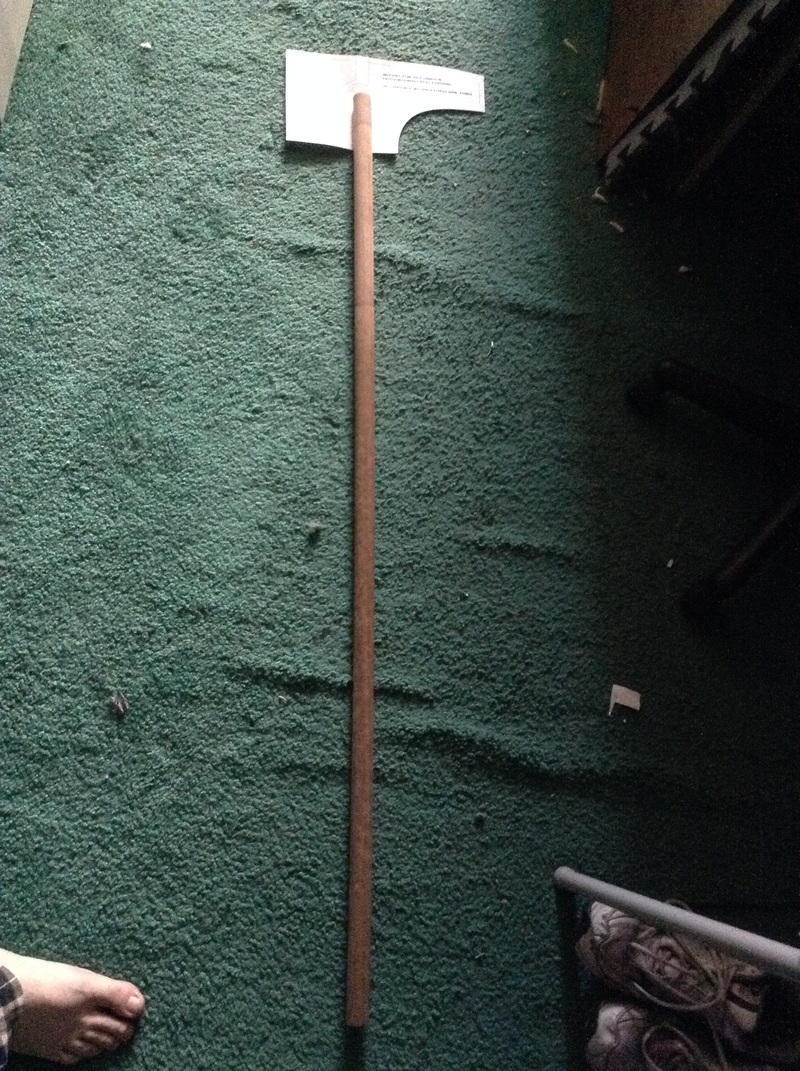 The staff is a 1.25" dowel, four feet long - a remnant of back when I was part of a medieval sword fighting group. That means it's got the scars of battle behind it, what with all the dings and dents! Perfect height for the warhammer. The hammerhead may look small in this shot, but I didn't have anything to scale it to nearby. Once the scale was set, I started cutting parts out! 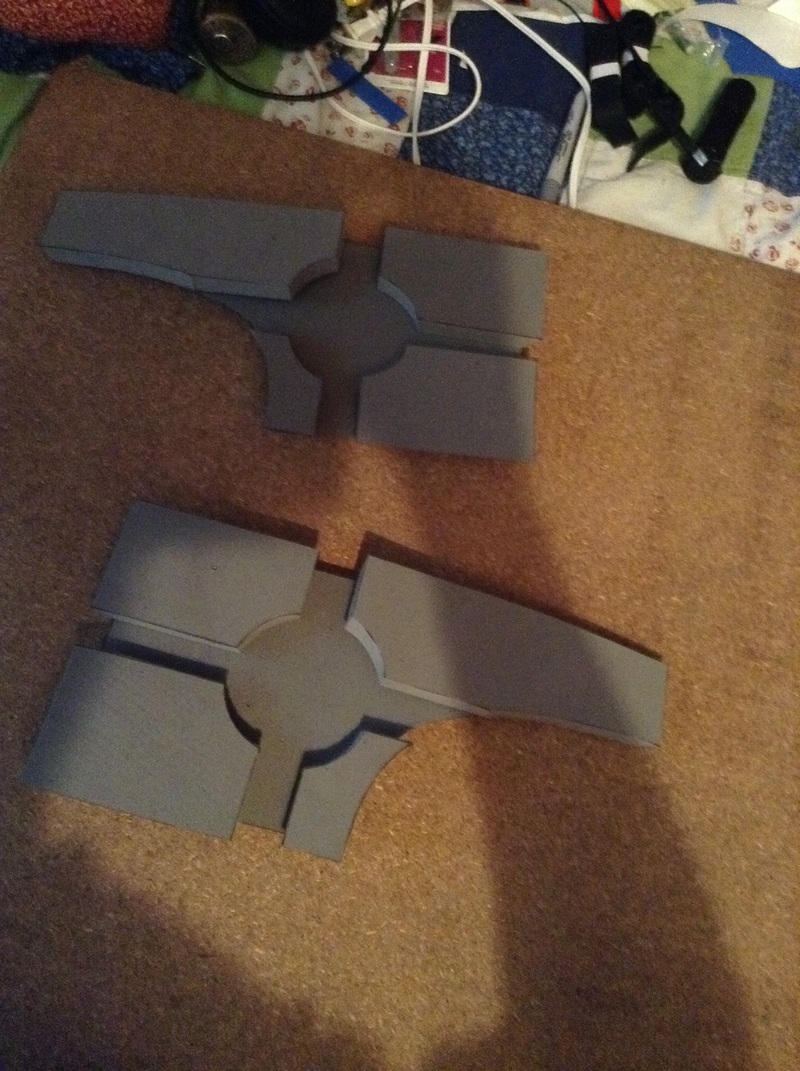 I did the hammerhead in two full layers: the inner support layer, and the outer detail layer. Both were the 1/2" floor mat foam. Once the side sections were cut out, I started making the three dimensional parts - that is, making a whole bunch of boxes! 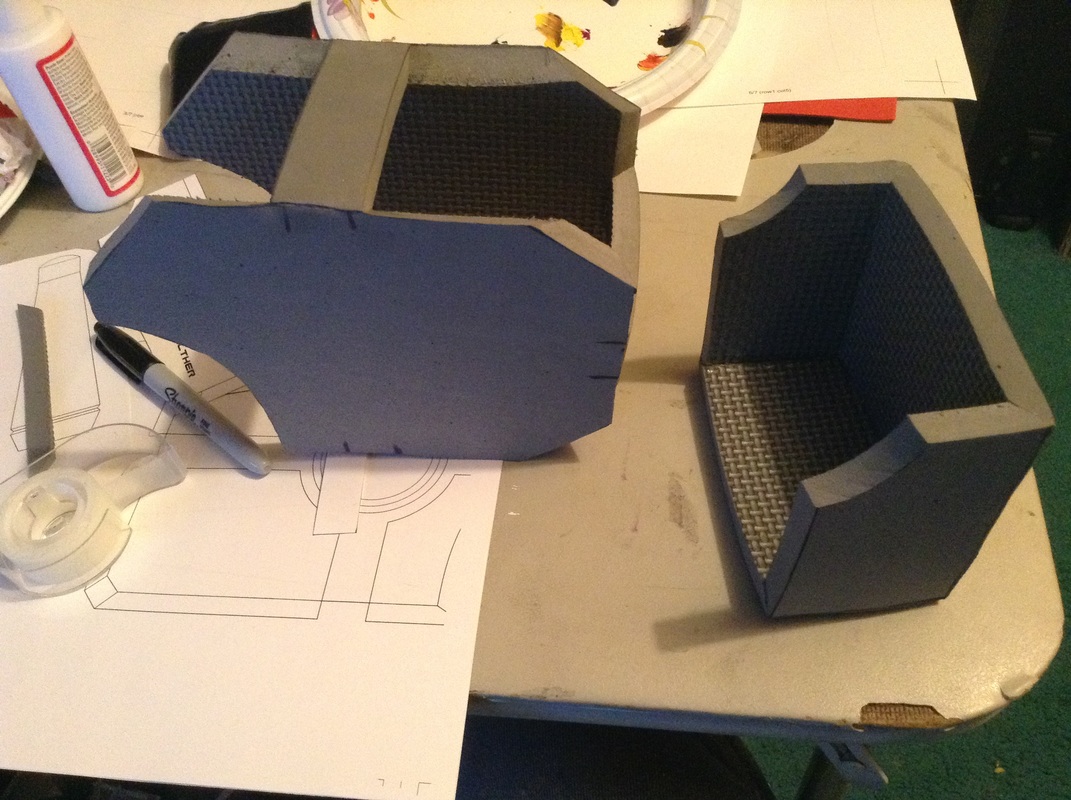 I marked off where each outer layer piece would sit, then made a strip a little wider than the marking for the inner track to support everything. Then I assembled the inner box and used that as a guide to freehand the sections to attach the outer details together. Worked like a charm! 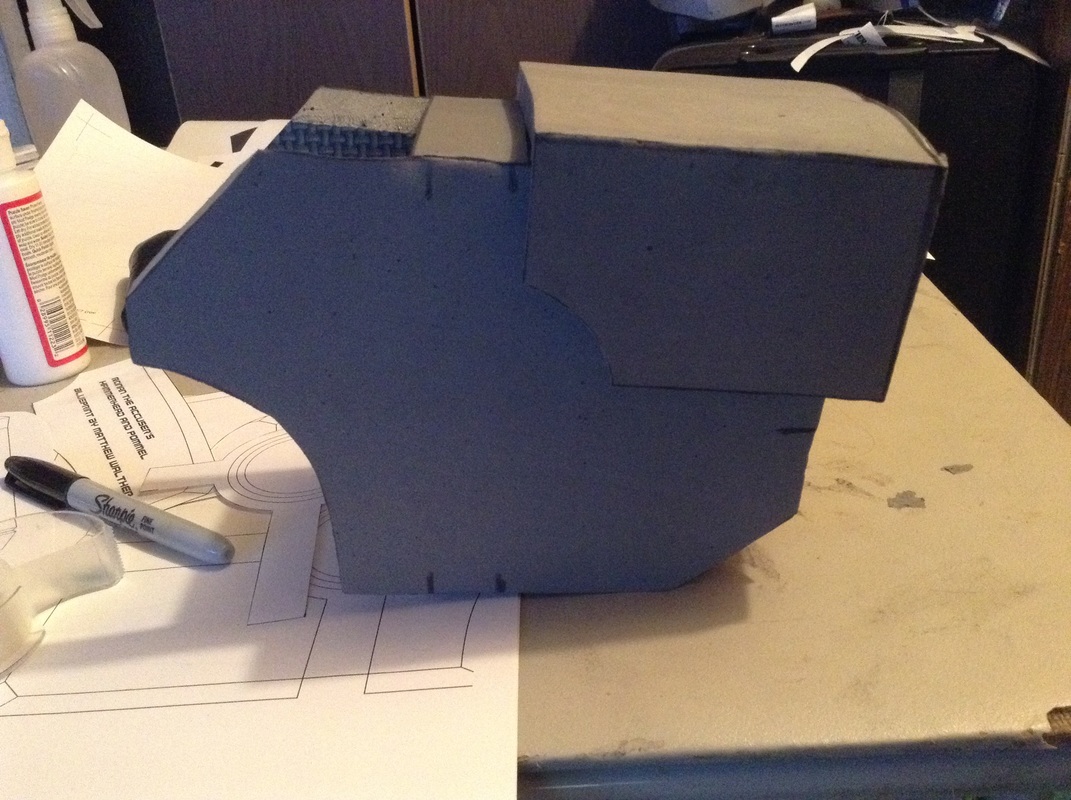 The upper back area has a curve, which meant interesting measurements to get everything to fit right. In the end it worked great though. 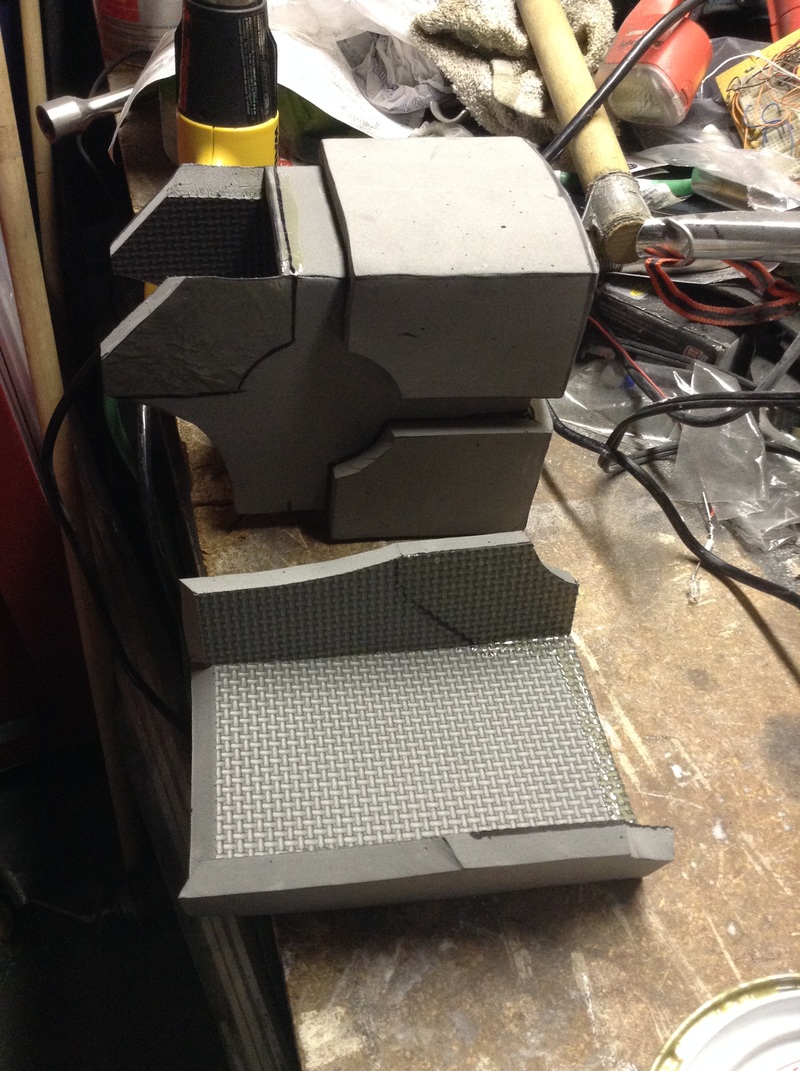 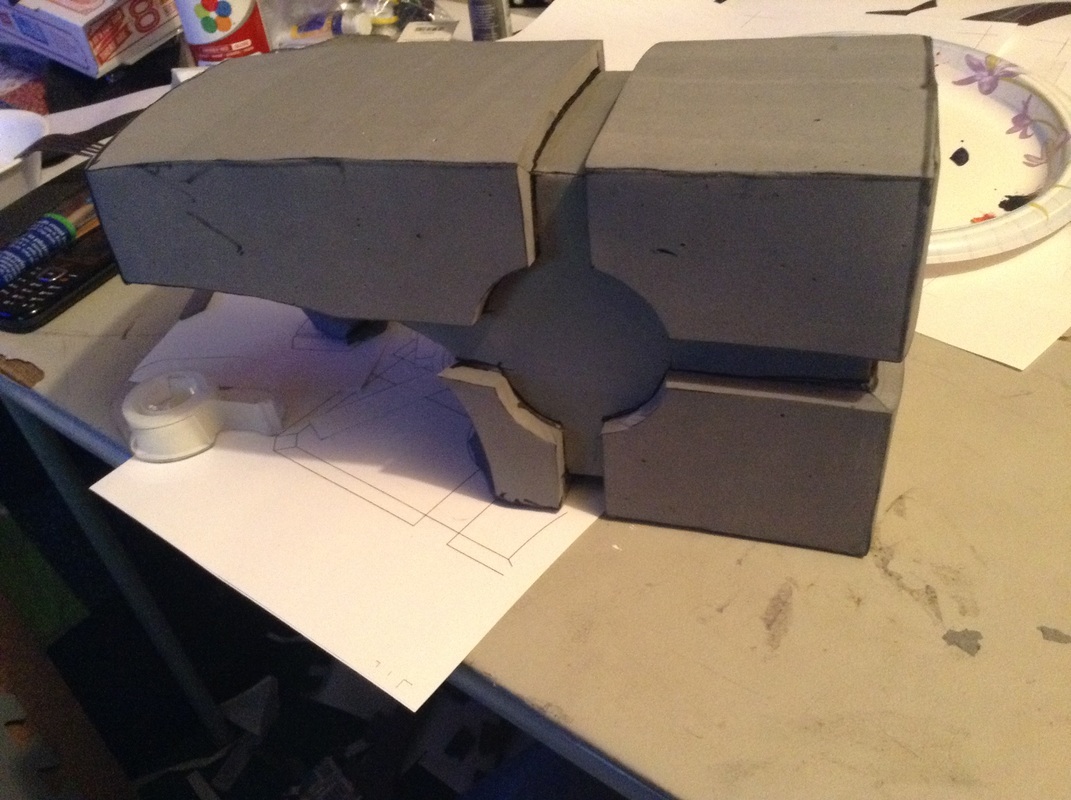 The last section was the most difficult, as it wasn't just one flat area - it was three. Two angled in and curved from the sides, and one final piece that connected it all at the back. And all that connected to an odd shaped piece in the very back for the hammer's claw. For this, I made the back and bottom piece to the shape I wanted, then attached them and used the opening to trace the shape I needed. After that it was a simple thing to cut it out and give it a slight curve with the heat gun, though gluing it was an absolute pain.... Got those on, traced and cut a hole for the staff, and hot glued that right in! After that, all it needed was the discs in the center and the pommel. This was easily done with layered craft foam on each side, and by rolling and gluing some 1/2" foam down at the bottom. Nothing fancy, nice and simple. Size-wise, I think it turned out juuuuuust right! No time to spare, it went right into the paint. Covered the foam sections in Plasti Dip, then covered the whole thing, staff included, with what turned out to be exactly how much Krylon Ruddy Brown primer I had left. 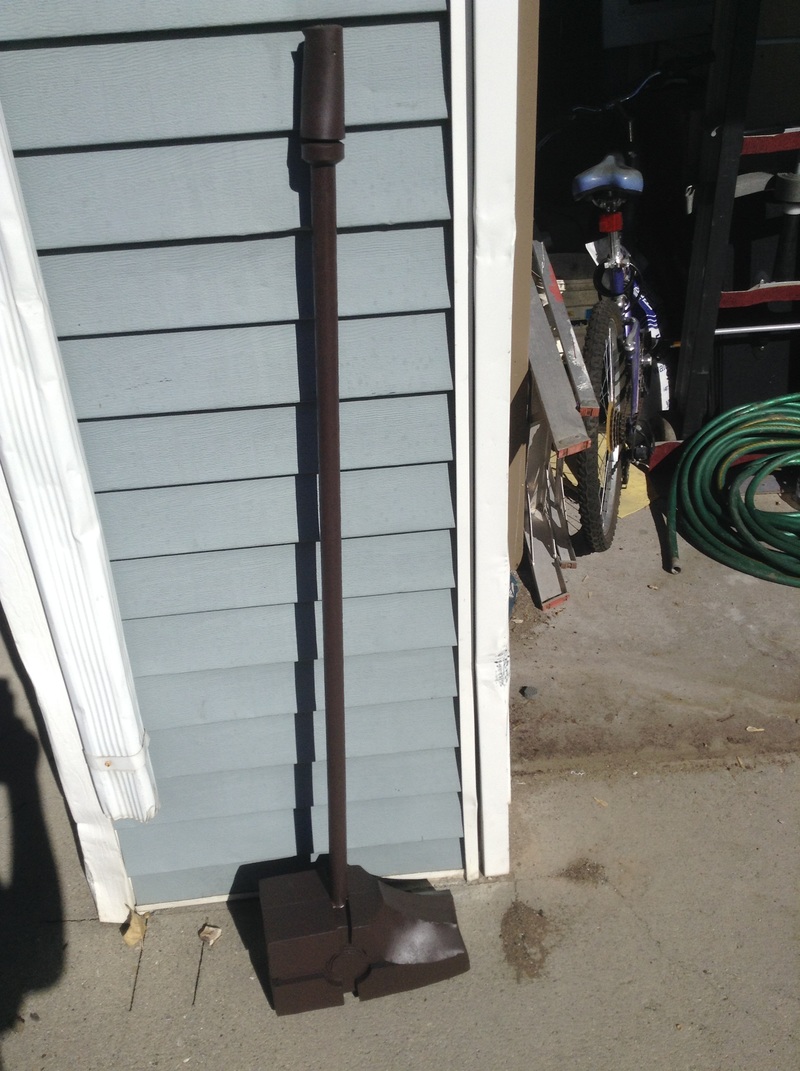 After that some metallic silver. No, the staff isn't leaning. That's it resting on the curved part of the hammer, the only way it would sit still long enough for a picture! 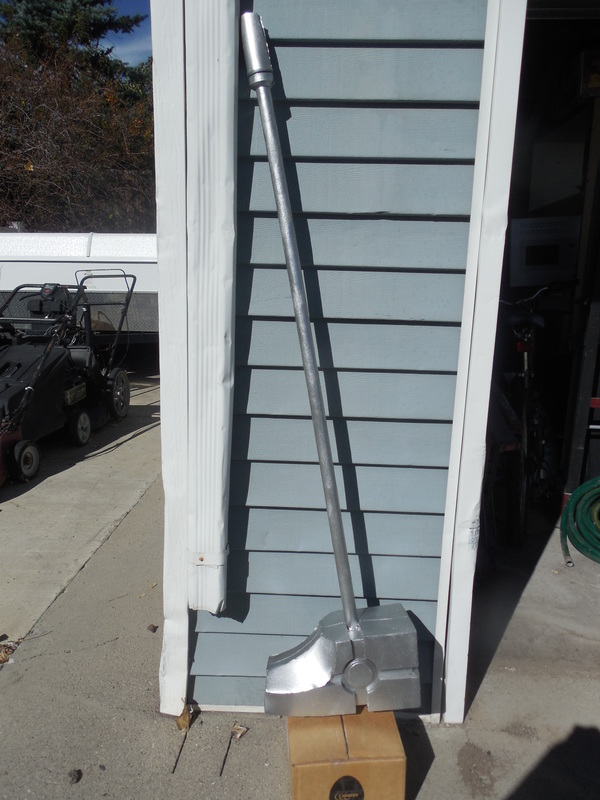 And then, out of time and needing to let it dry, I did a quick spray over some areas with more of that automotive gunmetal I had, including where the indents of the staff would normally be. I would have preferred to actually cut those out, but I just had zero time left. And that was done just in time! It was another big hit at Anime Banzai, though once again no one bought it despite the low price point I put it at. Oh well, no big deal! Just means I can toss it on the wall once I have space to! Thanks for reading! Enjoy some final pics of it and the rest of the pile I took to Anime Banzai! 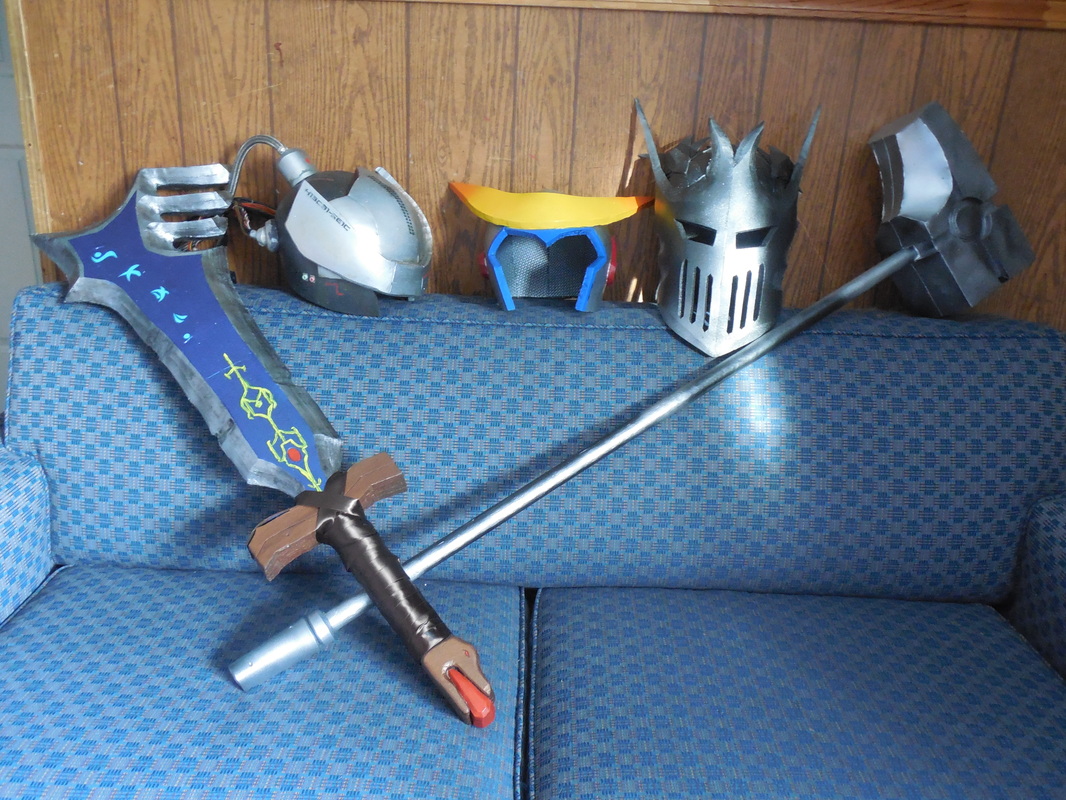  Time to recap this most interesting of builds I've done thus far: the Sword of Ahrah, from Dust: An Elysian Tail! First things first, I made a blueprint after scouring the interwebs for pictures. I would have taken them myself, since I own the game, but my system was (and still is) packed away in the moving pod. 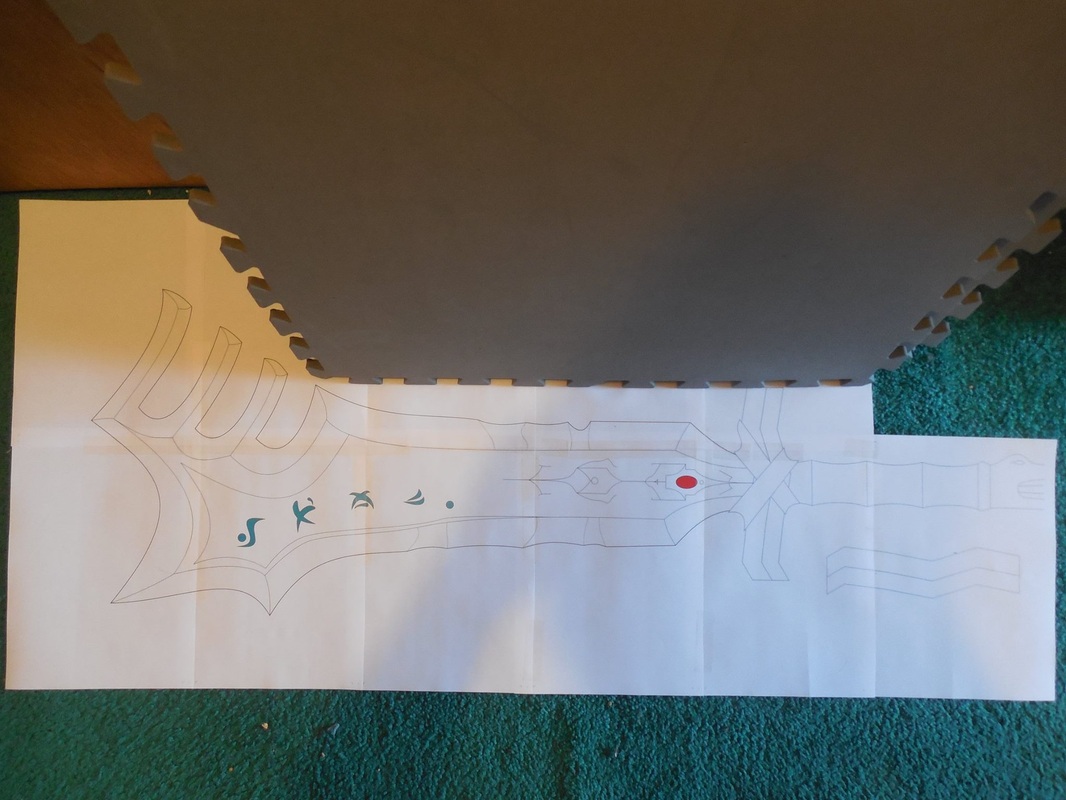 I scaled the sword at three and a half feet long, both for the size of my client and because anything larger than that would have been too unwieldy. Even then, though, the blade section was longer than the foam I have, so I had to make it in two parts. 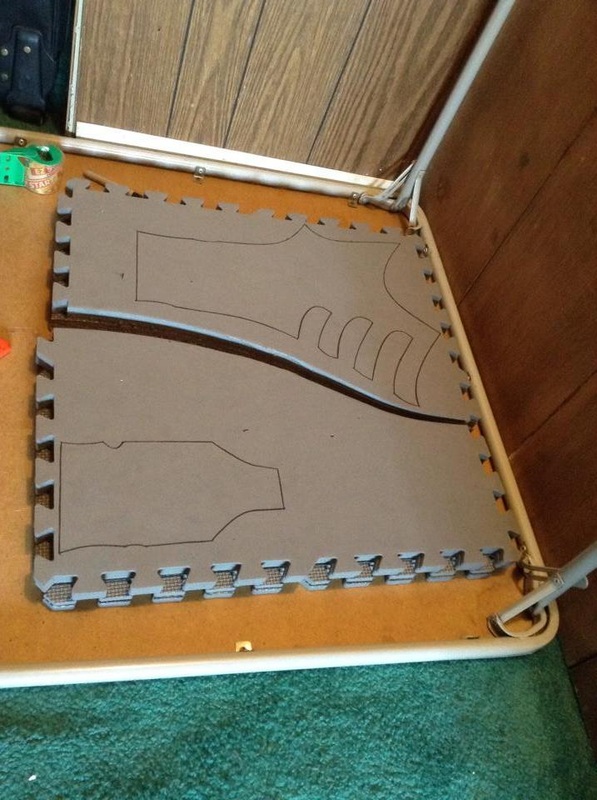 Now we come to the first of many conundrums for this build. Because it's so bulky, I decided on 4 layers of foam. That meant a lot of cutting at once. Since I needed to do work on the inner layers as well, I needed to keep them all separate from each other. Since I am no good cutting by hand exactly straight, and since I would have to do each piece as identically as possible, box cutters and xacto knives were out of the question. Normally I would reach for my band saw at this point, but guess what? Remember how my console is packed away? Yeah. Every single one of my tools/power tools is too. No band saw, no scroll saw, no belt sander, no nothing. So, I went and got a cheap electric knife, something I could use and throw away when it's done because I knew the torture I was about to put it through would kill it utterly. What I didn't anticipate was how quickly it would die. 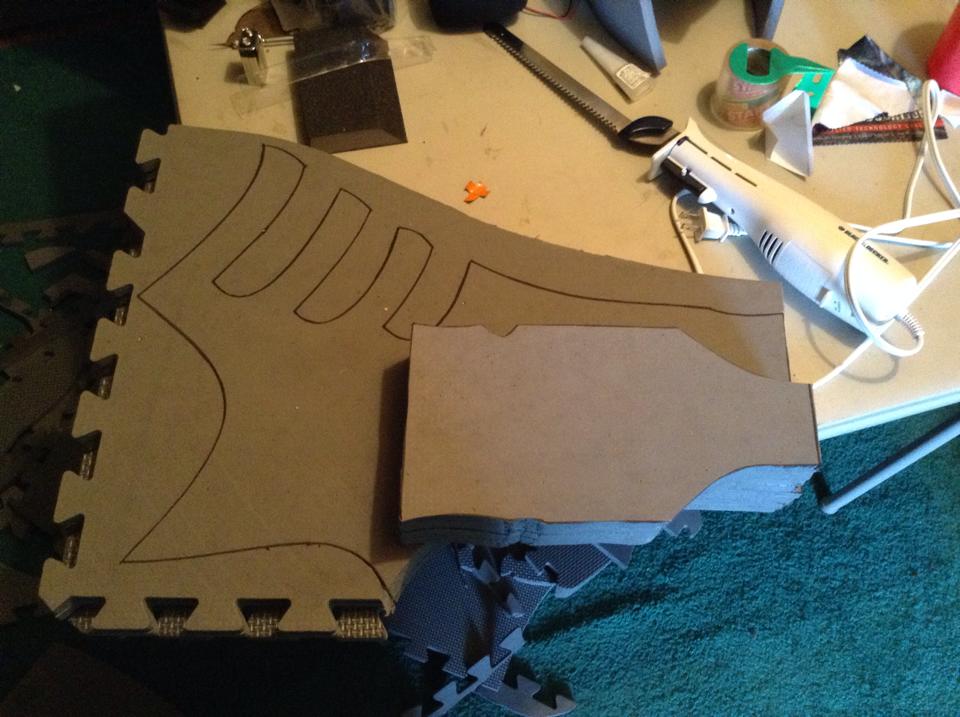 Yep, that's right: cut out the bottom bit of the blade, and a small part of the upper bit, and gave out on me. Thing still turned on, but the blades wouldn't move. After trying to figure out what else I could do, I splurged a little and grabbed a coping saw, along with the cheapest dremel I could get since I knew I needed it soon. Not pretty, but the saw got the job done finally. 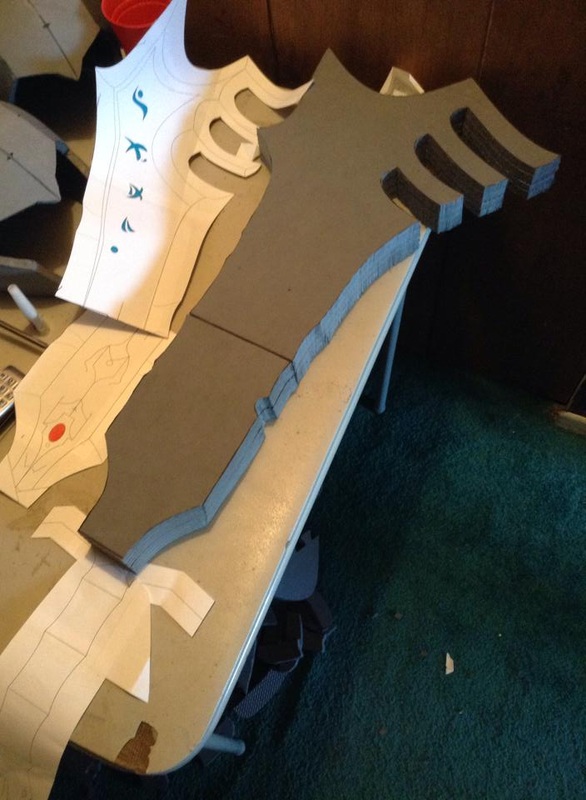 Now I could start on the inner workings. I grabbed a dowel that was lying around, cut it down, marked out where it would slide in and support as the blade's tang, and cut the trench out with a box cutter. 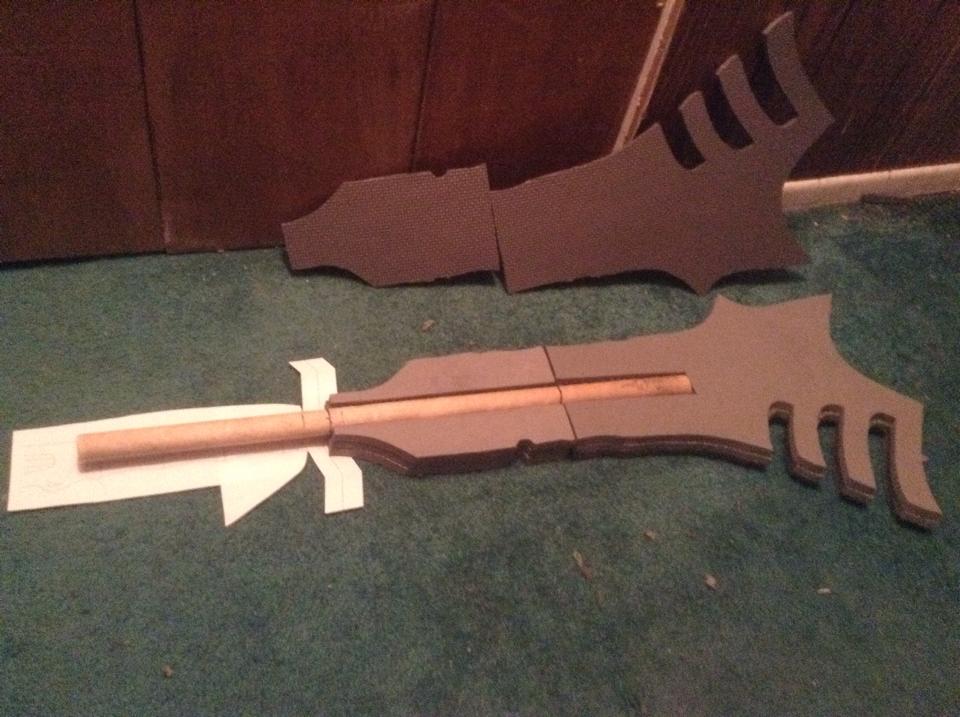 I then glued two layers of each side together, keeping the halves separate since there was still a little more work to do inside. Since the client wanted it to light up, I went out and got some turquoise acrylic, then traced a small section out for where the runes would go. 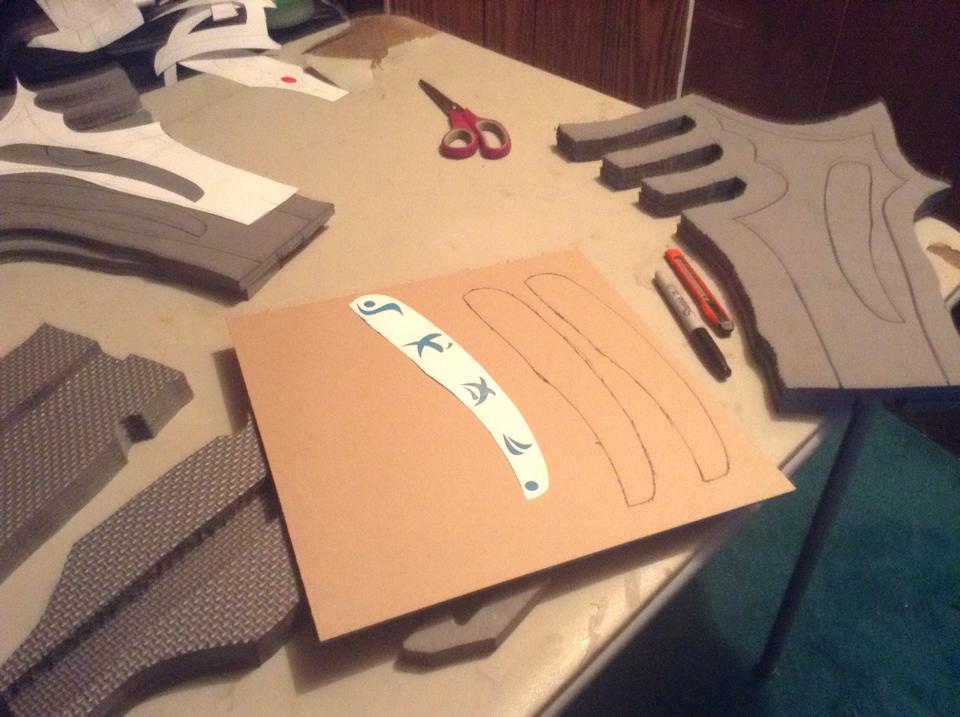 I would have preferred to cut out each rune and install them that way, but I don't have access to a laser cutter, and there was no way I could hand cut such intricate details out of two layers of foam - twice - to install them. Not only that, but the foam is malleable, whereas the acrylic is not, and given that this was a big sword going to an anime convention I didn't want to risk them popping out. So, I opted to cut a larger section out with the coping saw, to give it more surface area to glue. I traced that larger piece onto each half, and cut them out. Part of the dowel stuck out into these sections, which would make things easier for the lights. I also cut out the cross-guard, and wrapped the end of the dowel in foam for the grip. Once the fit was right, I made a stencil for the runes and cut them into the protective sheet on the acrylic. Once I removed the larger area, this left behind the rune shapes, which saved me from having to re-tape them later just to do the same thing. 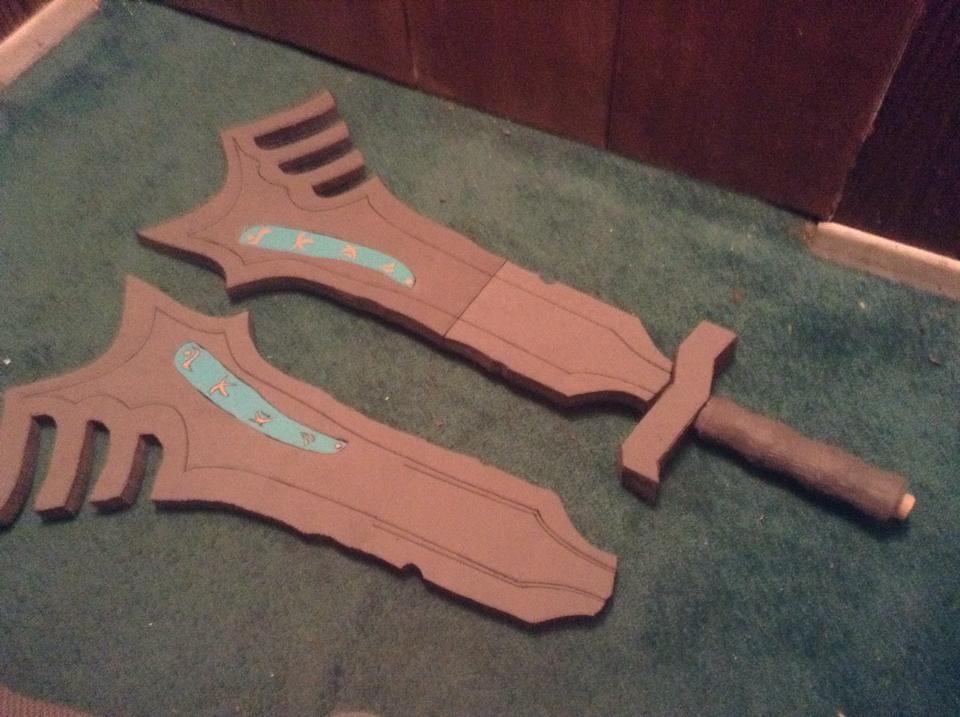 Since I didn't want to replace all my soldering stuff, I decided to get a string of prewired LEDs attached to a battery pack, which had an on/off switch. Made things simpler, and man those lights were bright! Glad of it though, since I needed as much light as possible to make it through the opaque acrylic to be seen. Secured the lights and acrylic panels in with hot glue, then glued the blade together along with the hilt/dowel. In hindsight, I should have waited to install the hilt, but there it is. Now the real fun begins! Remember those lines on the blade? I marked those out so I knew exactly how far I had to bevel it down. This took ages with the dremel, and literally covered me head to toe in foam dust. Thank goodness for goggles and a respirator! Now it's reeeeeally starting to look like a proper sword! You can see that I also took the dremel to the grip, to give it the wavy look of the game model. From here, I took my xacto knife and scored in the pattern at the base of the blade, then took a heat gun to it to separate the cuts and make a nice etching. I also made the snake-head pommel, did the same trick to etch the eyes, and attached it. Finally, I took a bit of craft foam and used it to cover the battery pack in the hilt, accessible via a small bit of velcro. Home stretch! Time for one of my favorite parts: painting. Threw on several layers of black Plasti Dip, as a base. 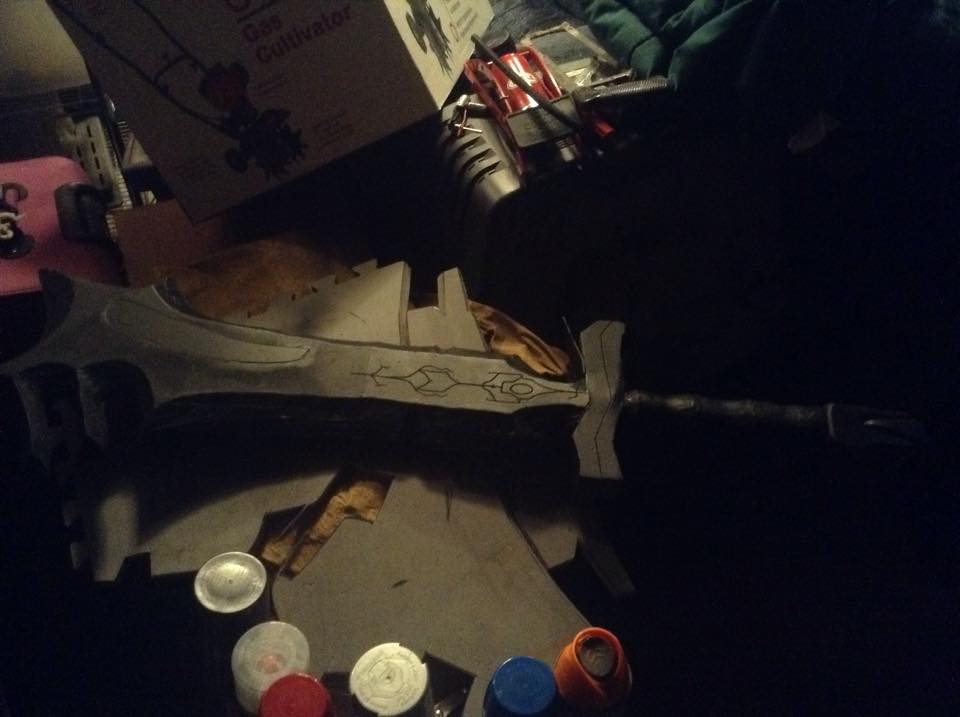 Then painted the cross guard and pommel a goldish bronze, let it set, and taped it up. Once that was ready, I covered the blade with an automotive silver paint, which gave it a nice shine. 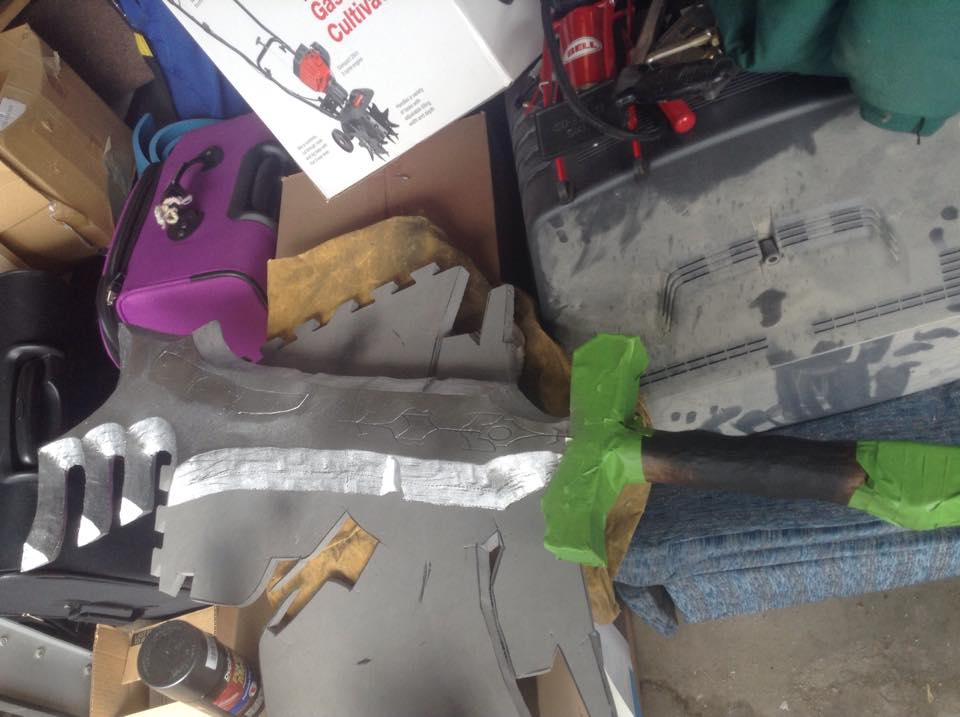 Taped it up some more, then covered the central part of the blade with a nice, deep blue metallic paint. Once that all set, all the tape came off, plus the rest of the protective paper from the acrylic! You can still see the seam where the acrylic meets the foam, which I tried to hide as best as I could but still never fully worked. The biggest issue was going from a solid piece of acrylic to the softer foam, but I also should have waited to put the two layers together until I had evenly glued in the acrylic piece. Oh well.... Hand painted in the yellow filigree on the blade, using the etched lines as a guide. Also did the red gems in the blade and pommel, and threw a basic black wash over the silver of the blade to give it a little bit of weathering. 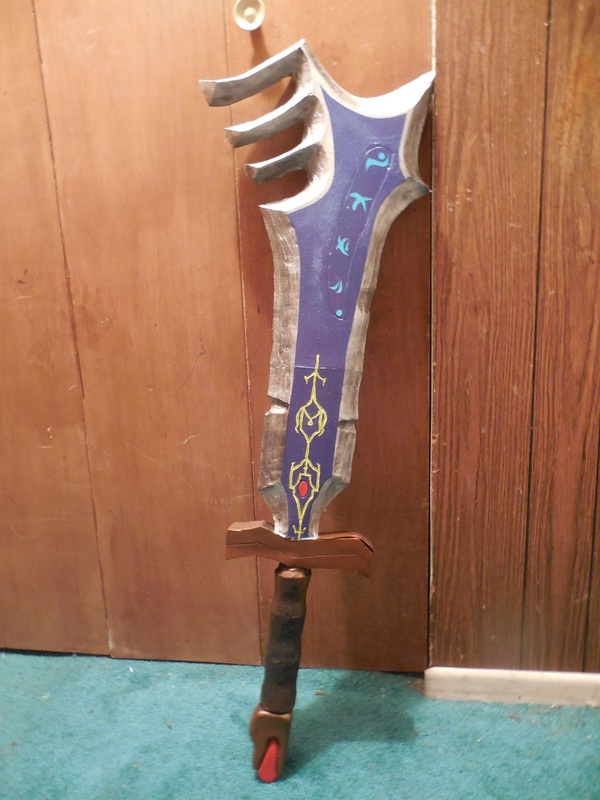 Once that was all done, I could add the finishing touches: the wrap. Got a simple brown lace from Walmart, glued one end down, wrapped the grip up to the top and wrapped the hilt, then went back down with the excess and glued it down too. Worked perfectly! Really happy with how this turned out, even with the visible acrylic edge and the craft foam cover that refused to stay down, and a seam on the top opening after everything was done. Given how I had to use tools I wasn't used to, having to go without the tools I would have liked to use, and still turning out how it did makes me feel really good about how my skills are improving. Hope you guys liked this build! Here's a send-off of some outdoor pics I took to show off the details a bit better. 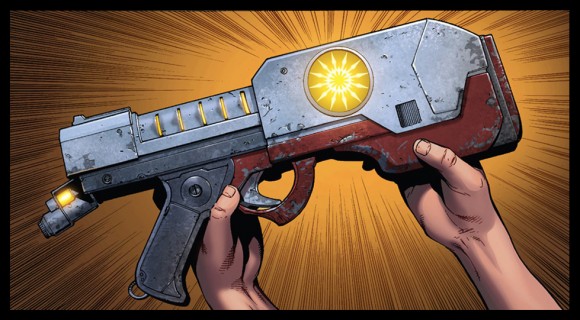 Was commissioned to make the comic book version of Star Lord's pistol, by a previous client of mine. Not only did it look really cool, but with the upcoming release (which has now passed) I thought it'd be fun to do and a bit of a challenge. First up, printing out the proper sized thing, and cutting pieces out of the foam.  If you read the previous write-up on the Turian Phaeston (which you should if you haven't) you know that these two builds happened basically at the same time, so you'll see both in a lot of the pics. Don't worry though - I'll try to keep things on track. ;) Once all the layers were glued and each puzzle piece cut out, I got to work on the acrylic pieces. I was still debating a few different ways to do the glowy parts, as well as hide the battery, but after a wonderful chat with Beer Money Props, we came up with a couple simple, and useful, solutions. 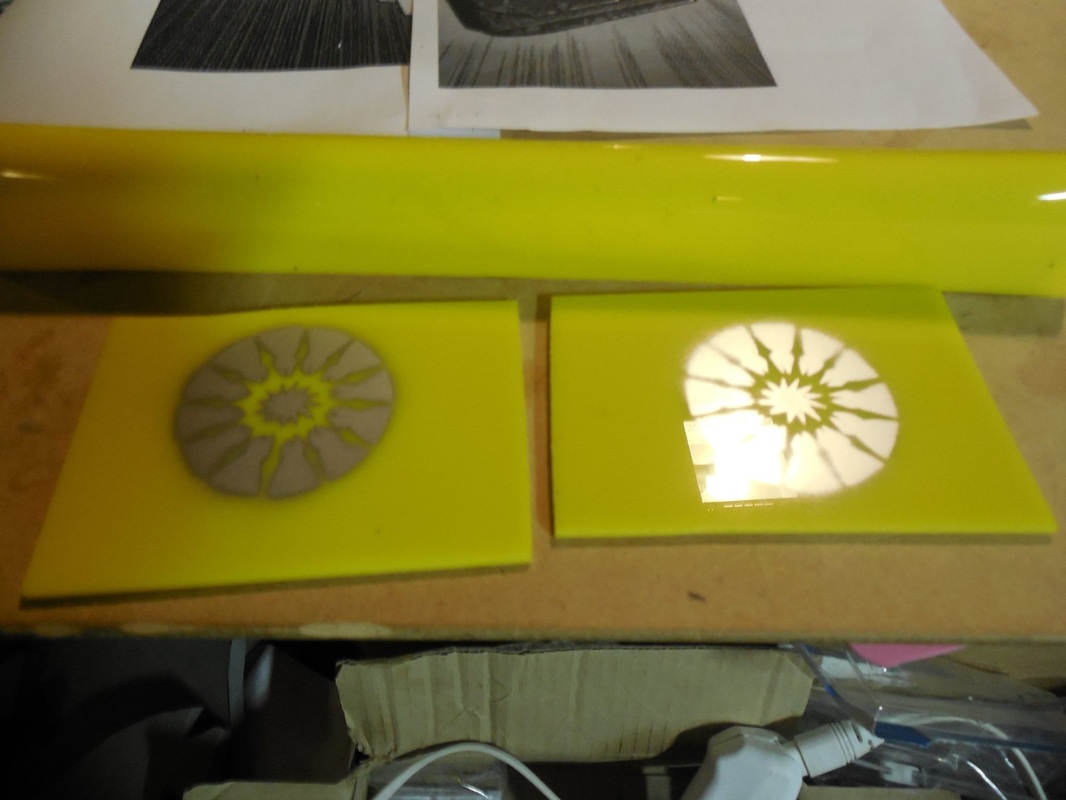 First, I cut a quick and dirty mask with painter's tape and sprayed some paint on what would be the inside of the acrylic. This would help make the cool pattern in the discs when the light shines through, without blocking out the light entirely. Next, I heated up a section of the acrylic and bent it over a small pipe, curving a section and leaving two flat walls, to make the middle section. Originally I was just going to make that out of foam, and insert a panel of the acrylic on either side, but this was his suggestion which was not only easier, but worked perfectly. 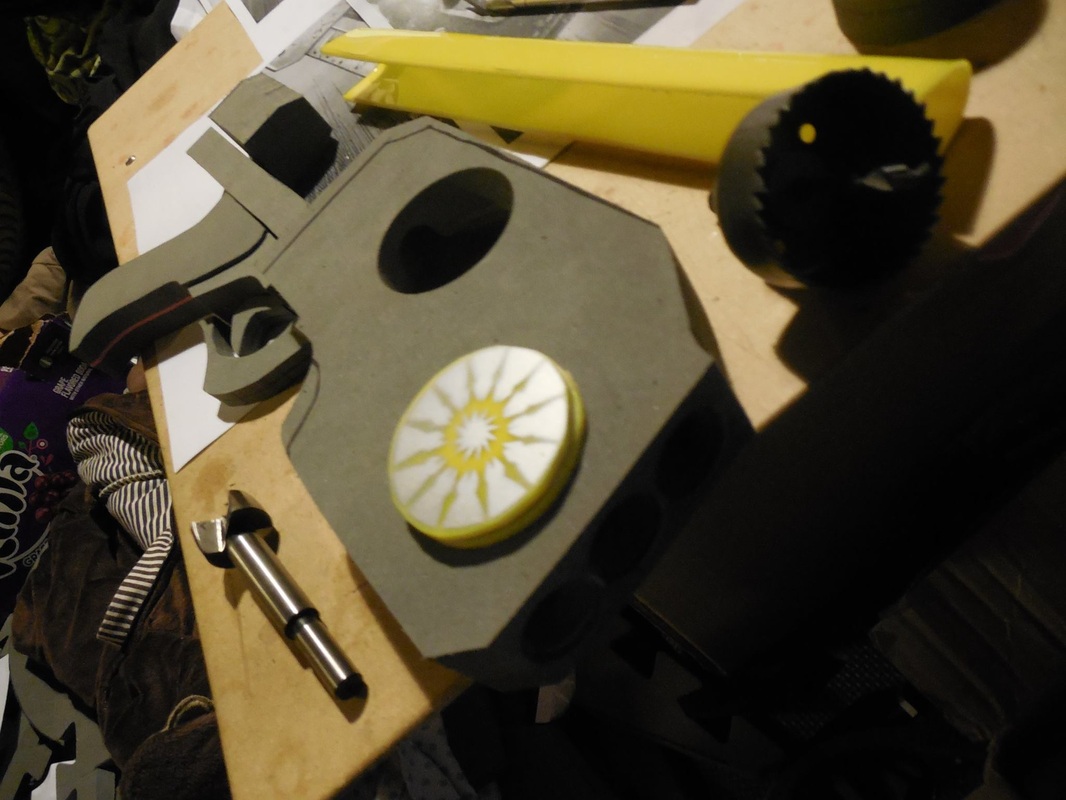 Here you can see the cutting bit I used to cut out the large hole in the side, where the discs would go. You can also see how the other acrylic bit bent to go in between it all. Finally, I used a forstner bit to drill a hole in the back for the wires, as well as in the front for the barrels. For that I used a slightly larger bit, followed by a smaller bit, to give them a bit more detail. 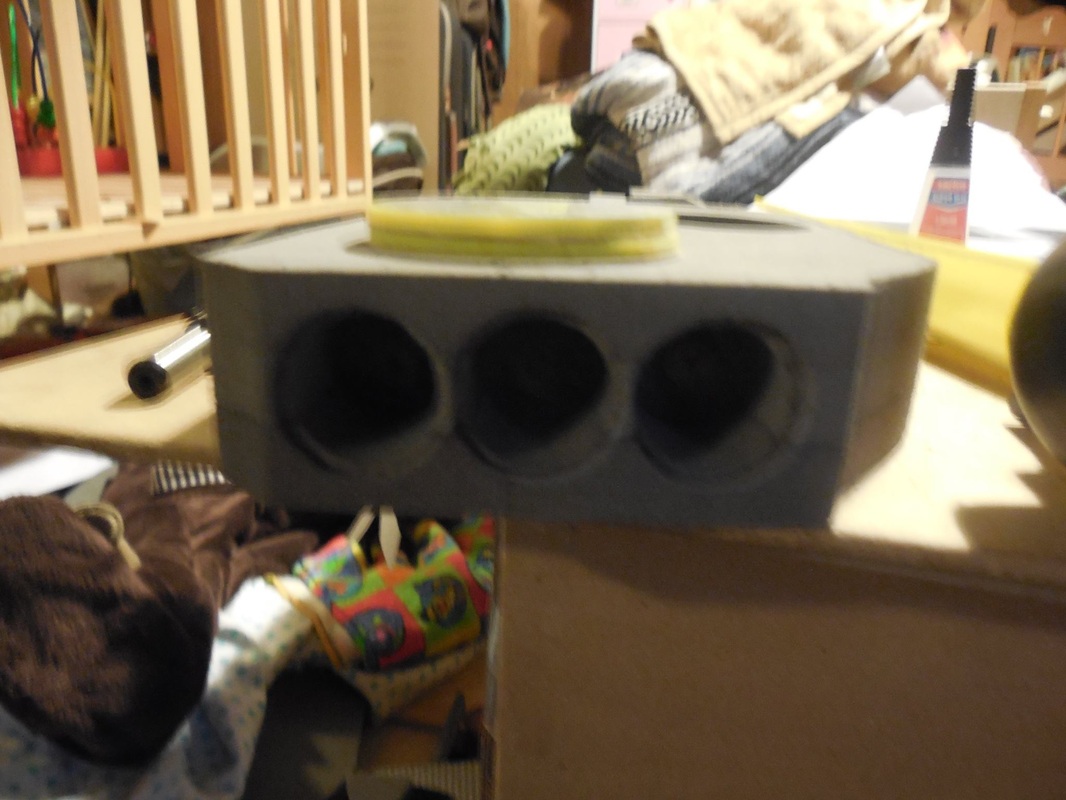 Finally, I had originally planned to have the very back section be removable, attached via magnets, to hide the battery and give easy access to change it. However, Beer Money Props suggested sticking it in the middle, above the grip, which would give it a more even balance. So I did. :) 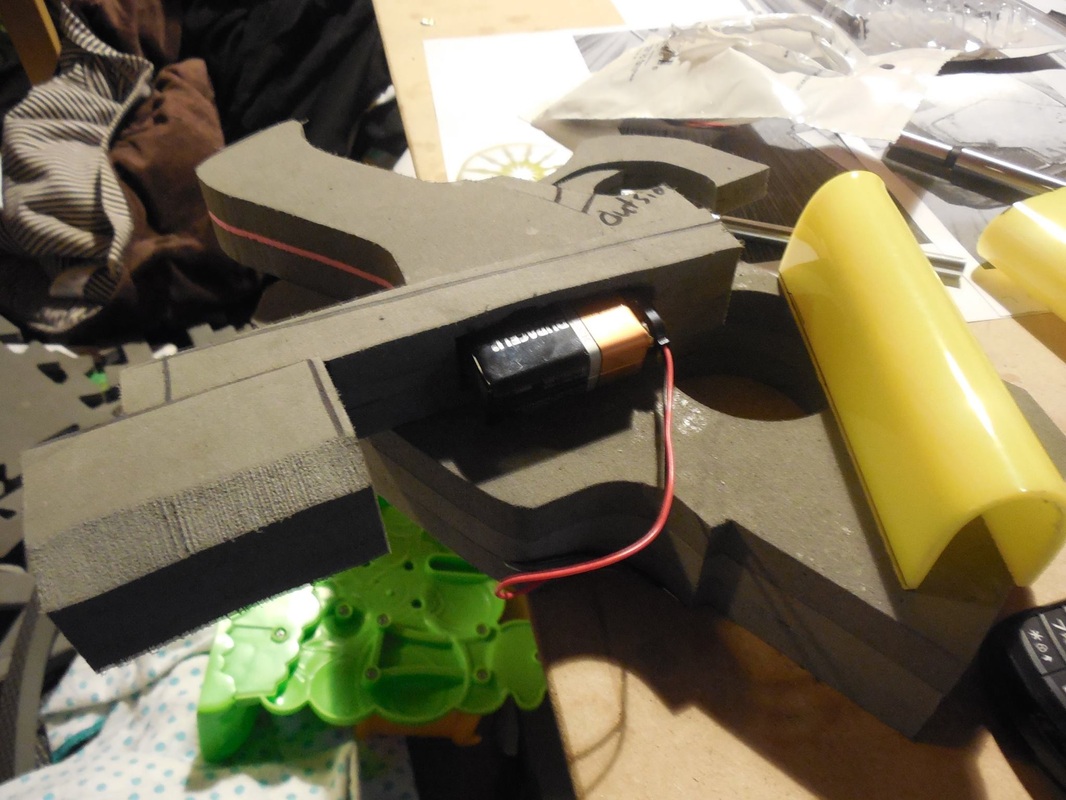 I still had to cut out a small chunk of foam for it to recess into, but it worked a lot better. Now that that was done, it was time to wire everything! 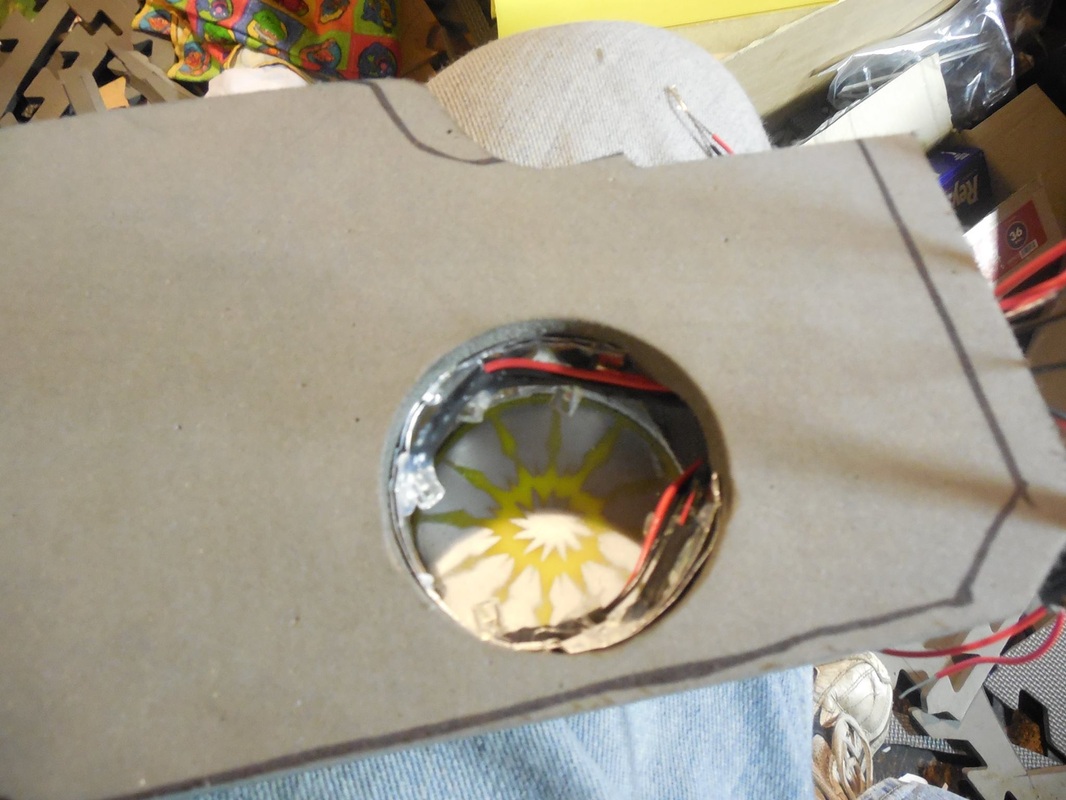 I put six wide angled LEDs inside the front bit, with some aluminum foil to help diffuse the light more so it didn't look spotty from the outside. You can also see that I installed one of the two discs so that I knew exactly how much room I would have. When that was done, I installed the other disc. 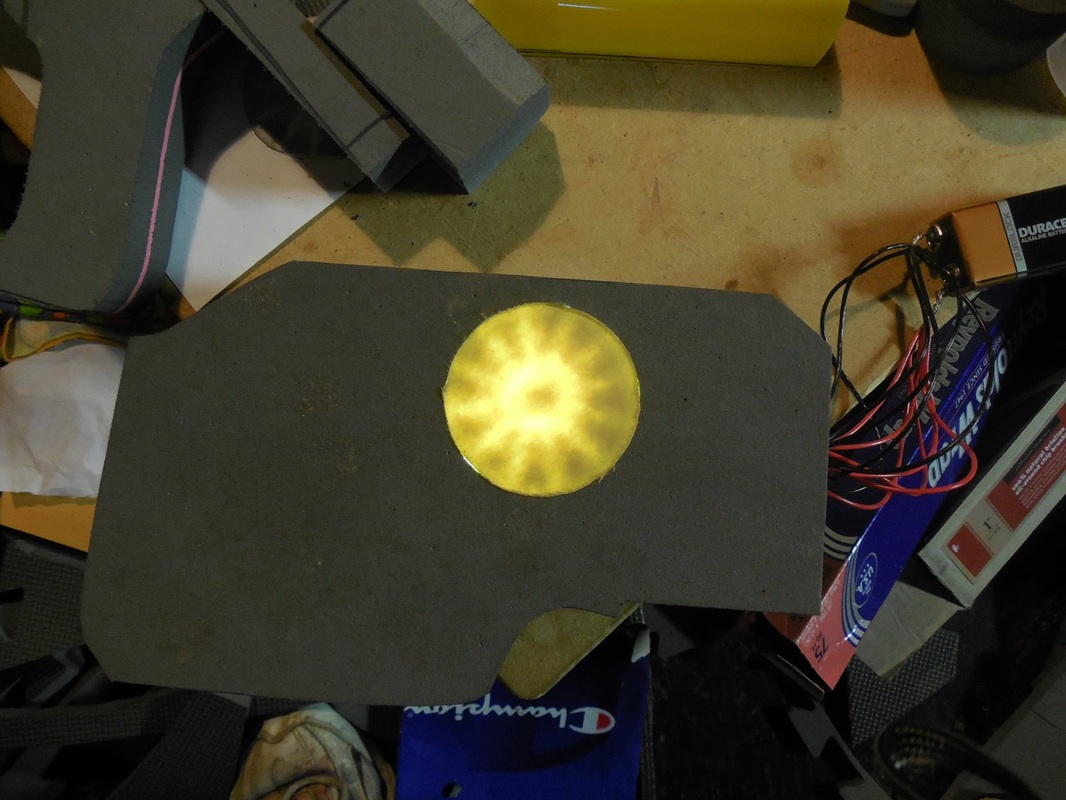 And it works! You'll probably notice here that I left the protective paper on the outside of the acrylic discs. This was to save me from having to tape it all back up again after painting it, which would have been a pain. I left it on both discs, though I took it off entirely from the cover piece. Once I had that all set, I glued all the pieces together, added a couple more LEDs to the other acrylic section, and tested the lighting again.  In hindsight, I probably should have put a third light in the middle there, but I was worried the battery would block that light anyway. Still turned out great though, so now it was time for all the details. 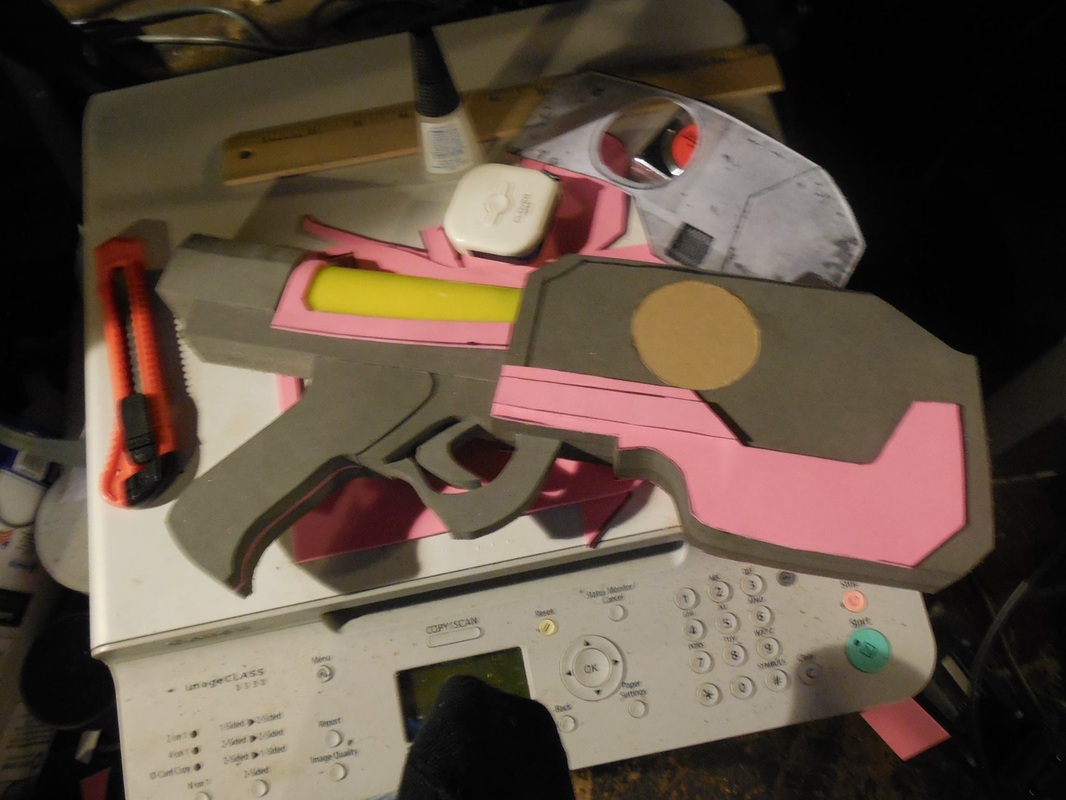 Started out with some craft foam layers, to get the thinner spots. Also added the central details onto the acrylic with the craft foam. This helped hide the edge of light and wires underneath. 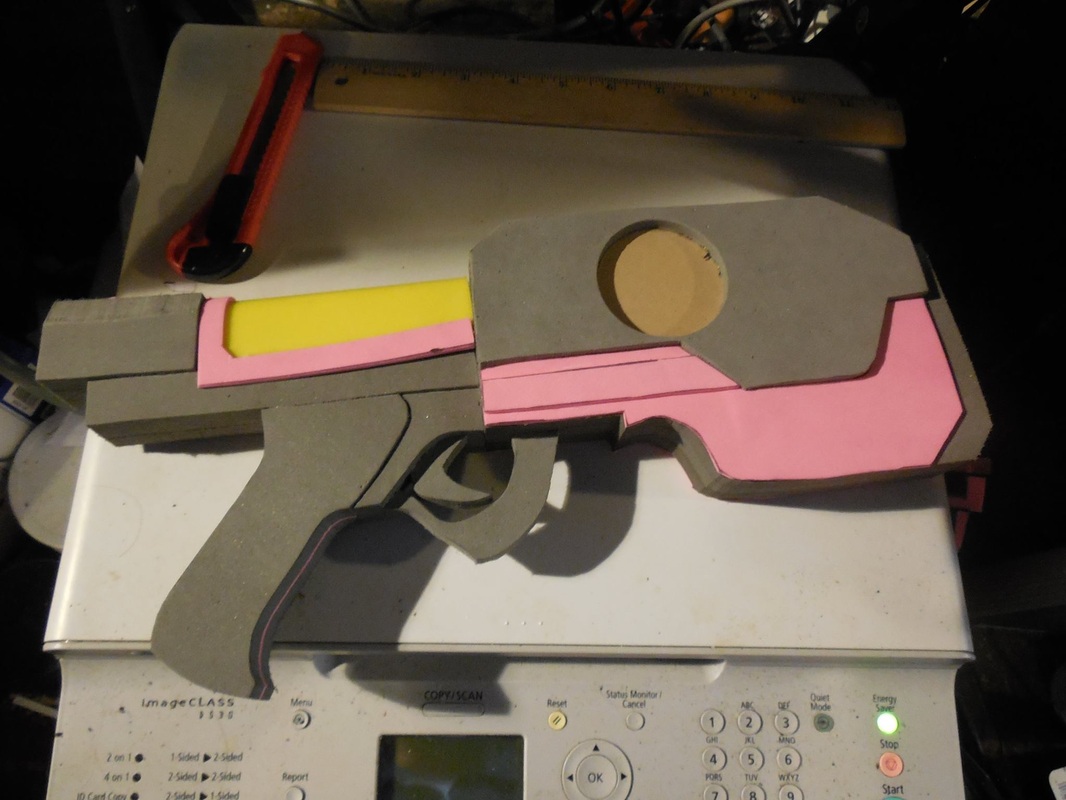 Then came the 1/4" foam, again with the hole cut out, for the slightly thicker area (which the 1/2" would have been too thick for). Once both sides were done, it was time for the details! 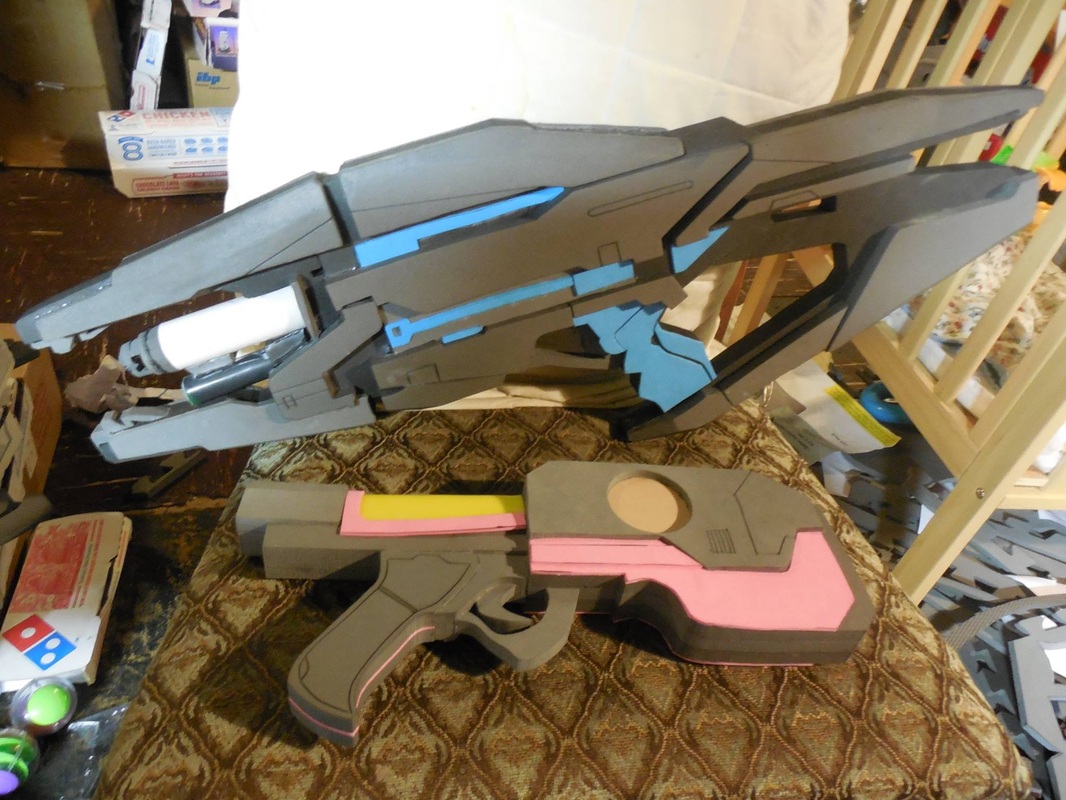 These were done, as always now, with the xacto knife and heat gun. Super fast, super easy, super clean! 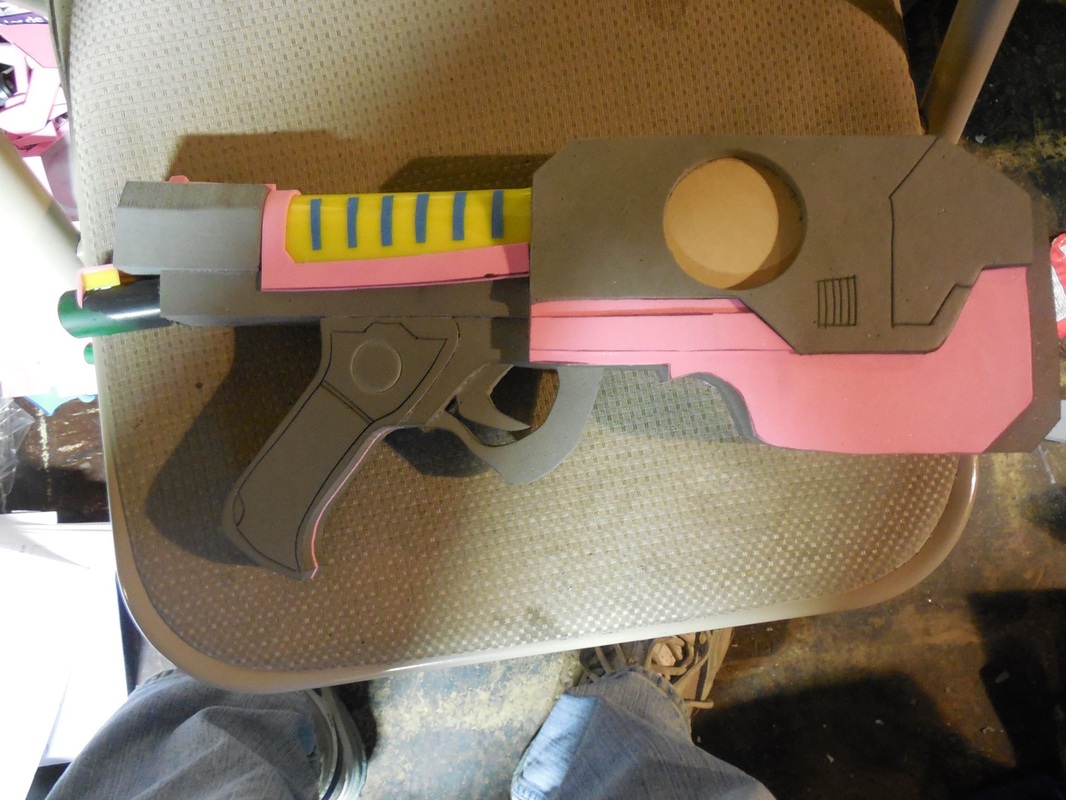 Lastly, I cut a small PVC pipe to size, used a dremel, file, and some sandpaper to sharpen the inside edge of the pipe, and scored a light ring on each side of the grip. Then I attached it to the back of the pistol, and used more craft foam and scrap acrylic to form the doohickey on the back. Those strips of blue are bits of painter's tape, to mask off the acrylic. That will make more sense later. I also taped off the inside of the half-tube bit, to make sure no paint got inside, as well as the battery connector. Then it was off to the Plasti Dip!  I didn't want to risk pulling out the wires of the lights attached to the half-tube section, so I opted to cover one side at a time. Once that was set, I propped the pistol on its top, painted the grip and back section a metallic black, let it set, then taped it up some more. 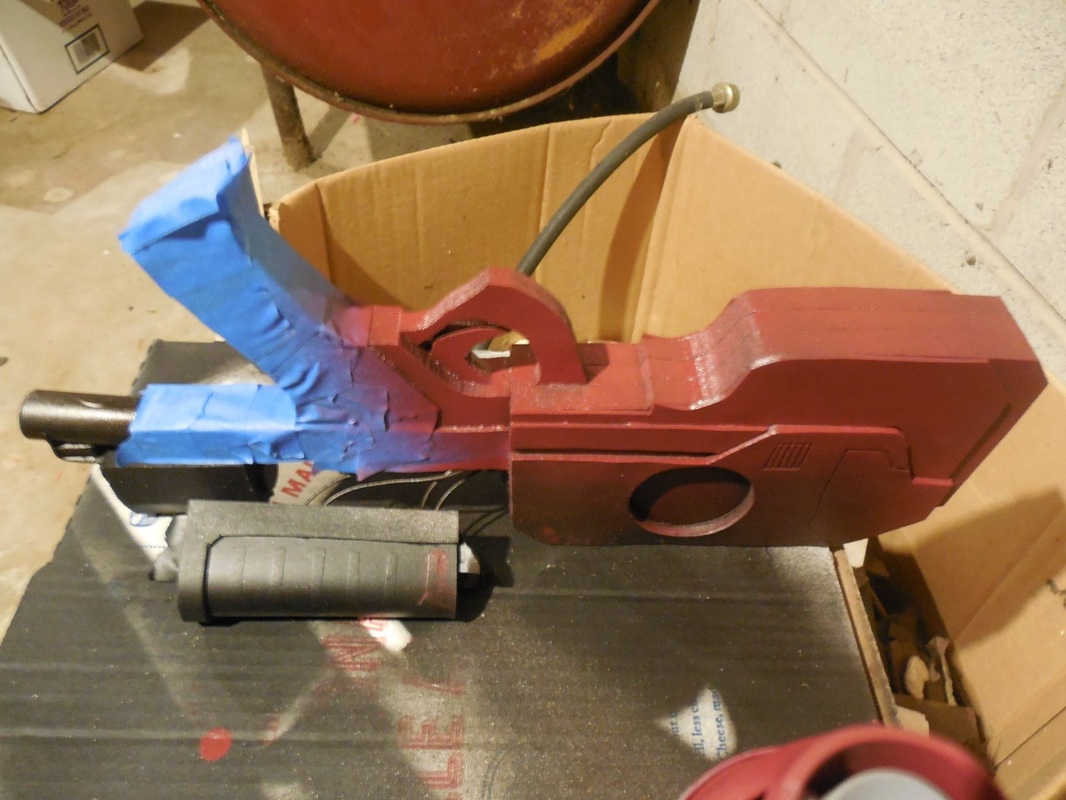 Then I grabbed the darker red I used in the Original Helmet 1 build, and painted more of the bottom area as well as the front. Naturally, I let that set too, then taped it up to paint the rest of it silver. Once that set, I took all the tape off, including the strips on the half-tube section and the paper protecting the acrylic. The result? Perfection. *drool* Ahem. Sorry. :D The paint masking on the inside of the discs worked exactly as planned: there, but not holding back the whole light. The strips shone through wonderfully. You can see it best when I turned down the light levels on the camera in the third shot. Finally, time to tie it all together with the weathering!  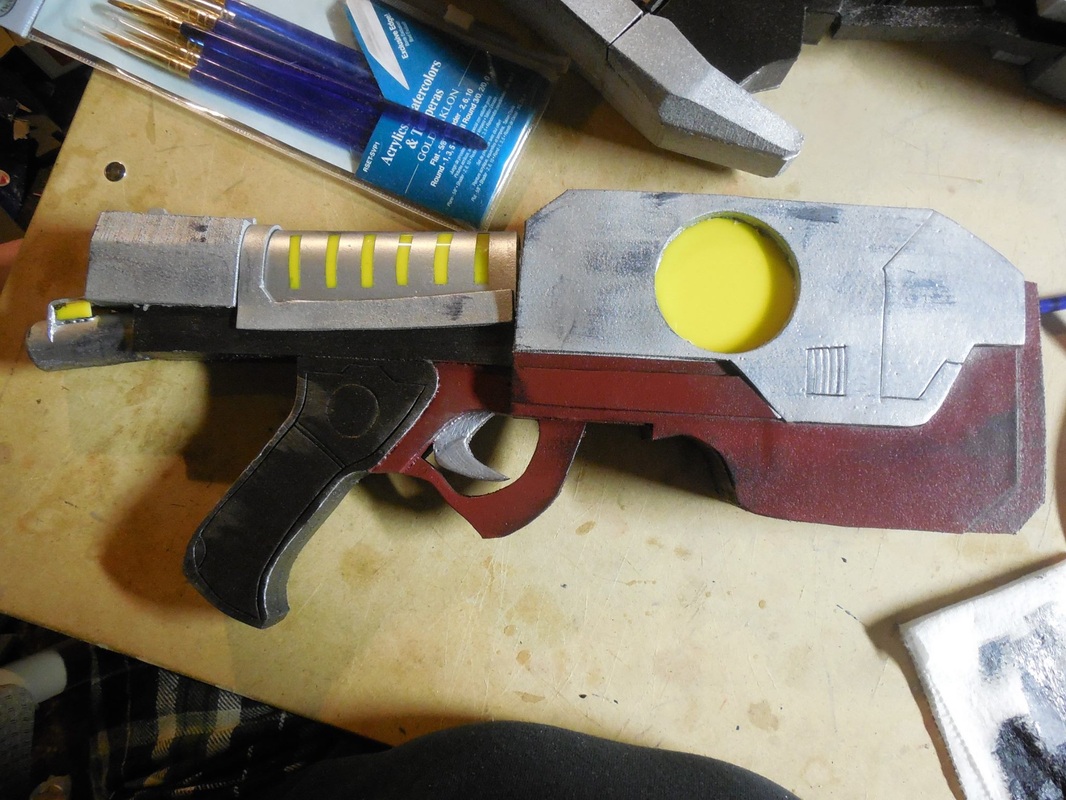 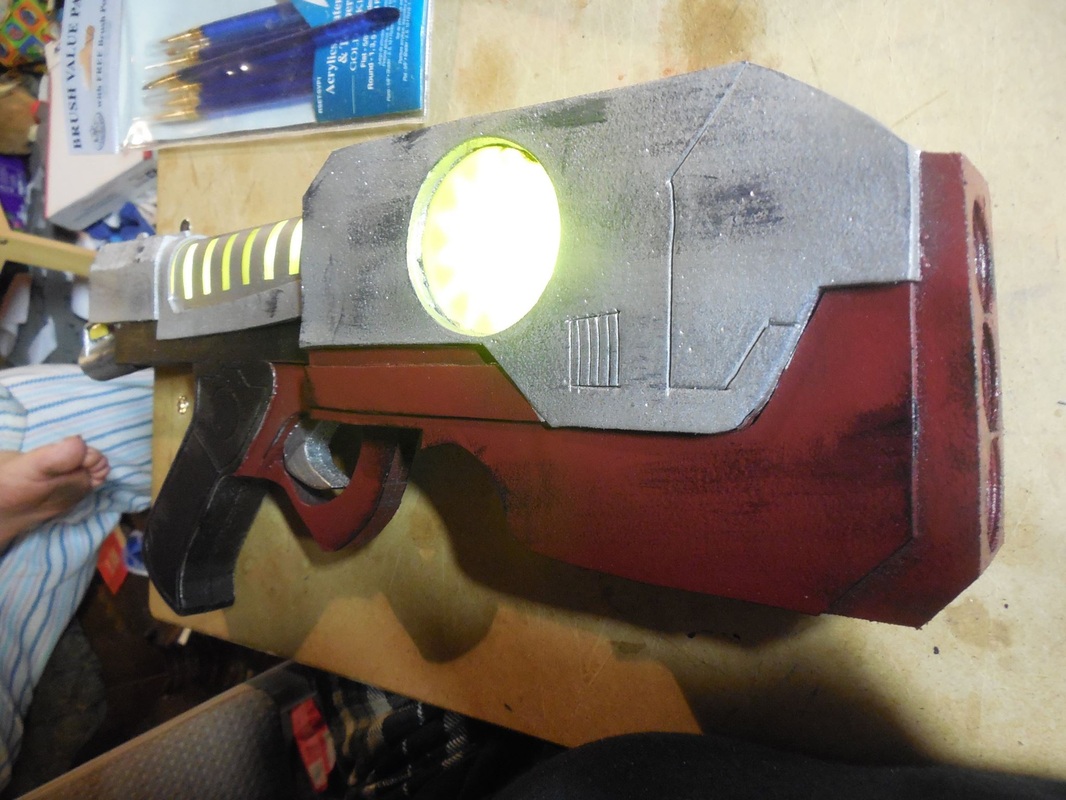 Acrylic wash and dry brushing, then a clear coat to seal it all in. Super stoked at how crazy cool this turned out, and it looks amazing even without the lights on. Big thanks to Beer Money Props for his suggestions which helped a ton, and to Viverra Cosplay who will share some amazing pictures of it once she's finished the costume (crossing fingers)!
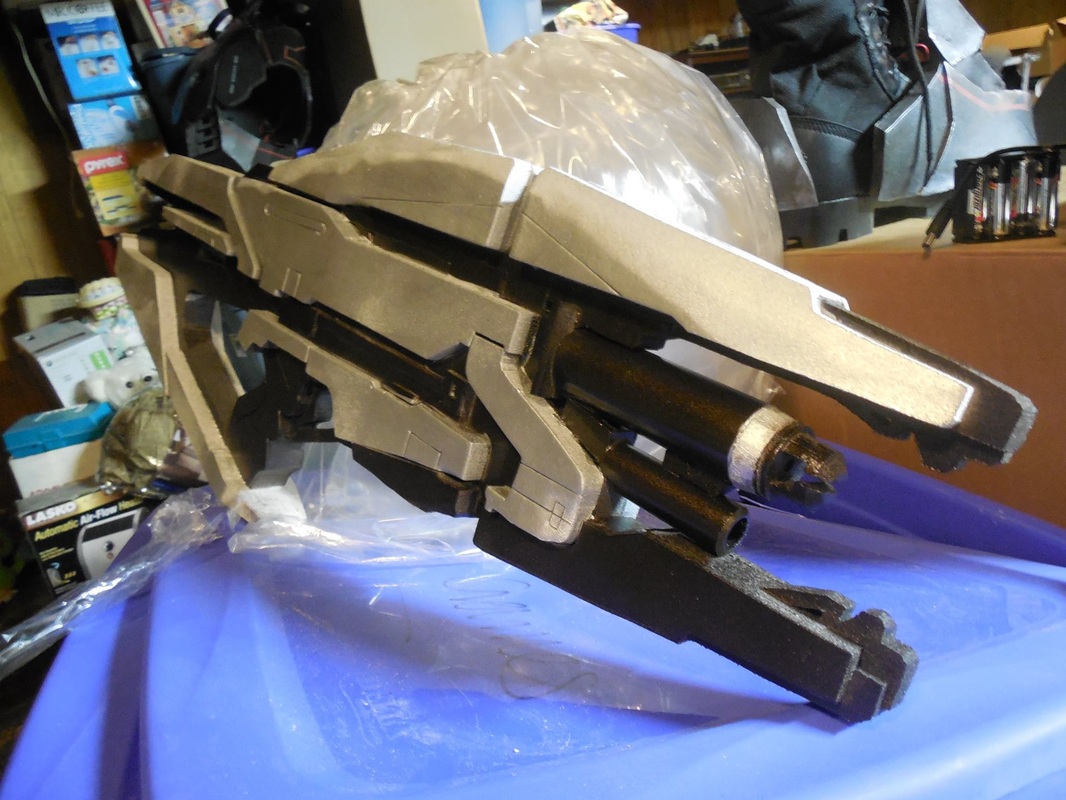
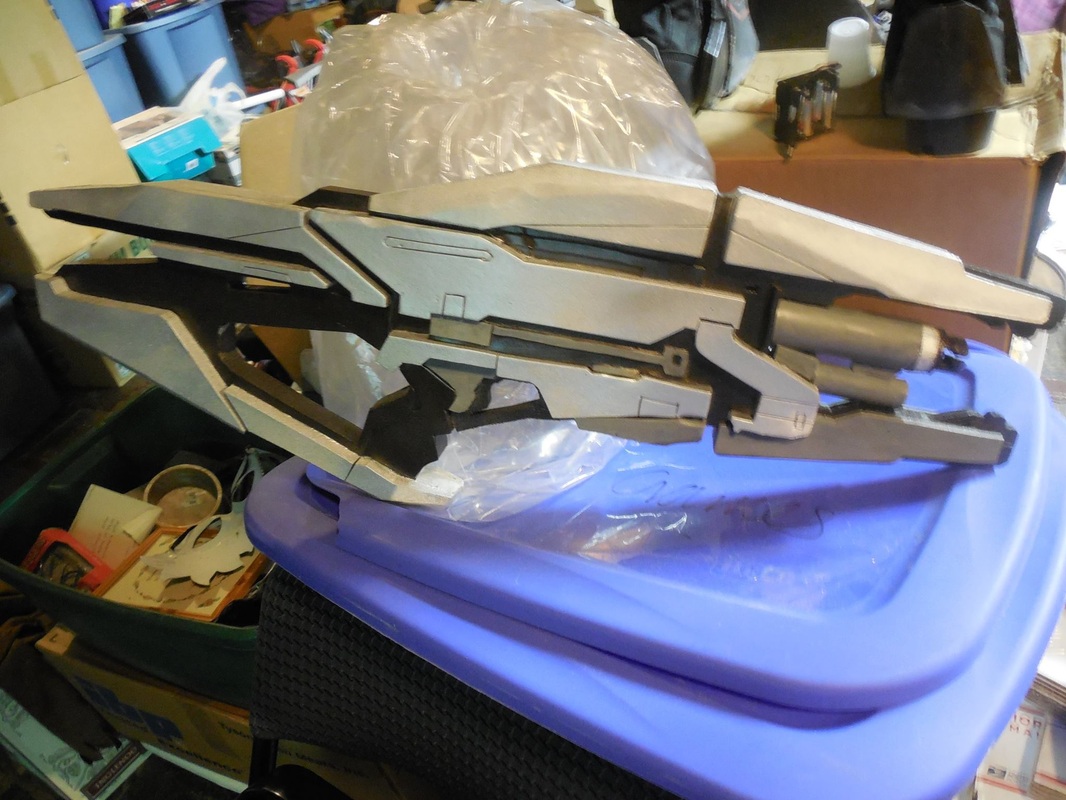
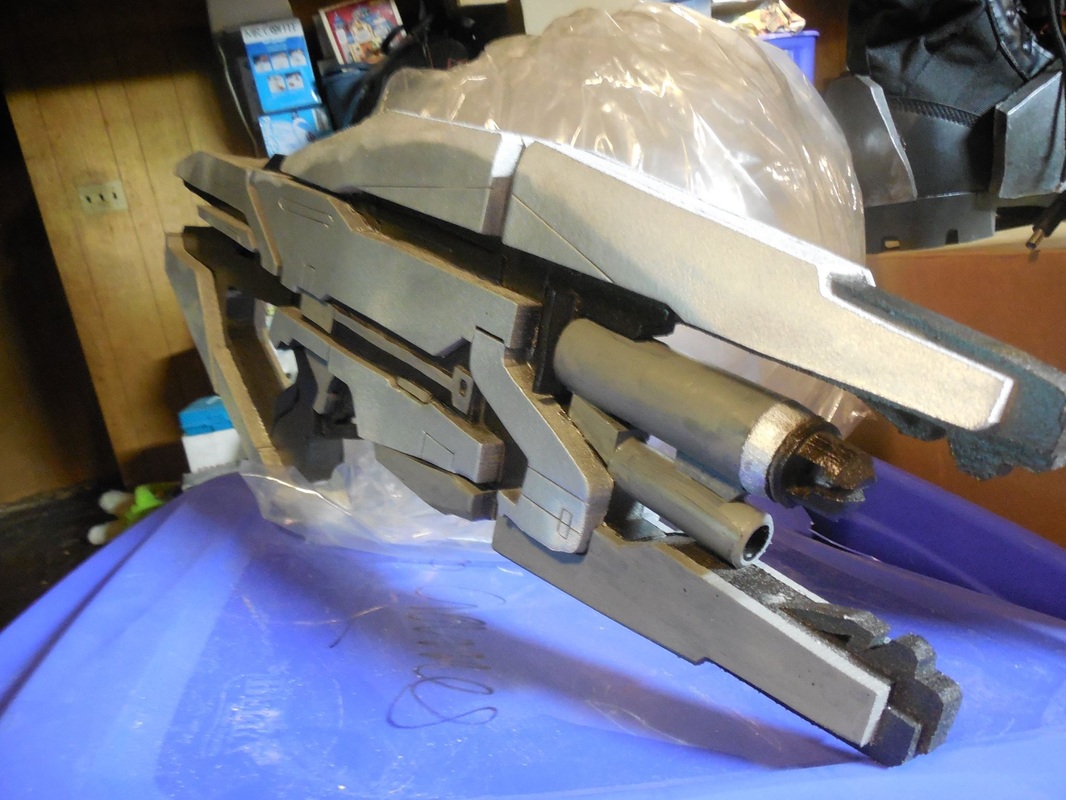
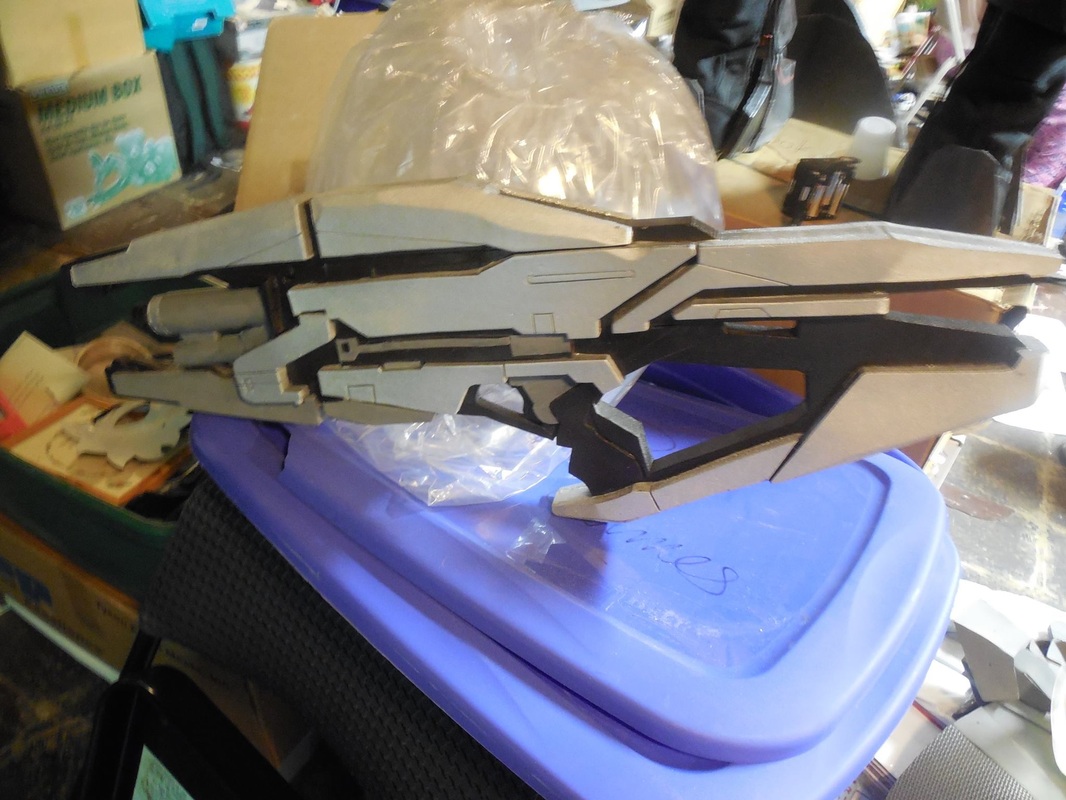
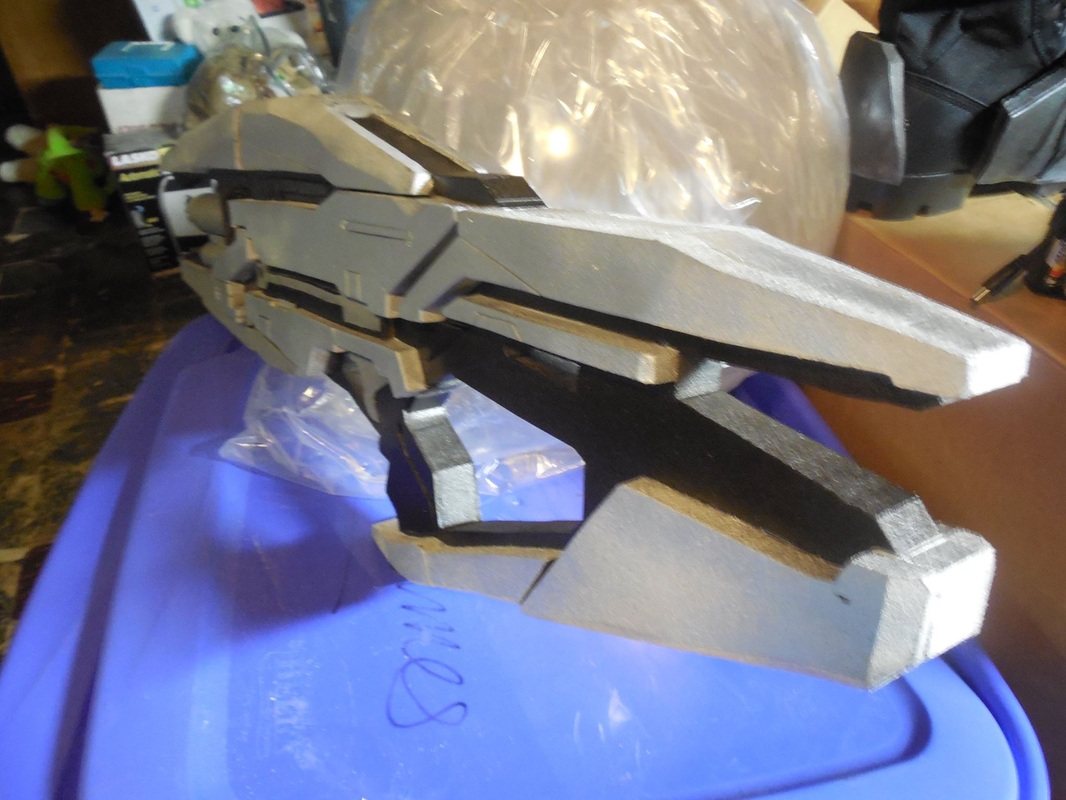
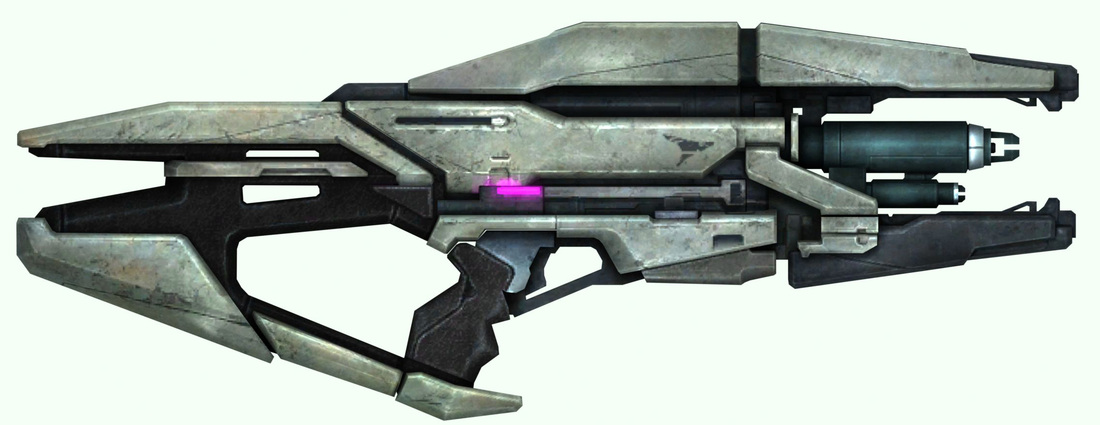 And now, back to the awesomeness that is the Turian Phaeston. I built this to go along with my Terminus armor, though unfortunately I ended up having to sell it to raise some money to move my family BACK to Utah, after having been in Pennsylvania only six months. Two moves in one year, both cross-country, have really done a number to our already drowning finances. :( Still though, it was a fun build, and I know it's gone to a good home. I'll make another one once I get all my stuff back from the storage pod everything is living in. Onward! Started this one, as always, scaling and printing a massive version to use as a template. 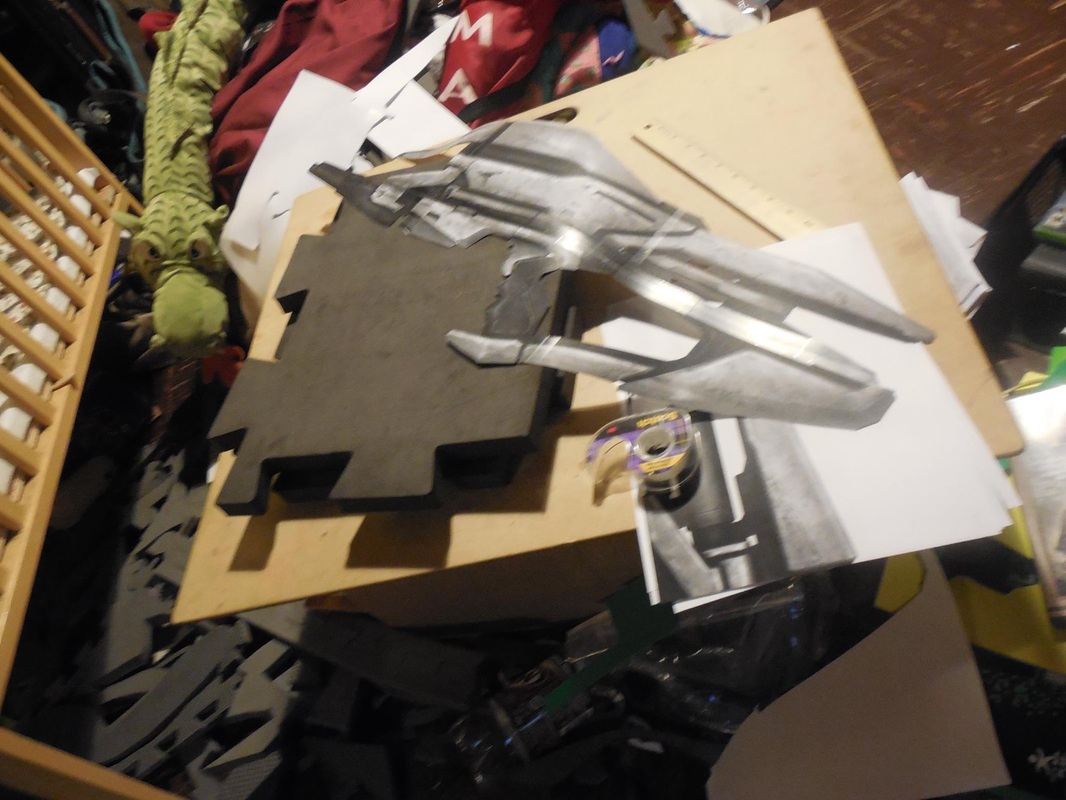 Decided to go the same route as I did with the M8 Avenger version 3, with the 1" thick foam as the core, and the other foam as build-up layers. Had to cut it out in three different pieces though, due to the small sheets of foam you can see above. Got it all cut out though, and used the contact cement to glue it all back together. 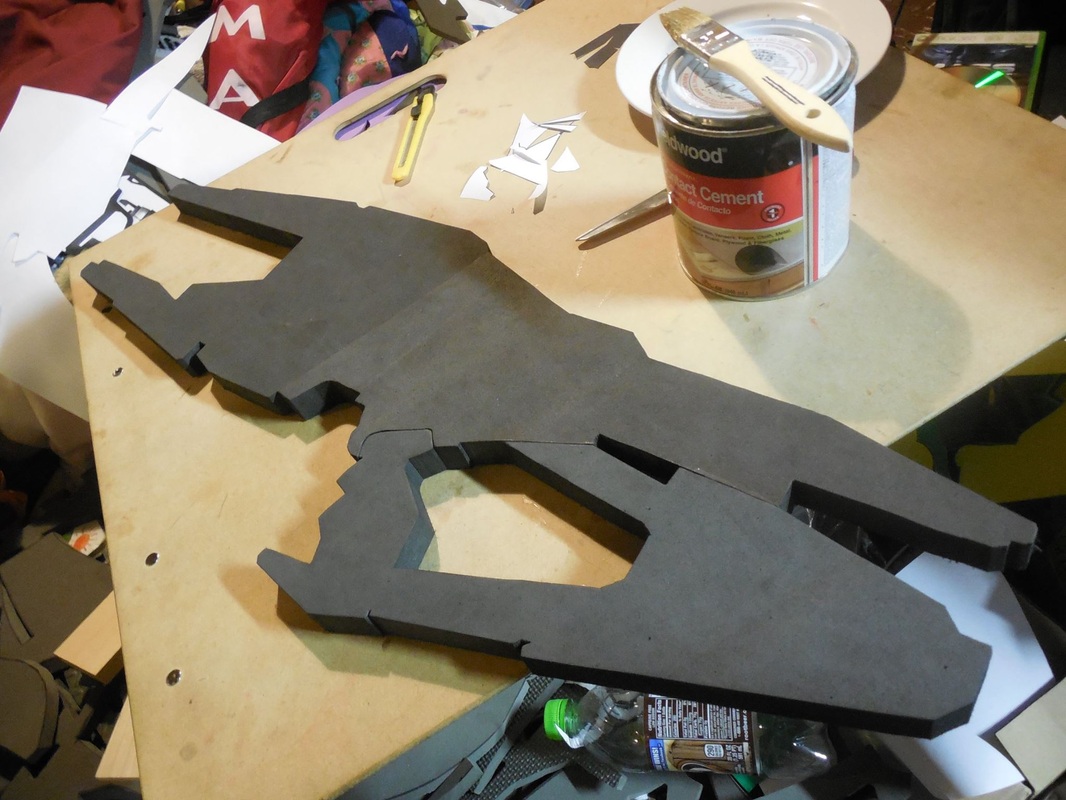 From there, I cut the paper template into smaller pieces, using them to prep the rest of the foam. I traced these onto 1/2", 1/4", and craft foam, to really give it a nice layered effect. The subsequent pile was quite a sight. 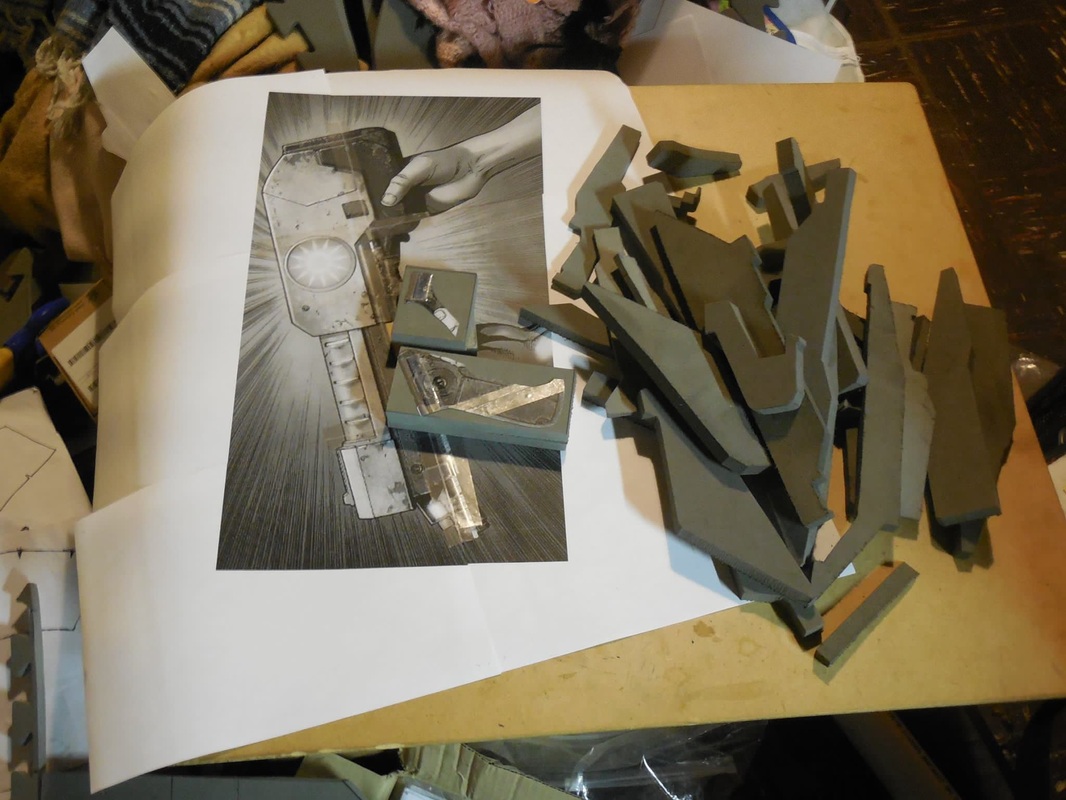 (Heads up - I did a lot of the Phaeston at the same time as Star Lord's pistol, seen on the left, so you'll see a bunch of pictures of them together as we go along. I'll write-up the pistol next, to help stave off any confusion if I can.) Once all the pieces were cut out, I arranged them to ensure they fit on the core, then slung contact cement everywhere and put everything together. 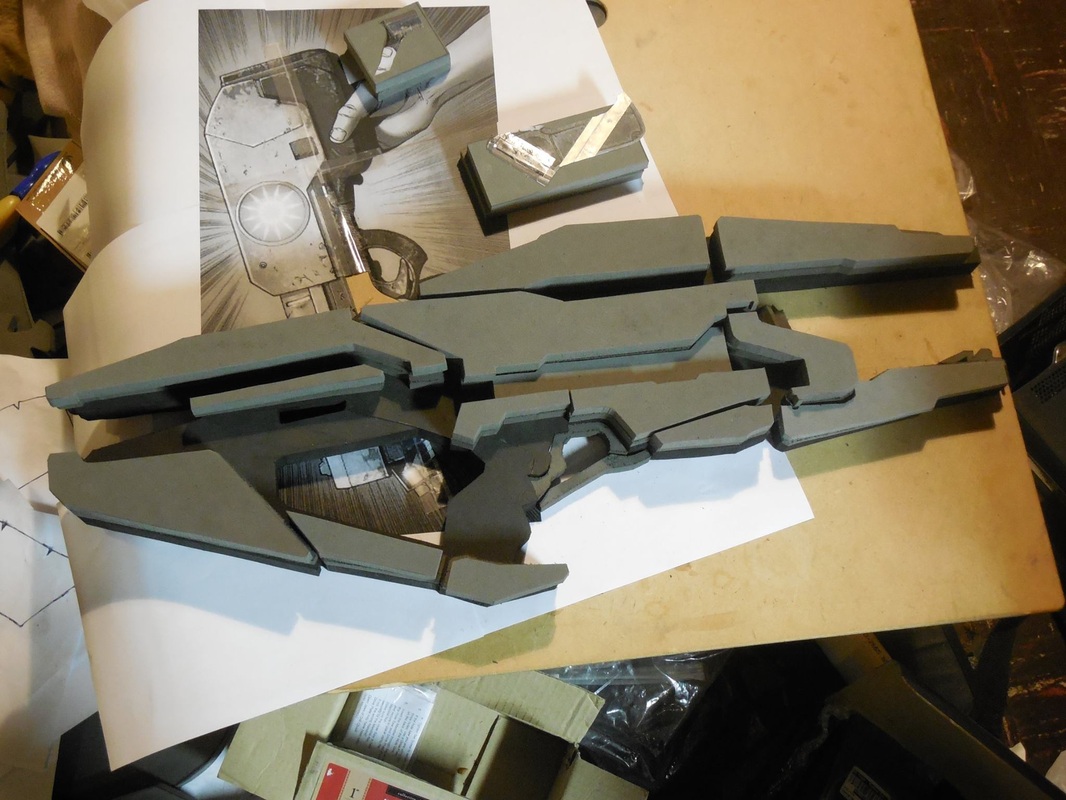 Then I threw on all the craft foam, to give everything the final feel. 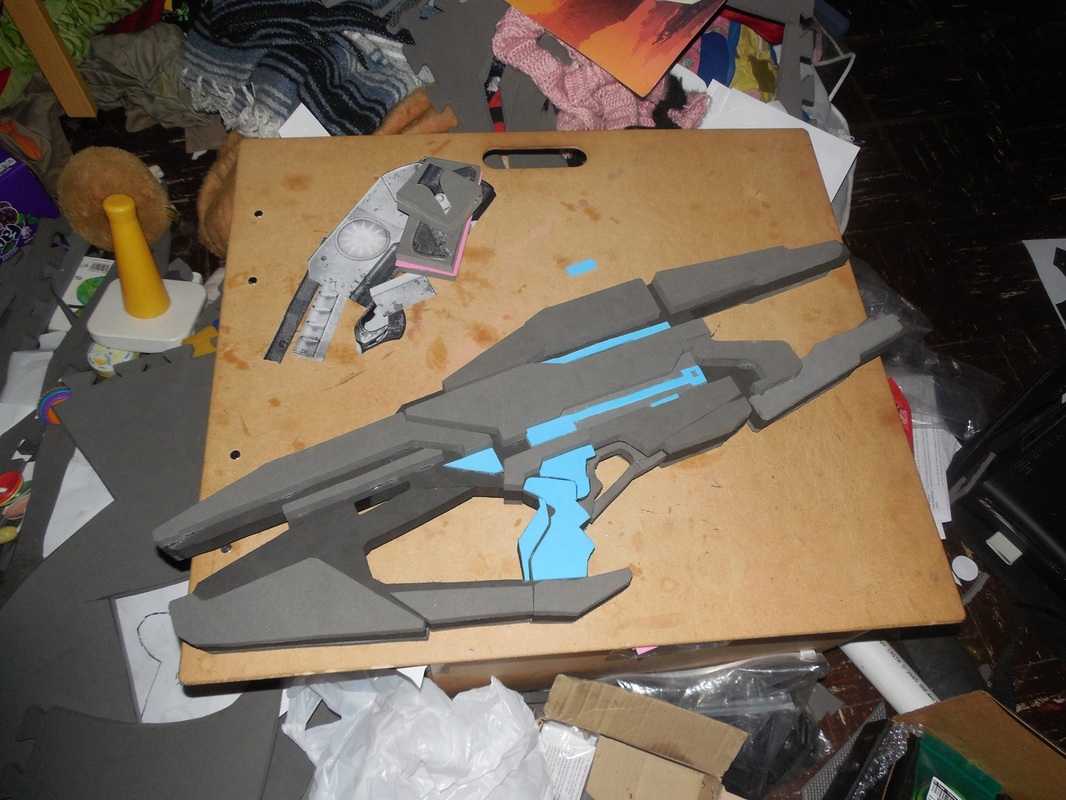 Next came the tricky part. I had to angle the top section, the rear of the stock, and the base of the grip, as well as bevel some of the edges. So, I took it out to the belt/disc sander, and got to work. While I was out there, I also cut out the barrels and final pieces, and used the puck left over from cutting out the hole in Star Lord's pistol to make the extended chunk of the Phaeston's main barrel. 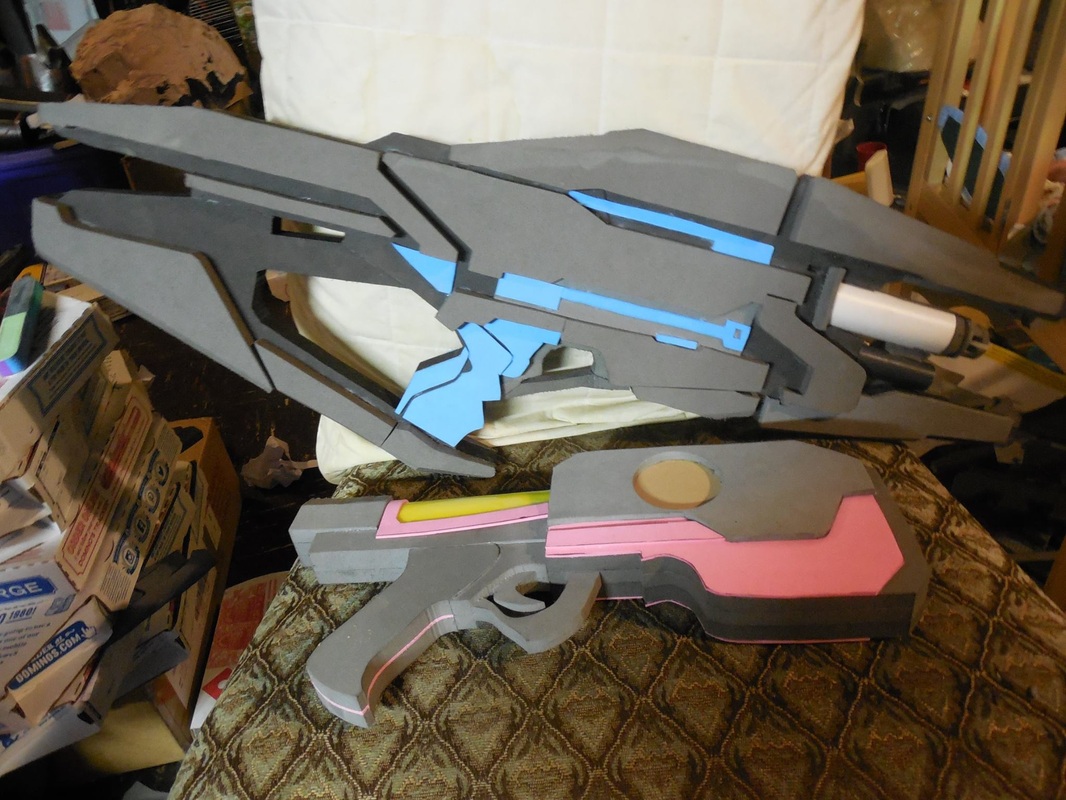 After some cleaning up, I then took my xacto knife and heat gun to it, and etched in all the detail lines.  Once I was happy with everything, it was time for everyone's favorite thing, Plasti Dip! I followed that up with a coat of silver as well. Originally I was going to do a custom color scheme with it that was similar to the Terminus armor, but I was worried that it would blend too well with the armor and it would get lost in it. Instead, I stuck with the original coloring to have it stand out on its own and compliment the armor. 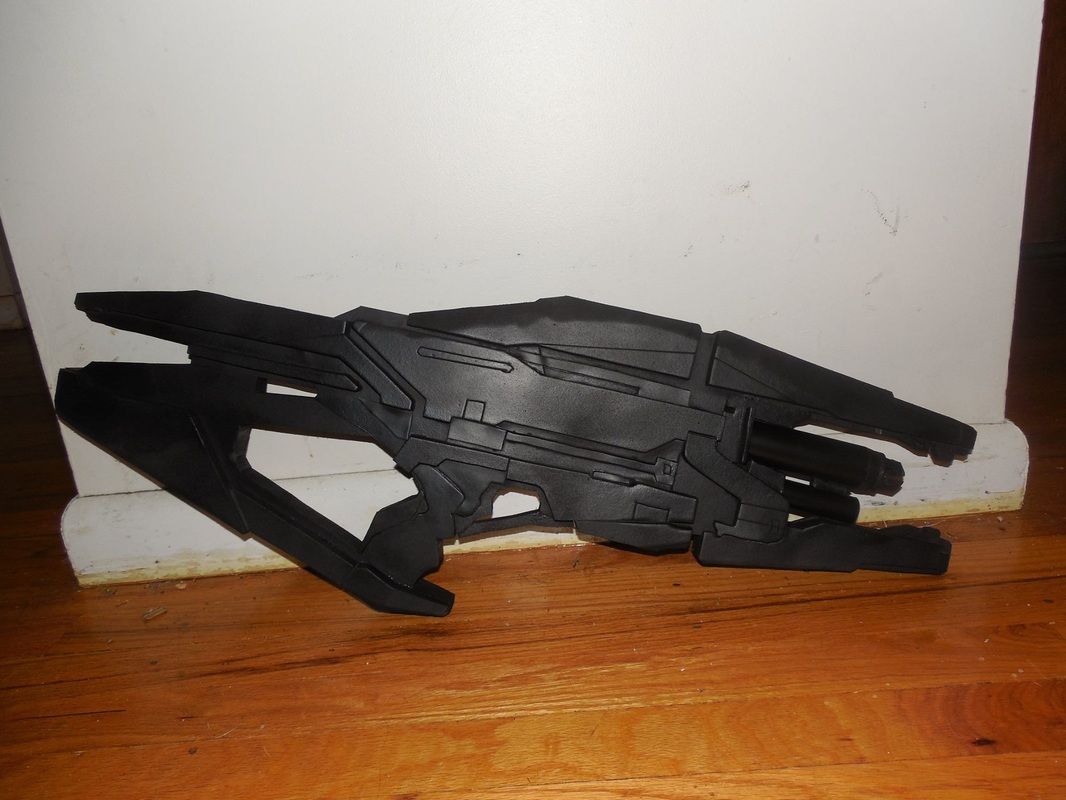  'Course, that ended up not mattering, since I ended up having to sell it, but oh well! Still looked awesome. Taped up everything, then threw on the same metallic black I used on the Terminus. After that I painted on an acrylic pewter, which is what I normally use on the M8. This helped give some contrast to a few of the lower layers and the barrels. And last, but definitely not least, came the weathering. As per usual with the silver, I did a black acrylic wash, with dry brushed highlights over everything else. 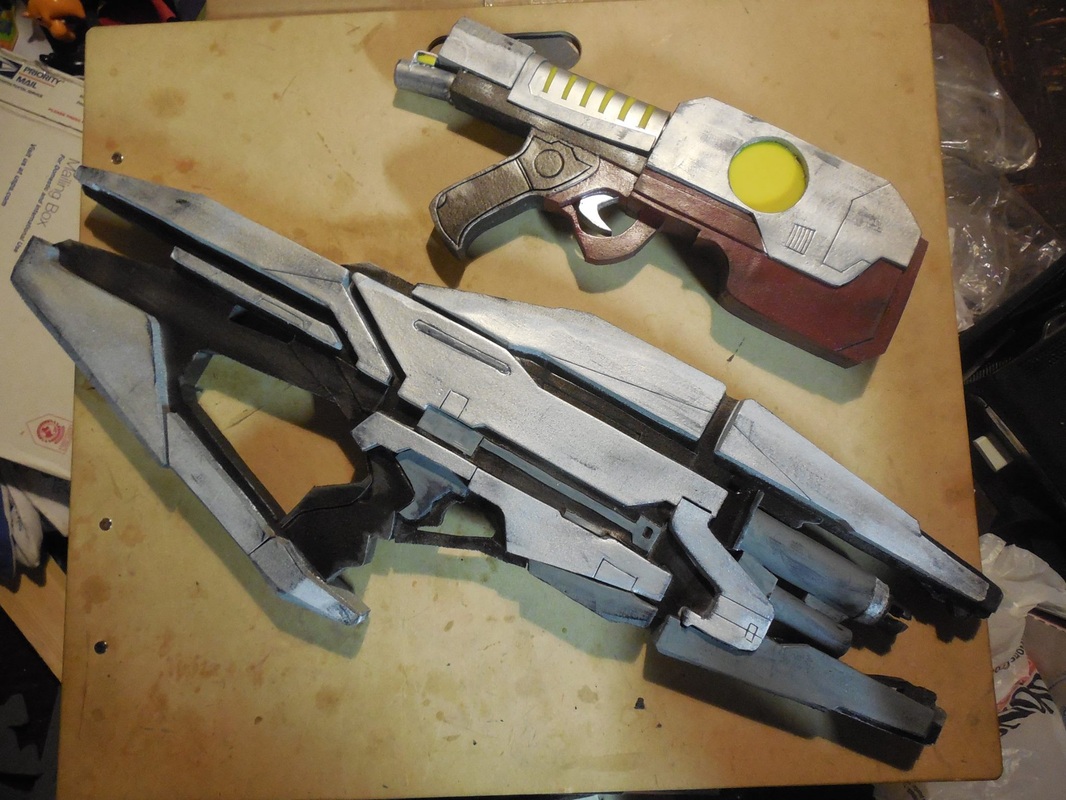 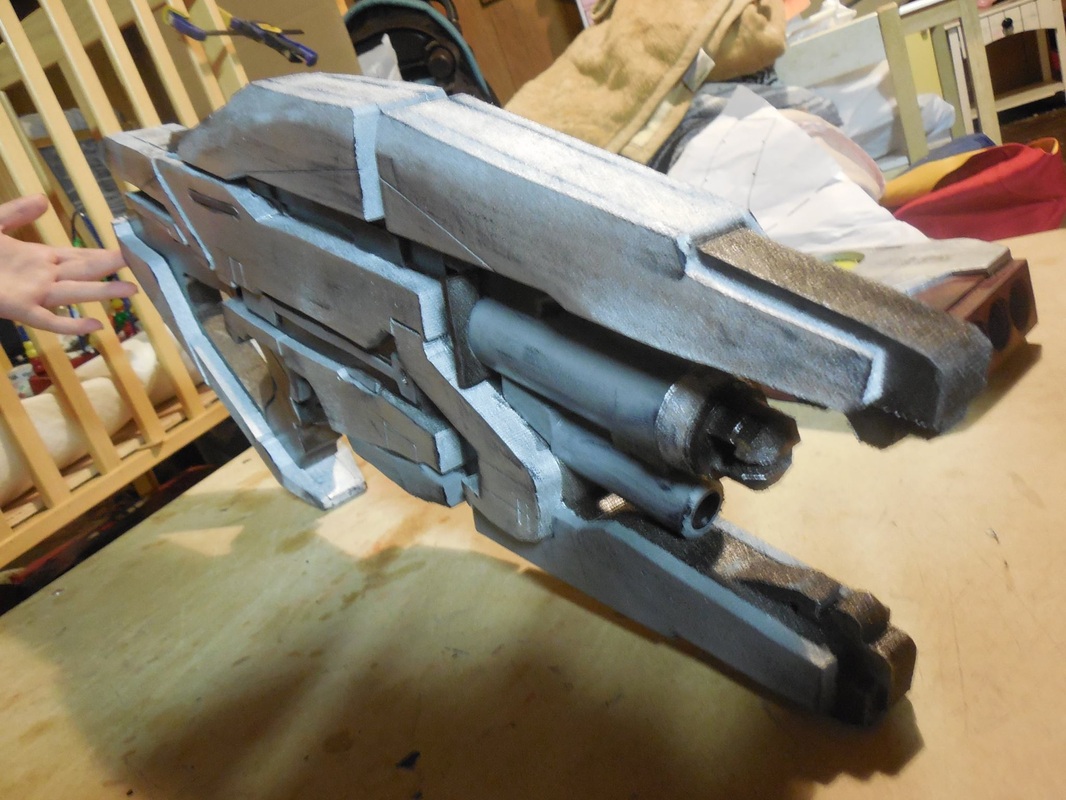 I'm really proud of this build, and sad to see it go, but such is the way of things. At the very least, I know what to watch out for when I make another one! :)
Check the Terminus Armor build for some awesome shots of the two together! Also, while you're at it, take a look over here and vote for me! Contest runs between August 18-28, 2014, and you can vote once per day. Appreciate it! |
|


 RSS Feed
